

When the theme for this month’s Art Element design challenge was announced, I could not have been more delighted. It’s lizards! Lizards! I’ve been hoping for a lizard theme, or even a broader reptiles theme, since I started participating in the challenges. Yes, I know I don’t have to wait for a monthly challenge theme to create lizard-themed art. Let’s just pretend I do, okay?
Lizards are one of my totem animals and have been with me since my earliest childhood memories. Two of my favorite types of lizards are native to where I grew up in the desert southwest: horned lizards (which some people call horned toads) and Gila monsters (which are the only venomous lizards in the US). Did you notice my logo is a horned lizard? You can read a little about its origin story on my About page.
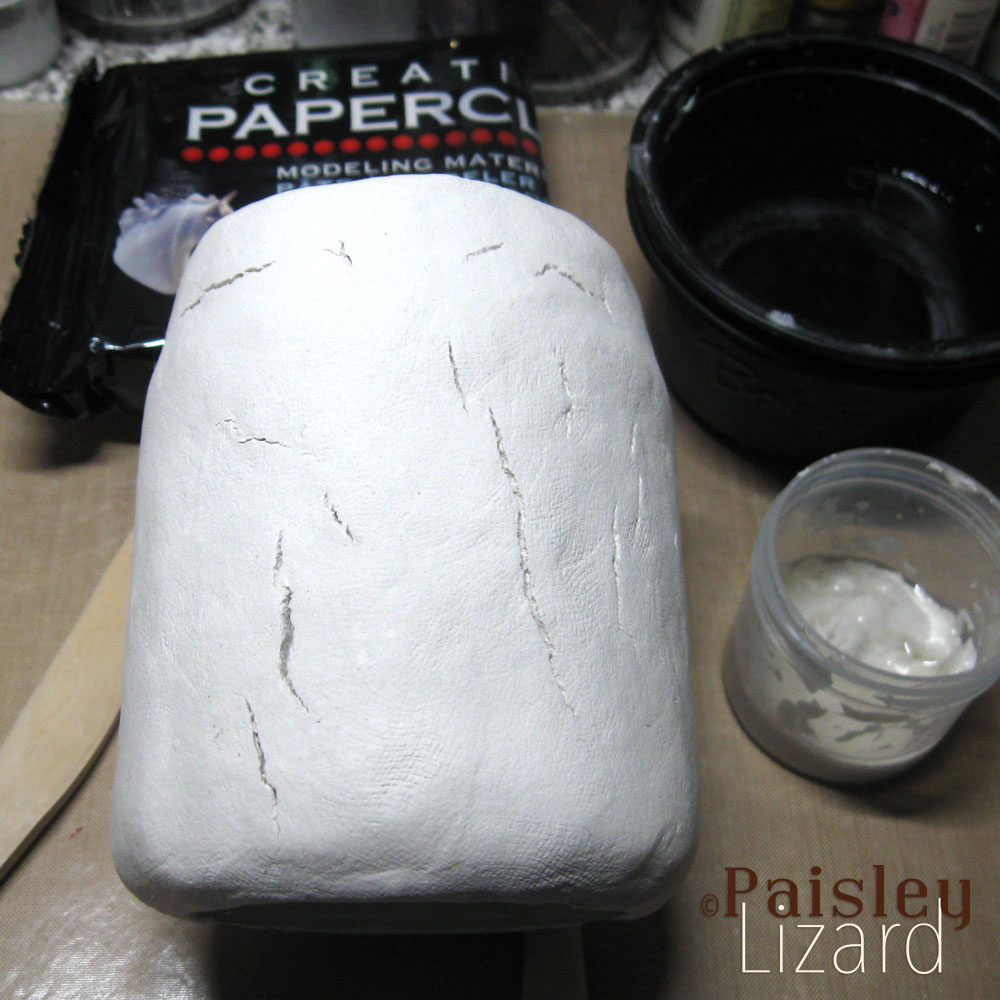
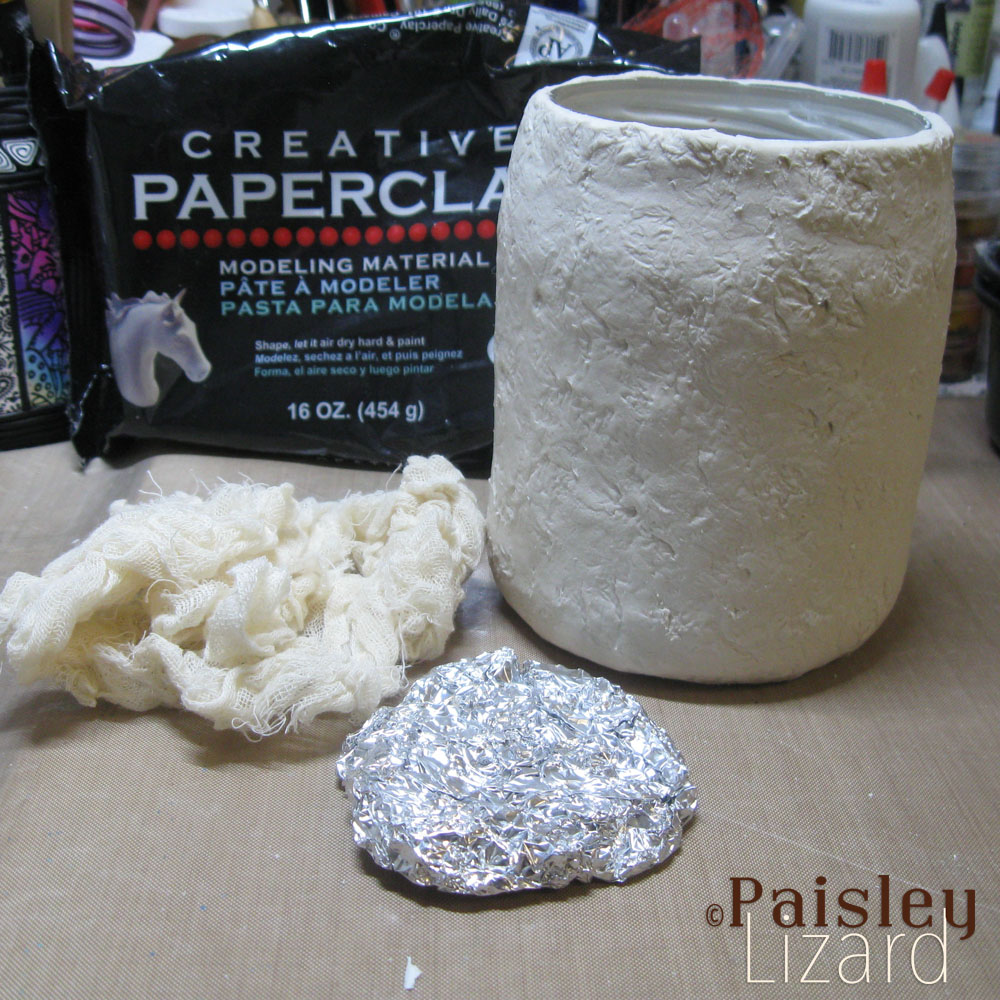
Both projects for this theme are upcycled glass salsa jars covered in air dry paperclay. I’m still relatively new to this medium, having completed a grand total of eight projects prior to this month’s theme: six covered jars and two wooden plaques. What seems to work best for the jars is to work in stages. Stage one is to add a base layer of the clay around the jar, texture it, and let it cure. Stage two is to add bas relief or other sculptural elements. This seems to keep the cracking to a minimum as the clay cures.
Or at least, it has in the past. I don’t know what was different this time from the previous projects, but the base layer of clay on the first jar started cracking almost as soon as I was done adding the texture. And it kept cracking for days as it cured. Not just hairline cracks either, but wide chasms. If I hadn’t been aiming for a rough organic texture on the background, I might have been upset. As it was, I was just mildly frustrated because patching cracks and waiting for more clay to cure kept me from moving to the next stage of the project.
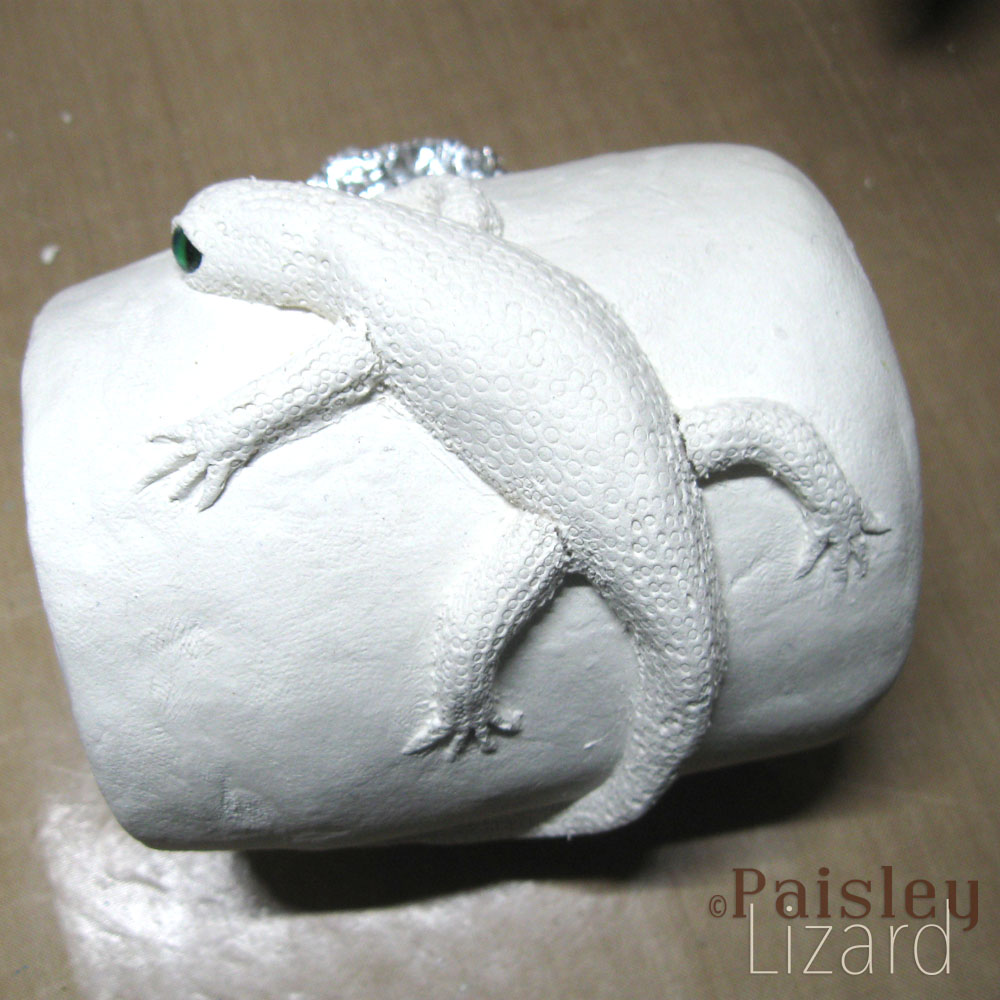
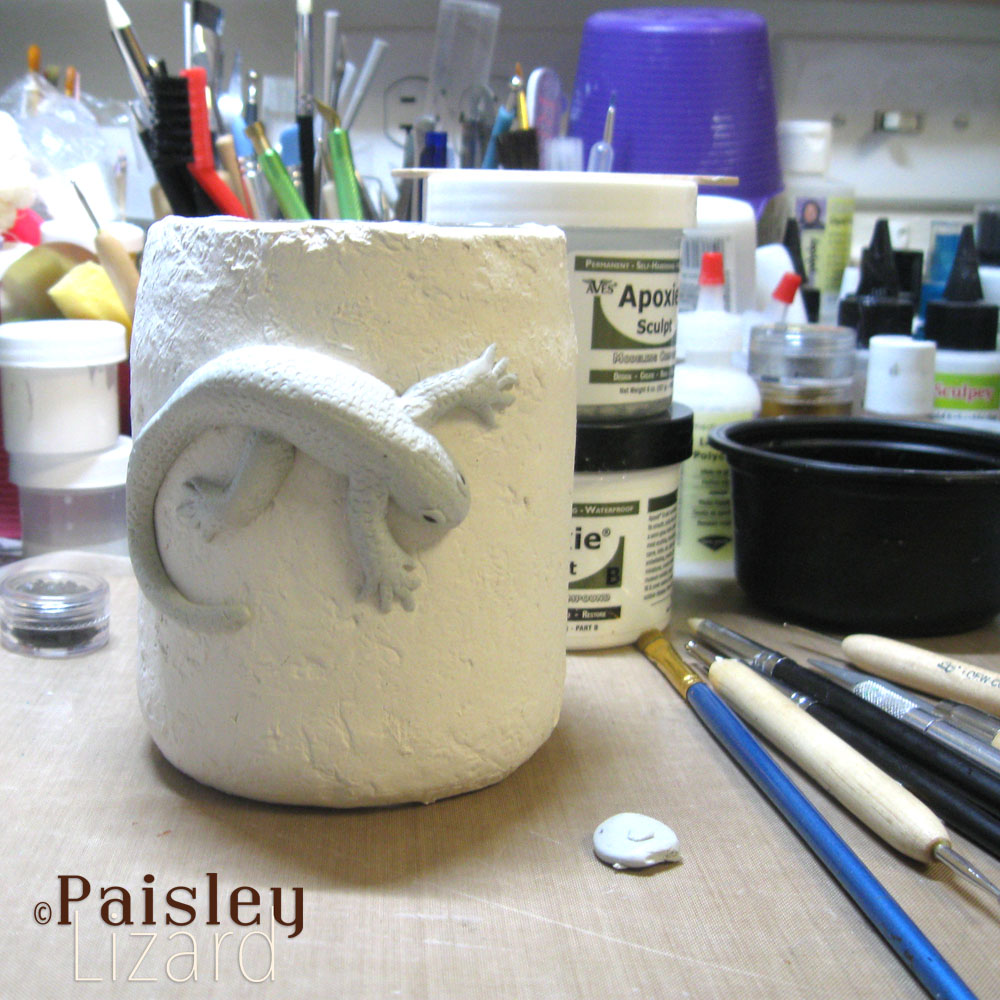
I knew my budding paperclay sculpting and painting skills were not up to the challenge of rendering a horned lizard or Gila monster in any sort of convincing detail. So I planned to sculpt a more skink or gecko type lizard. I really meant to sculpt thin whip-like lizards. Honest, I did. But my hands kept making stout lizards instead. Part of that may be due to a lack of dexterity and skill with clays that are relatively new to me. But I suspect the real force behind these – let’s call them robust – specimens was the influence of the lizard spirit itself. What can I say? I identify more with full-bodied lizards.
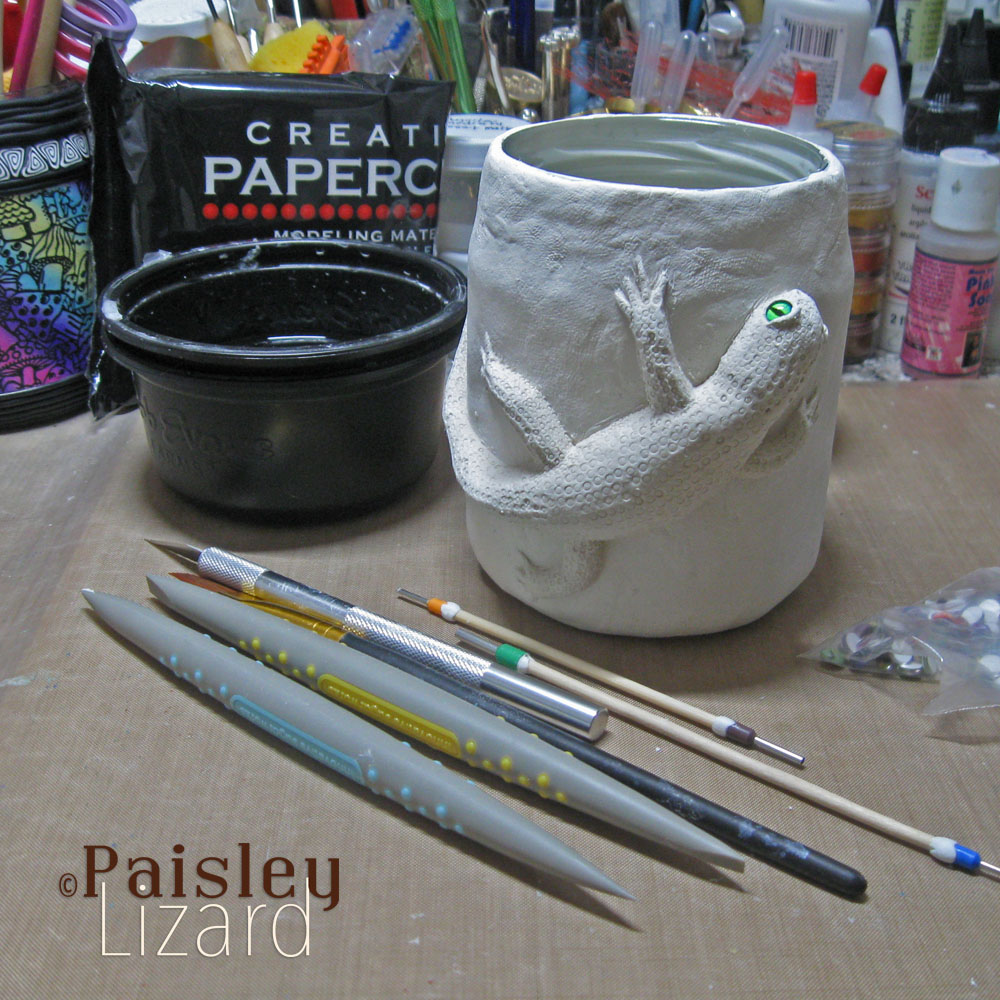
The lizard I sculpted for the first jar was almost 2 inches of solid clay at the thickest part of its body. That’s the thickest piece I’ve sculpted from paperclay so far and I didn’t know what would happen as it cured. I know you can use armatures to keep the clay layers thin. But like I said, I didn’t set out to make such a robust critter. Anyway, to be on the safe side, I tented the jar with a plastic bag to slow the drying in hopes of avoiding more cracks. And wow did it dry slowly. I waited two weeks but in the end, there were no cracks in the body and only slight fissures where I hadn’t done a good job joining the legs to the body.
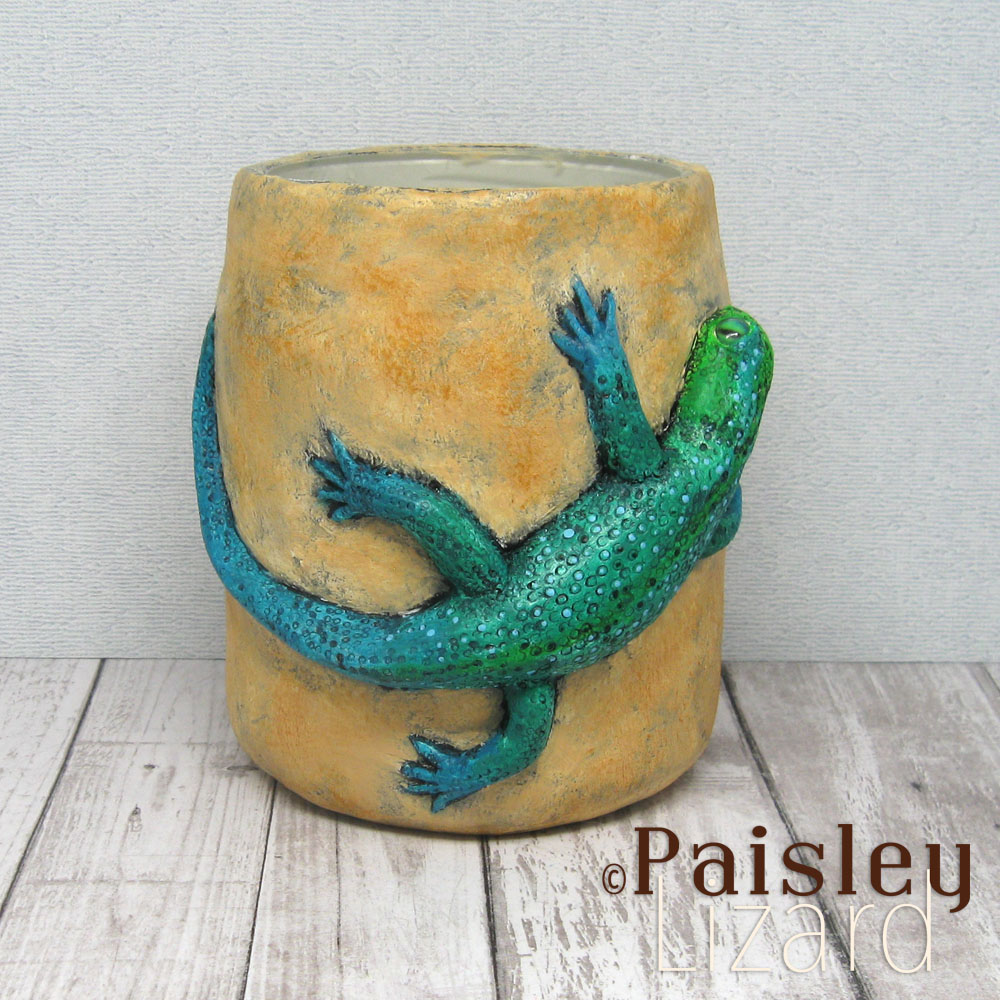
After waiting most of the month for clay to dry, I still wasn’t sure what color to paint the lizard. As often happens when I am ambivalent about my color choices, I defaulted to blues. Had I known when placing the green glass eyes in the clay that the lizard was going to be blue-green, I might have chosen amber eyes for contrast. Oh well.
While I was waiting for my big boi lizard to cure, I added a background layer of clay to a second jar. For reasons that I don’t know, that one dried with just a few cracks. It was the same clay brand, from the same package, and applied at the same thickness to the same kind of jar. The only difference was that I textured it with crumbled foil and cheesecloth whereas the first jar was only textured with cheesecloth. Perhaps it shall remain one of the great mysteries of the universe.
By the time the second jar was ready for lizards, I was nearly out of time. And patience. It was five days until the end of the month, which meant not enough time to wait for more paperclay to dry. Not even thin lizards, had I been capable of sculpting them. So I thought I’d try using a 2-part epoxy clay to sculpt the lizards, knowing it cures hard enough to paint within several hours. I’ve only used epoxy clay for sculpting once before, over a wire armature for a miniature bottle tree. I don’t know much about it except it starts curing as soon as you start mixing it and won’t be very pliable after about the first hour. So, no pressure.
Once again, my attempt at sculpting whip-thin lizards did not go according to plan. In my defense, I was feeling a little stressed about the workable time with the epoxy clay and didn’t spend as much time as I should have on body and limb proportions. The good news is, even though the clay was less than fresh (I first opened the jars over a year ago for that tree project), it did adhere to the paperclay base. And, bonus, I was able to sculpt five toes per foot this time. They’re wonky, but they’re all present and accounted for. The even better news was, the epoxy clay was fully cured and ready for paint the next day.

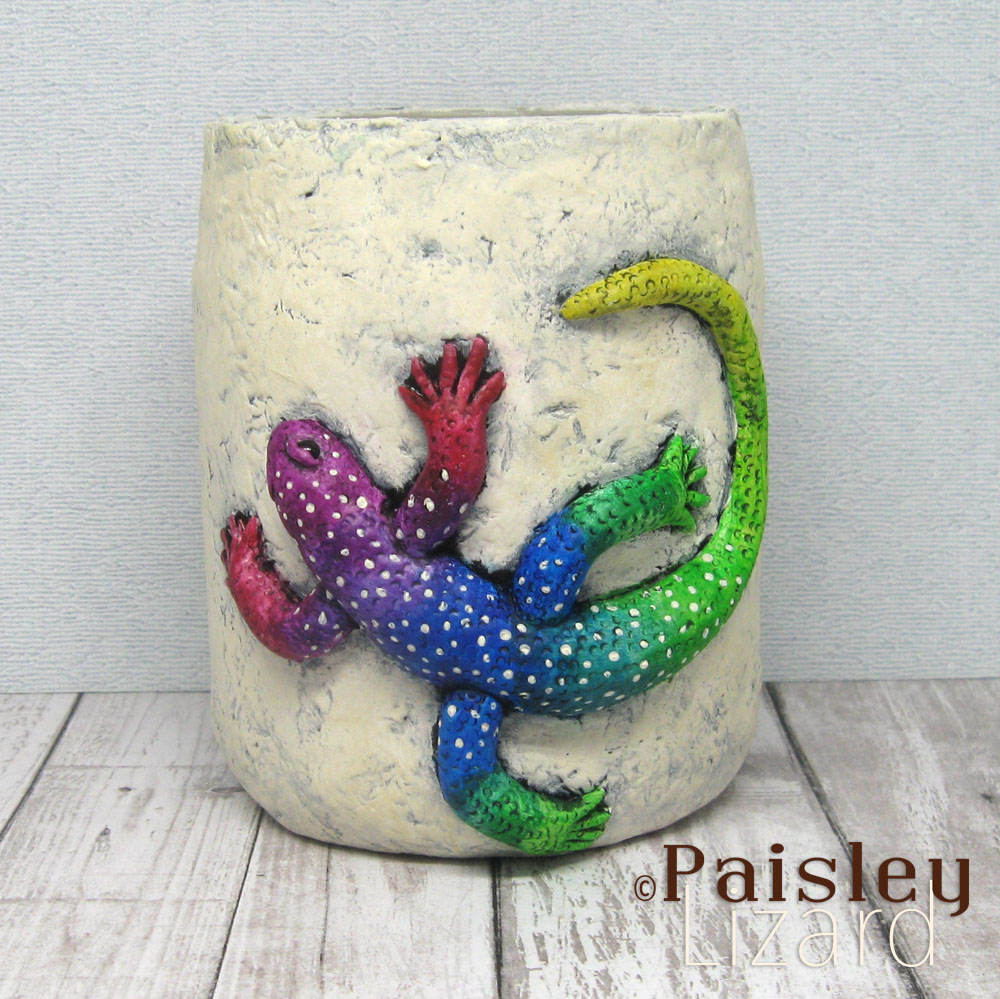
Lizards come in a stunning variety of colors and patterns but I’m not an expert painter so I didn’t aim to imitate any actual lizard’s scales. Further, as my lizards’ bodies were not modeled after any particular species, I did not feel bound by the color patterns of actual lizards when painting them. Instead, I decided to go with an “all the colors” approach.
Many thanks to the Art Elements design team for choosing lizards for the theme this month. While the paperclay tested my patience yet again, I am pleased with the results, especially the textured backgrounds. And I think I need to try combining paperclay and epoxy clay for future projects. Thanks to you for stopping by my blog today. Please leave a comment if the spirit moves you.

I enjoyed your blog. I am such a perfectionist that some of the problems that you encountered and overcame resulted in really cute containers. My favorite is the orange and yellow lizard. It looks a lot like the card that I made for this challenge. I admire your stick to it spirit and your cubby lizards.
Thanks so much, Kathy. I have definite perfectionist tendencies, but working with paperclay is teaching me to go with the flow. Just a little. 😉
Wow Tammy you have far more patience then I do. If I had went through half of what you had with paper clay I wouldn’t never have touched it again. It has really paid off for you, these jars turned out great. I love the colour choices.
Thanks so much, Donna. My persistence with the paperclay is not so much because I’m patient as it is because I am stubborn. 😉
Love your lizards! Have you tried making your own paper clay? I just tore up some egg carton and packaging cardboard to give it a try. It’s taking a very long time to dry, so I’m waiting and waiting to see how it comes out.
Thanks so much, Sylvia. No, I have not tried to make my own paper clay. I just grabbed a couple packages of paperclay earlier this year because of a shortage of polymer clay, which is what I normally sculpt with. The dry time tries my patience and when it was not so hot, I cheated a bit and put things in my oven to speed it up.
If you want a longer working time and a really hard end product, try quick cure clay. It doesn’t set until you heat it up using a heat gun and turn rock hard upon heating. It can be painted as well. Cons: a bit expensive and doesnt stick to metal without an adhesive.
Thanks for the suggestion, Divya. I’ll look into that. If it weren’t too hot to fire up the oven, I’d be using polymer clay instead of paperclay or epoxy clay. It’s what I’m most comfortable with – but it’s simply too hot in the summer to use any heat source in the house.