
It’s a new year and I’m trying a new art medium: air dry paper clay. I’ve been working with polyvinyl chloride (PVC) based clay (which I’ll refer to as polymer clay hereafter for simplicity) for about 20 years and am perfectly content with it as an art medium. However, there have been sporadic shortages of polymer clay during this pandemic which have led me to seek out an alternative for some of my sculpting projects. These are my first impressions of working with paper clay.
So, paper clay, or maybe it’s paperclay, all one word? I’m honestly not sure. What I am sure of is the clay I’m talking about contains cellulose and dries/cures in air at room temperature, i.e., it does not get fired in a kiln. In fact, I’m pretty sure putting it in a kiln would burn it up. No, I did not test that theory as I do not own a kiln. But I do know paper burns at 451 degrees F and that kilns reach temperatures in excess of that. Ipso facto, as they say.
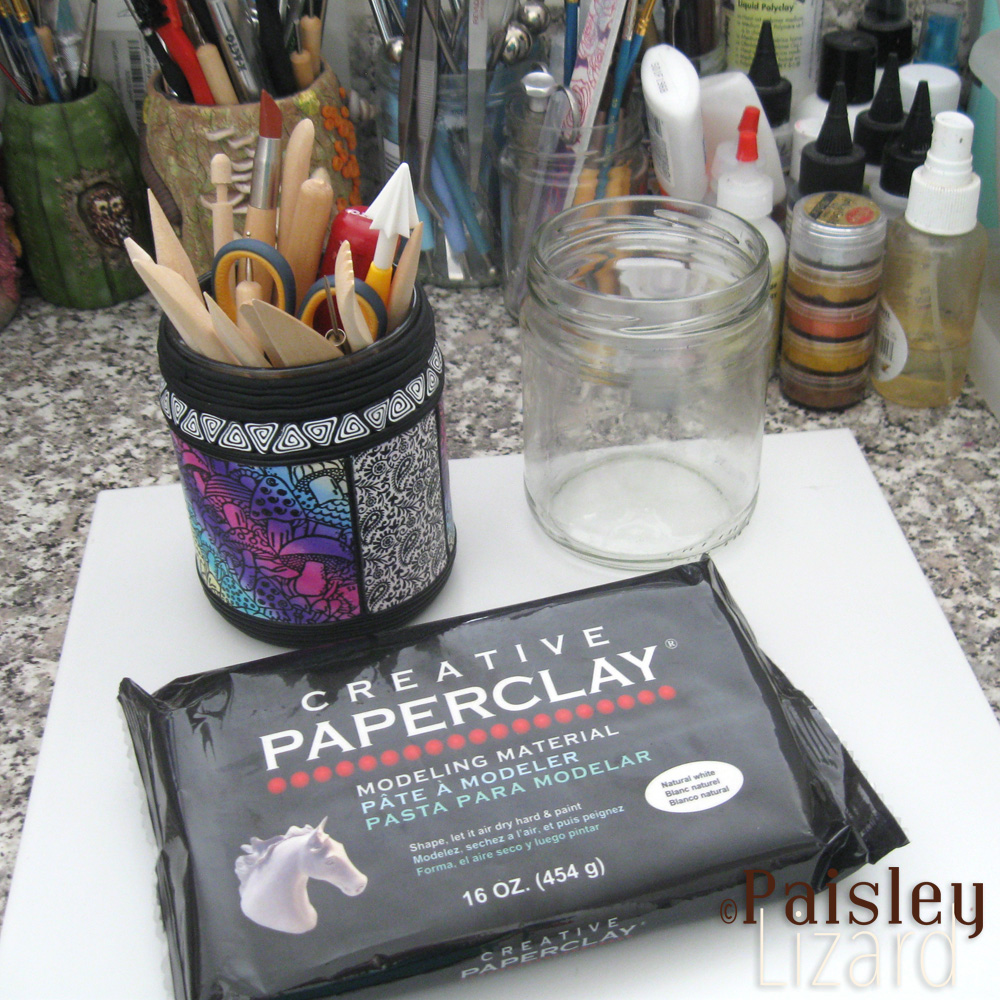
The brand of paper clay I tried is Creative Paperclay. This is not a product review and I did not conduct systematic experiments. I just opened the clay and started making things. I’m fairly certain my general observations would hold true for other brands, just as I am sure each brand has its own relative merits and quirks. Why do I think that? Because that’s been my experience with PVC polymer clay brands and products. And because it just makes sense that differences in formulations would lead to differences in things like body, strength, work time, etc.
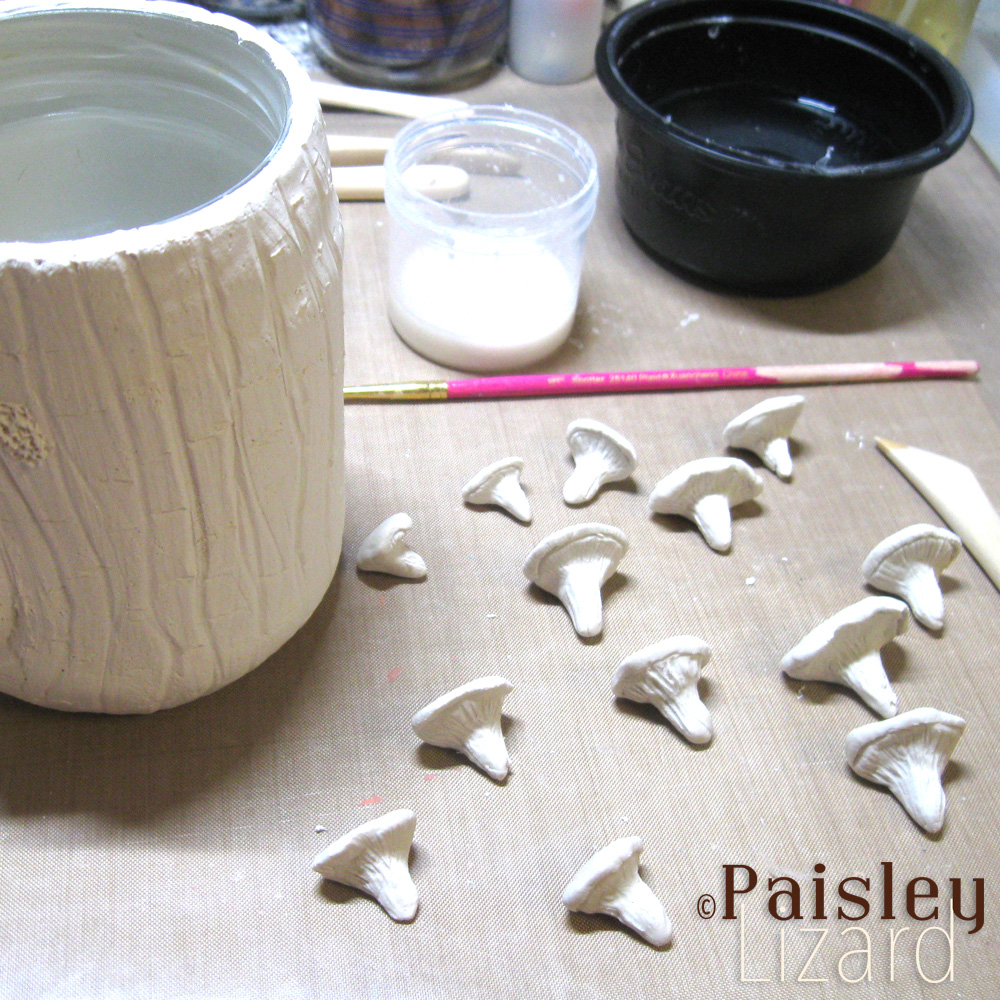
It’s Squishy: Straight out of the package, this stuff is pleasantly squishy. If you remember Play-Doh from your childhood, it’s a bit like that in terms of firmness. Or like a stiff bread dough. This made it easy to shape and smooth with little effort. It also meant it was super easy to deform my work when I wasn’t careful. As the clay begins to dry, it becomes firmer and less prone to accidental smooshing.
Due to the squish-factor, I found it’s best for me to work in stages, letting parts of my project partially or completely dry. It was relatively easy to add more clay to a project at any stage in the drying process. I brushed or smoothed a bit of water or slip (a slurry of paperclay in water) over the surface where I wanted to add fresh clay and smoothed or pressed the wet clay into the dry. The fresh clay adhered perfectly to the dry clay.
It’s a Little Toothy: When fresh from the package, this paperclay had a surface texture I would again compare to firm bread dough. It’s a little moist, but not sticky or tacky. As it dries, it starts to feel like, well, paper. Not slick like inexpensive copy paper. More like a premium cotton rag paper with a nice organic tooth to it. It definitely does not feel like ceramic to me. Nor anything like polymer clay, naturally. Also, not about texture per se, but I will add that paperclay feels cold as it dries – even when your studio temperature is 62F. I might vaguely recall the physics of why water evaporating makes something colder, but I won’t bore you with that here.
You Have to Hurry (and Wait): As you would expect, paperclay gets less pliable as it dries and at some point, sculpting is no longer an option but I could still carve or cut it. How quickly it dried depended on room temperature and humidity. No, I didn’t run tests of this. It just makes sense when you think about it. I found I had about an hour to work out large-scale shapes (if I kept the edges moist) and several hours more for impressing or carving finer details into them. I will add that up until it was fully dry, I could accidentally make dents in it with my fingernails or dislodge protruding bits of the sculpture. Yes, that happened. More than once.
For me, this means I need to plan ahead more when working with paper clay than with polymer clay. I assume I can cut or carve away cured paper clay if I change my mind about something, but I also assume repairing that spot will be more challenging. It did stress me out a little, knowing I had to “hurry up” before the clay started to dry. I’m sure as I get used to it, I won’t feel pressured by the clay.
Cracks Will Happen: According to my research, paperclay is prone to developing cracks as it dries because it shrinks as the water in it evaporates. The water content is what makes it possible to mold and sculpt the clay. It makes sense that cracks would happen if, for example, there were areas of uneven thickness such that the clay dried at different rates in different spots. I don’t know for certain what caused the cracks in my projects. But crack they did. All of them.
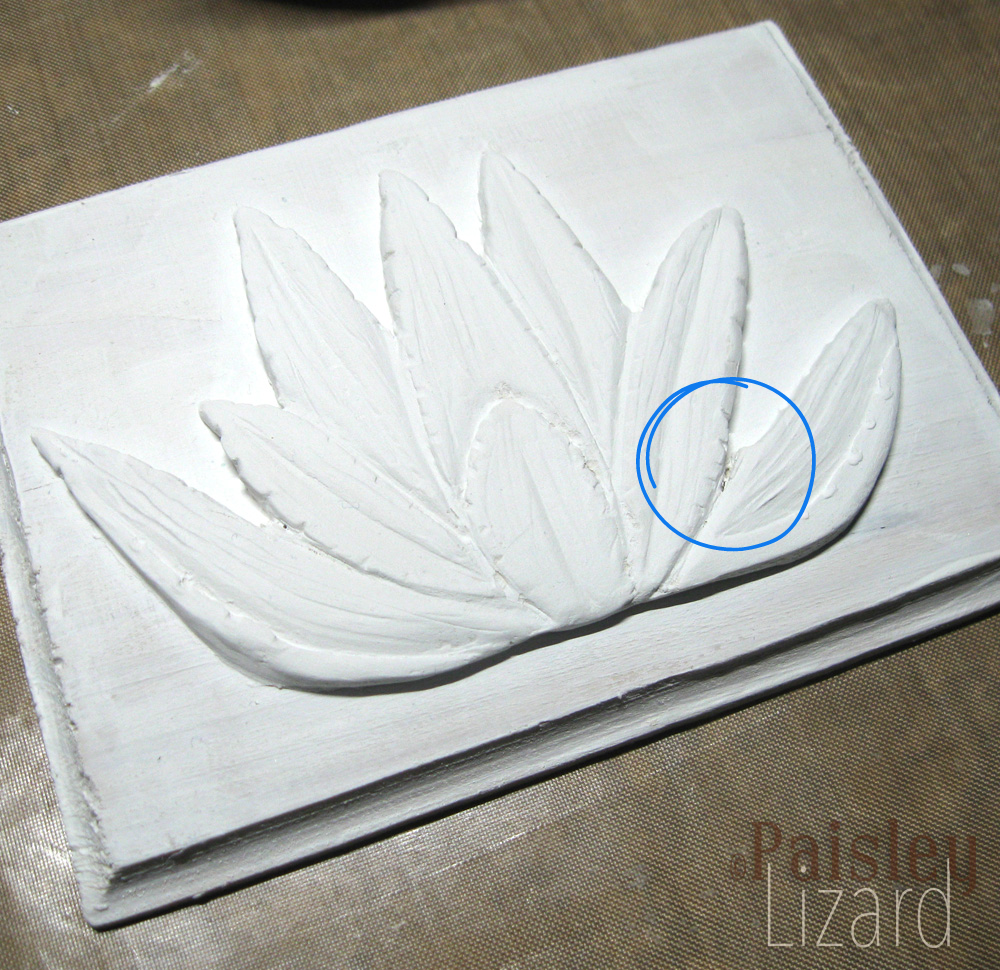
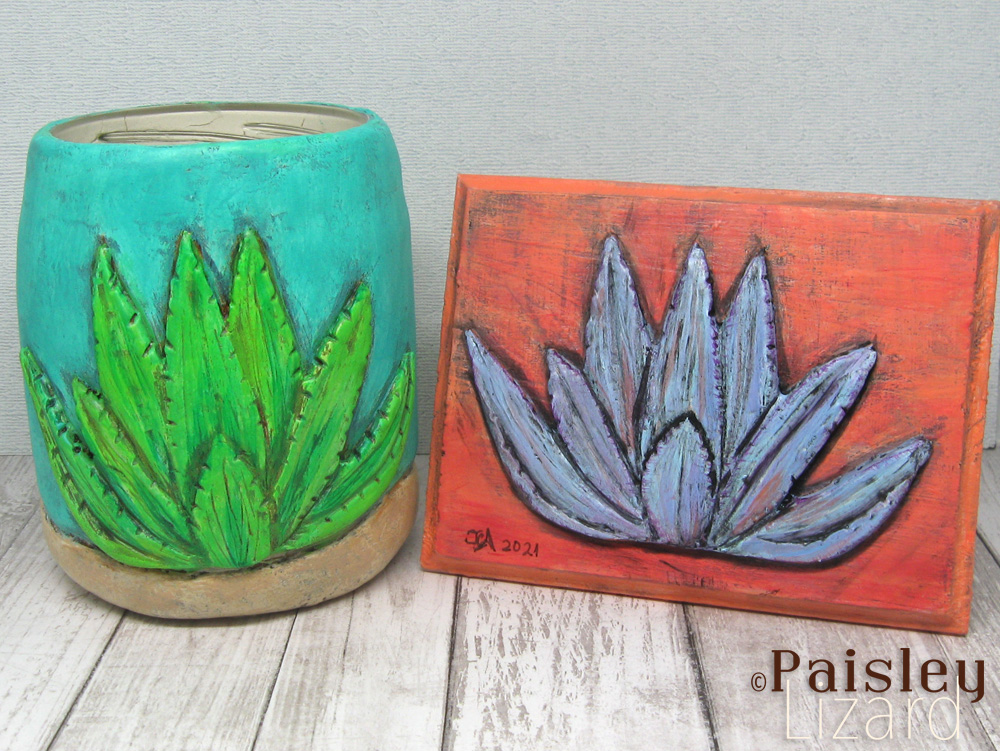
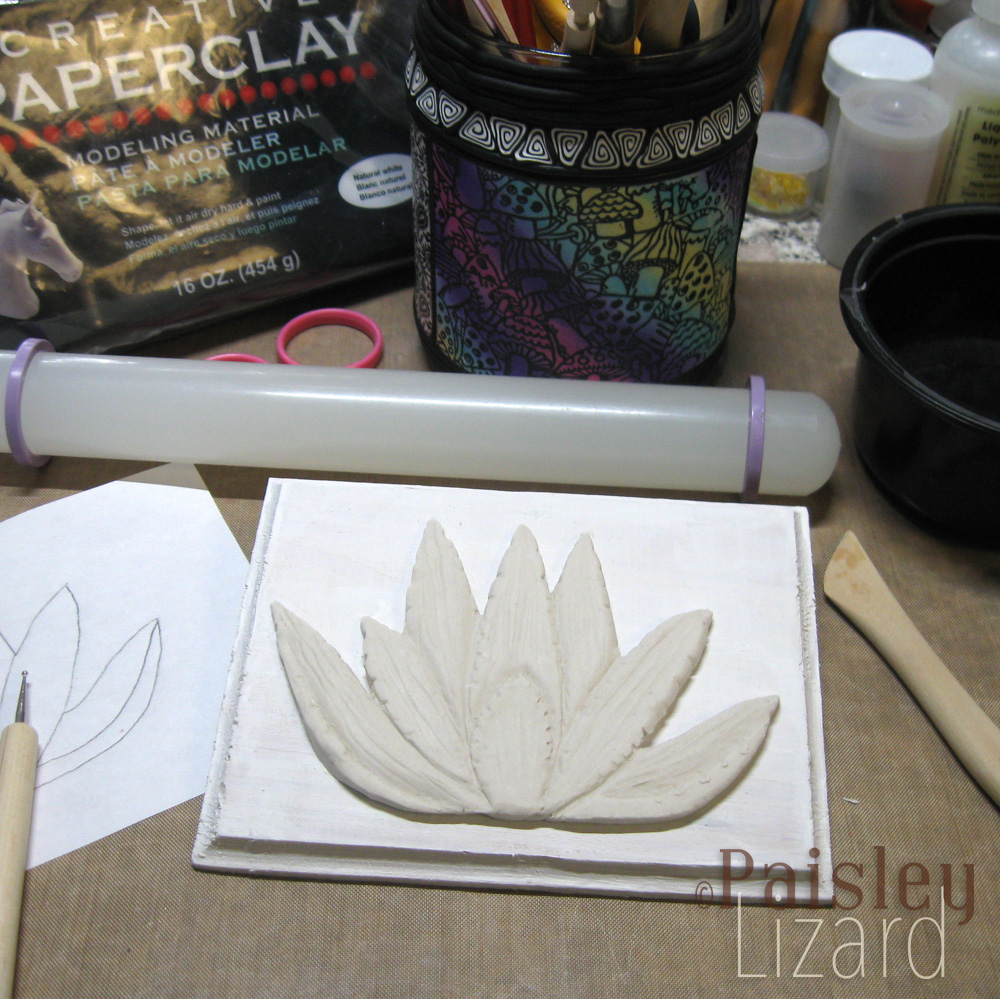
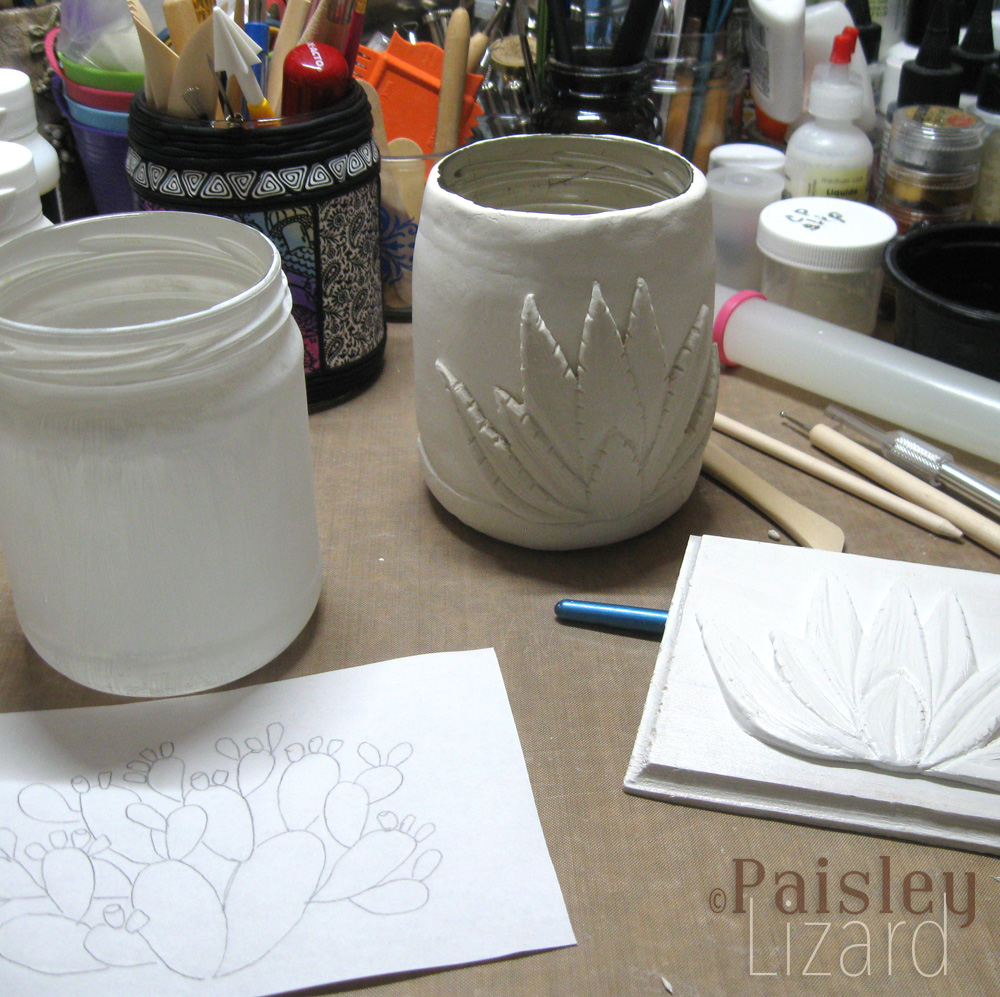
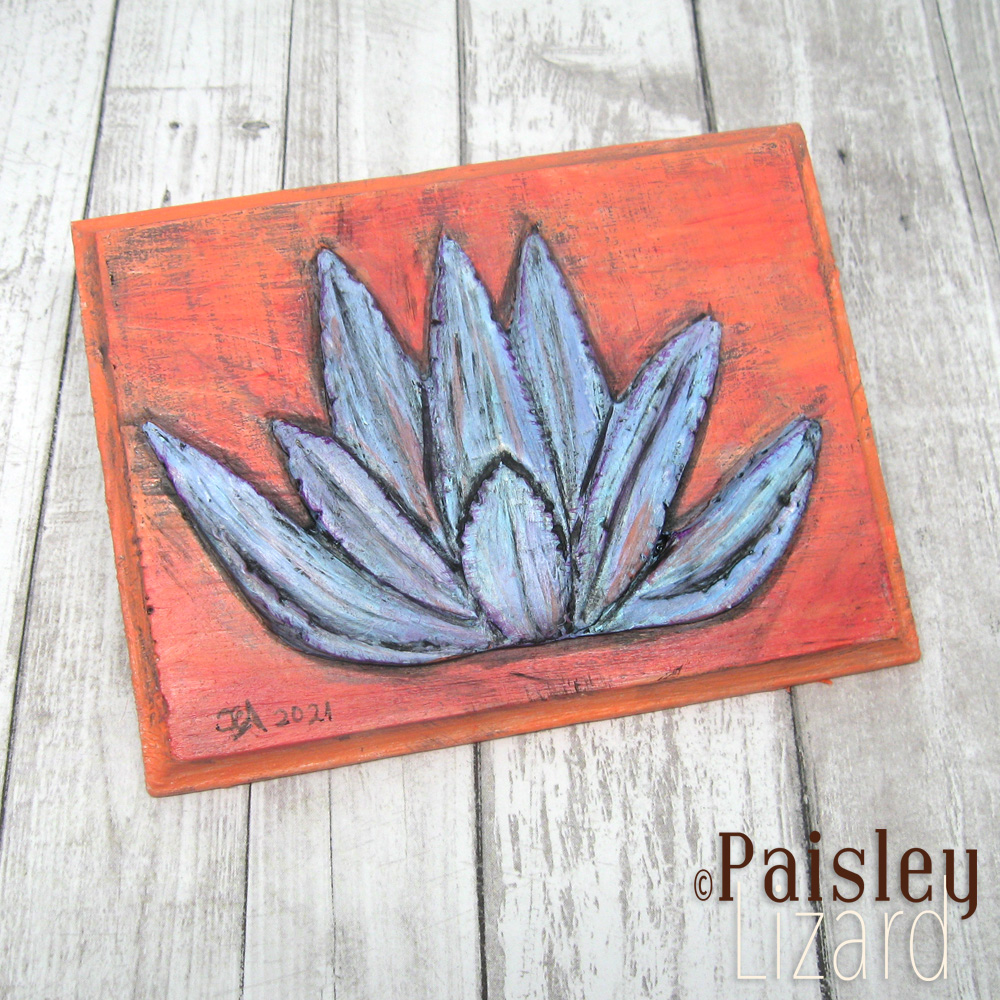
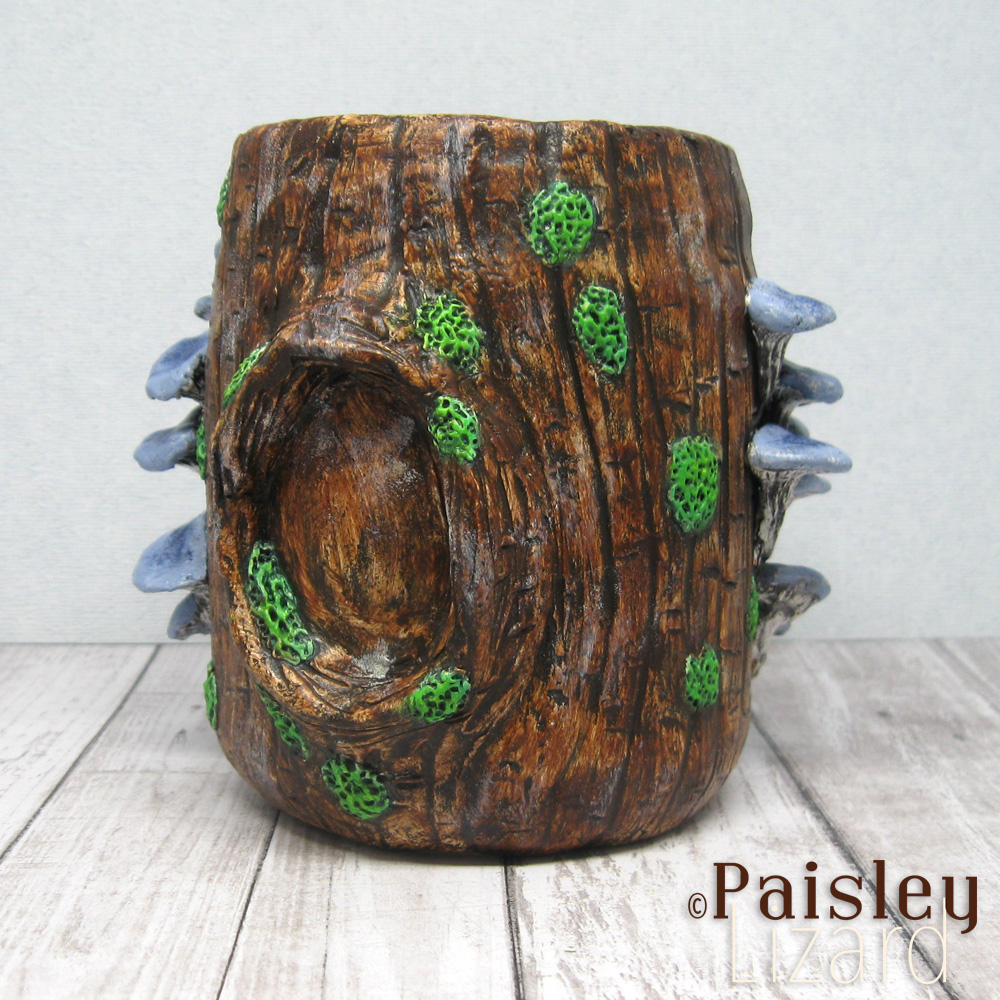
Both the piece sculpted flat and the clay formed around glass jars developed cracks as they dried. In each case, the clay was rolled to the same thickness and I didn’t add any water to the clay, other than dipping my sculpting tool in water occasionally for smoothing. The crack in the flat piece is barely noticeable and if you didn’t know how it looked before it dried, you might think the crack was an intentional feature.
The clay formed around the first glass jar cracked significantly more than the sculpture on wood and in very obvious ways. Most of the cracks were around the circumference of the jar near the top. I think they also more or less correspond to spots where I joined pieces of clay because I didn’t roll out a sheet large enough to cover the entire jar. The good news is, the cracks were easy to repair by simply brushing slip over and smoothing fresh clay into them.
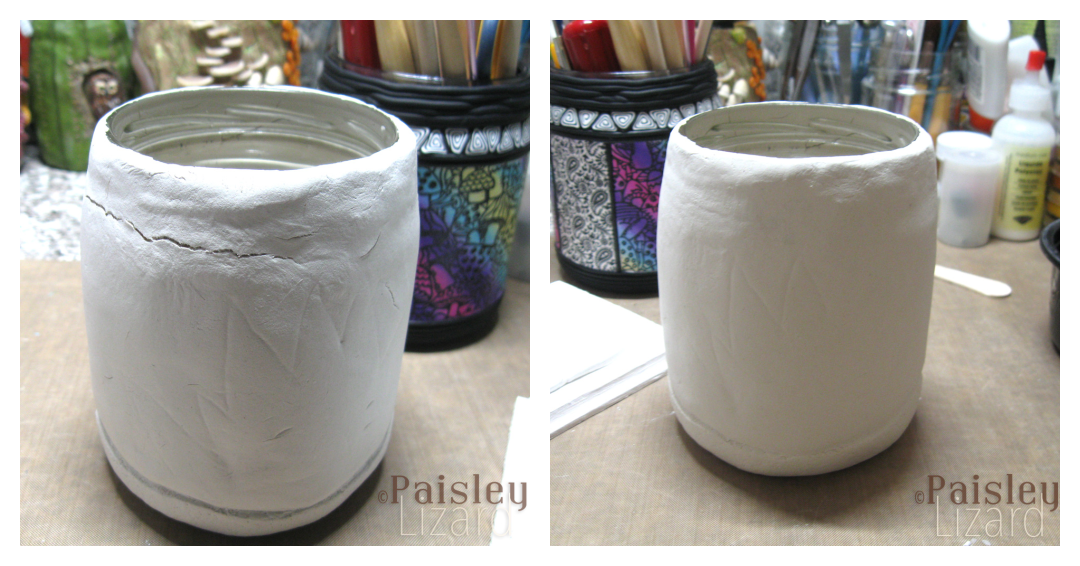
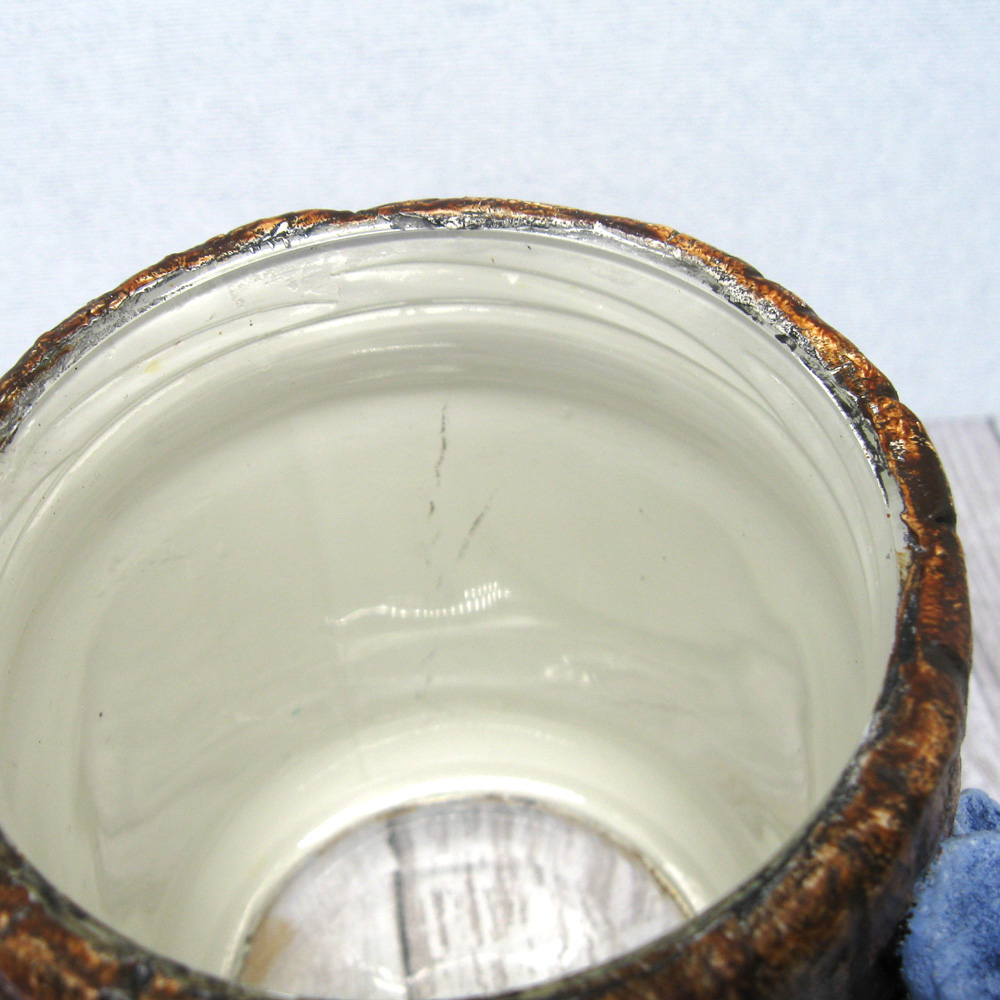
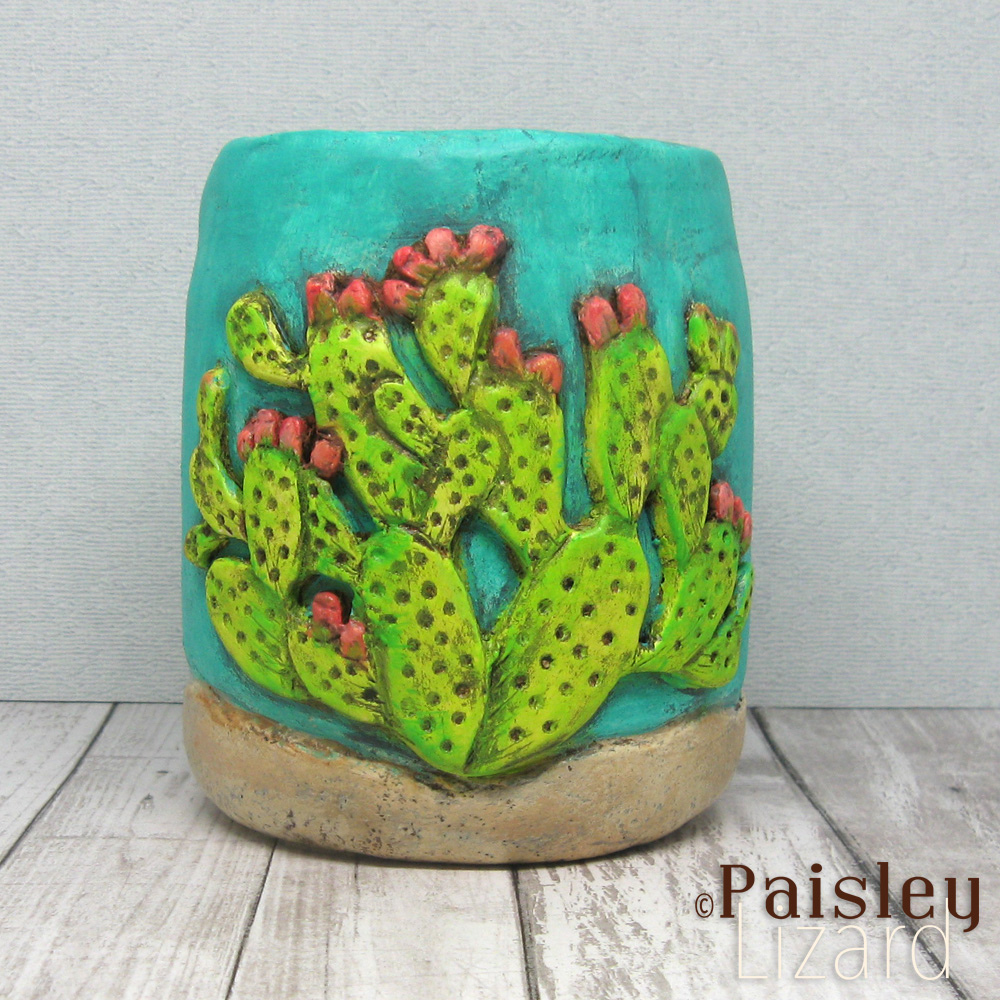
For the second glass jar, I rolled out a piece of clay large enough to fit all the way around. There were still cracks as it dried, but they were fewer and finer and seemed to correspond to places where I had added more clay over the base layer before letting it dry. So, it’s possible the uneven thickness was the culprit there. Sorry, I forgot to take photos of those cracks before patching them. They’re visible from inside the jar though.
So Much Waiting: The most challenging thing for me to adapt to with paperclay was waiting for things to dry. When I wasn’t waiting for the clay to dry, I was waiting for a layer of acrylic medium to dry. When I wasn’t waiting for the medium to dry, I was waiting for paint to dry. I think the solution to this for me will be to have multiple projects underway at various stages. But that may require more planning and organizational skills than I want to apply to my art time.
According to sources consulted, the clay has to be completely dry before you can start painting it. Sounds reasonable. Sure, I could leave it white and call it a day. But keep in mind that if paperclay isn’t sealed, it’s vulnerable to moisture and the sculpture is somewhat more ephemeral.

I am not a painter. I mean, I’ve painted things, but I’m not trained in how to use paints and mediums. But I did read that it’s a good idea to prime your paperclay sculpture with gesso before painting it. So, that’s what I did. I applied two layers – allowing them to dry in between coats. When I say “allowing them to dry” I may mean I dug my rarely used hairdryer out of the linen closet (what, isn’t that where you keep yours?) to speed things up. Patience is not one of my virtues.
After the gesso layer is dry, and after I used acrylic paints to give my sculptures color, I had to wait for that paint to dry before I could varnish it. Maybe I could skip the varnish? I don’t know. It seemed like a good idea to add a top coat though.
Resources Consulted: Before I opened my first package of paperclay, I watched more than a few videos on YouTube, some more informative than others. I did this because I like to know at least a little something about what to expect, what tools I might need, etc. I found some very helpful information on this artists’s blog. Her exquisite horse sculptures clearly demonstrate the potential of this medium. I also bought a book by Rogene Manas, Artful Paper Clay: Techniques for Adding Dimension to Your Art. Her explanation of how to use tools to define features in bass relief was straightforward. And I primed, painted and sealed my projects following her process.
Would I give up PVC polymer clay for air dry paper clay? Definitely not. Maybe I’m biased because it’s my first sculpting medium and I’ve been using it for so long, but I find polymer clay to be more versatile than paper clay for my purposes. Those purposes being both sculpture and jewelry. I’m sure there are people who make jewelry components from paperclay. I’m sure because I asked Google and did a quick search of Etsy shops. However, I’m not sure I would feel confident that my paperclay pieces were sturdy enough for jewelry. Maybe after I get more familiar and comfortable with it I will change my mind. I reserve the right.
However, I do see myself preferring paperclay in lieu of polymer clay for making sculptures in the heat of summer when it’s too hot to fire up the oven to cure polymer clay. And assuming the pandemic-related polymer clay supply issues will get sorted out, I can still see a place for paperclay in my art supplies in general. That place is currently a plastic shoebox holding a few packages of Creative Paperclay, one package of DAS modeling clay (I bought two brands of paperclay but have only tried one so far), and bottles of gesso and gloss medium. All the other supplies needed for working with paperclay came from the extensive collection of tools and media I already had for working with polymer clay.
Thanks so much for stopping by my blog today and following along with this newest chapter in my creative journey. Fair warning, I’ve got a lot of those empty glass jars (because I consume a lot of salsa) and I bought more paperclay. So, you should expect to see more experiments with this new-to-me medium. Please leave a comment if the spirit moves you. And follow me on instagram @PaisleyLizard for more photos of works in progress and stories about my creative journey.
I love reading your blog, the sense of humour is delightful! I really enjoyed reading about your venture with paper clay. No I’m not trying it. I would not have the patience for working with it. I find it hard for some steps with polymer clay so I can’t imagine trying to get organized enough to work with this lol. Your finished pieces do look great for all the you experienced and learned! Thank you for sharing another great experience with us! I’ll be waiting to see if more paper clay projects show up on your blog! 👍👍👌👌👏👏🌟🌟🥰🥰🥰☃️☃️☃️
Thanks so much, Donna. I do love that I can create a complete project in full color with polymer clay in a matter of hours. I’m sure there’s lots more that can be done with paperclay and at least until I can get my hands on a reliable supply of polymer clay, i’ll be exploring the possibilities. Also, I have lots of empty salsa jars waiting to be covered. 😉
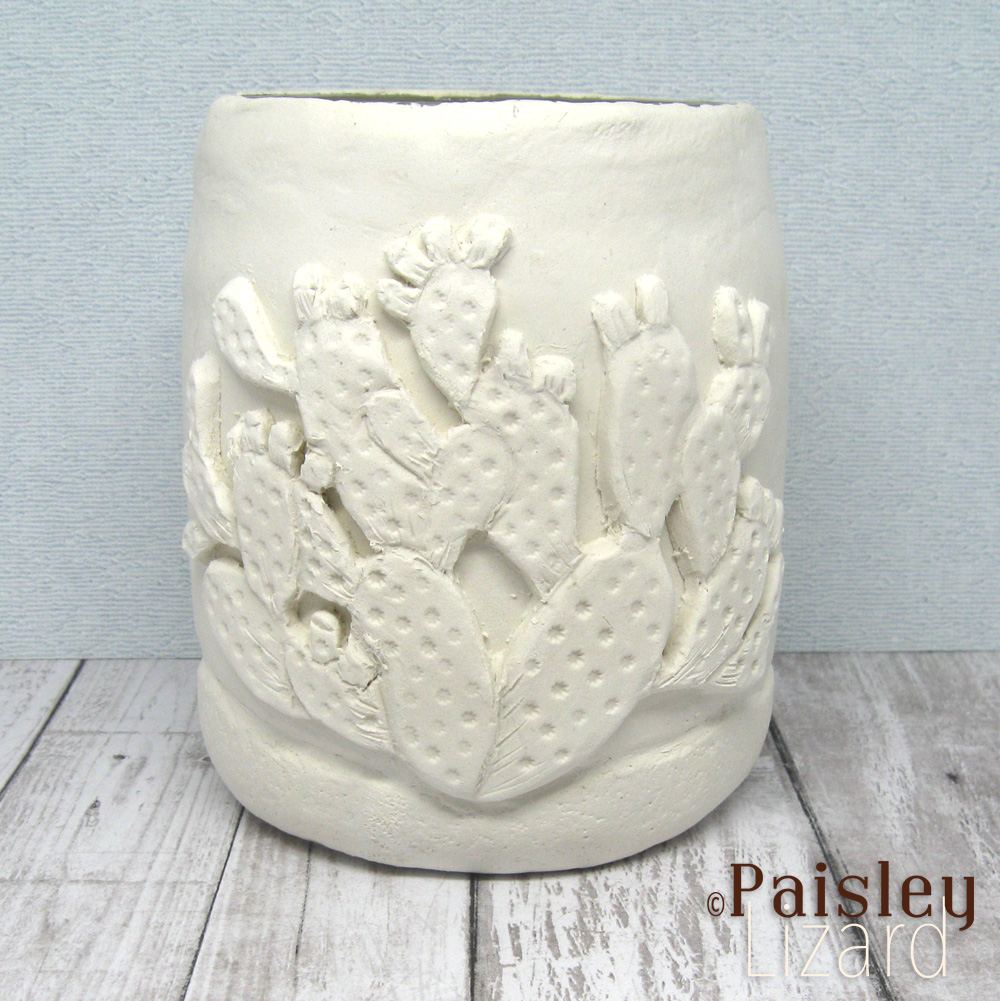
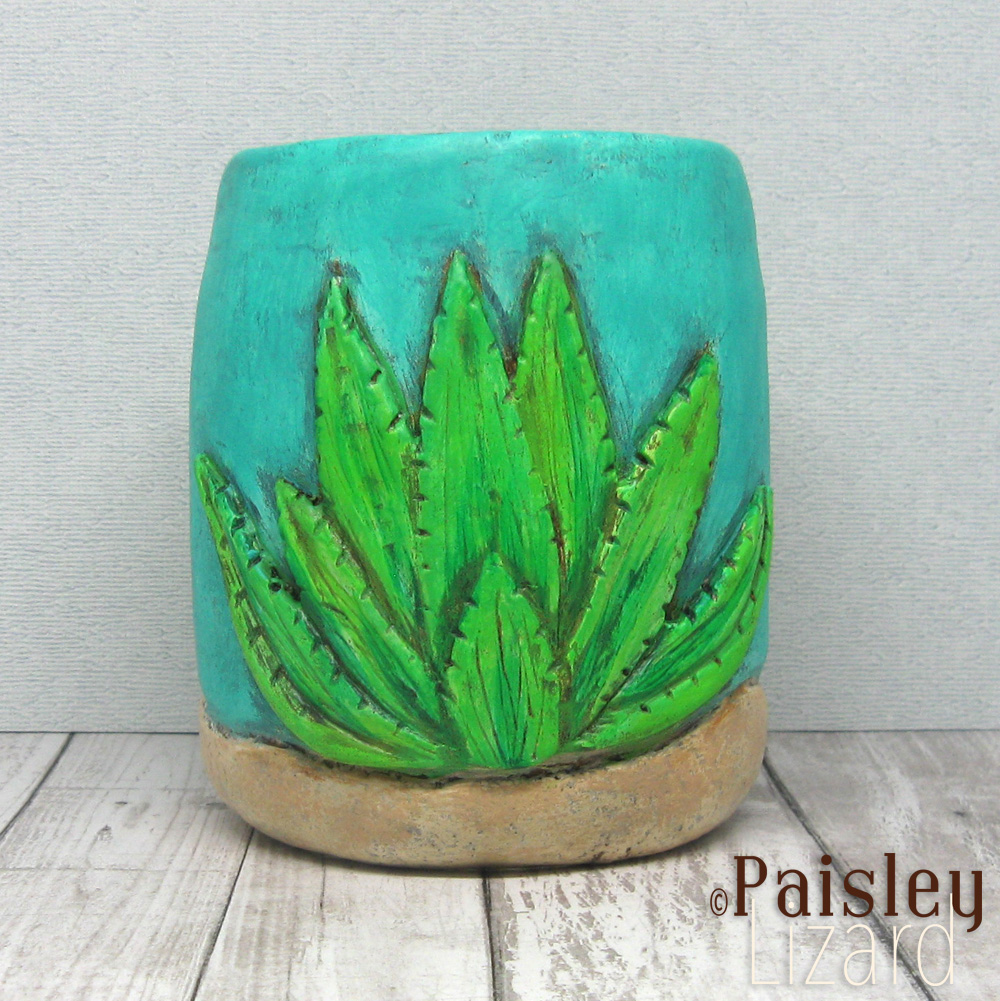
Once again, thank you for keeping your blog online! You did a fabulous job with the paper clay…liked the Agave with just the umber wash BTW ^_^…I use paper clay exclusively for my small face sculptures, and have been pleased with the results…the waiting for drying is something I just have to build into the schedule! I did once try microwaving the clay…not too bad…definitely some distortion…wouldn’t recommend it ^_^ Love getting your artistic updates!
Thanks so much, Debora. I like the look of the clay with the umber wash too. I was tempted to leave it just like that. I may do a few pieces that way in the future. I read that you can put the paperclay in an oven on low (around 200F) for about 15-20 minutes to speed up drying. I may try that on days when I’ve already had the oven on to cook: put the clay in there as the oven cools down after cooking. But otherwise, I do just need to work on better planning and more patience. 🙂
I don’t like waiting, so paperclay isn’t for me (I tried once and knew it after the first attempt).
Kudos to you for pulling this through.
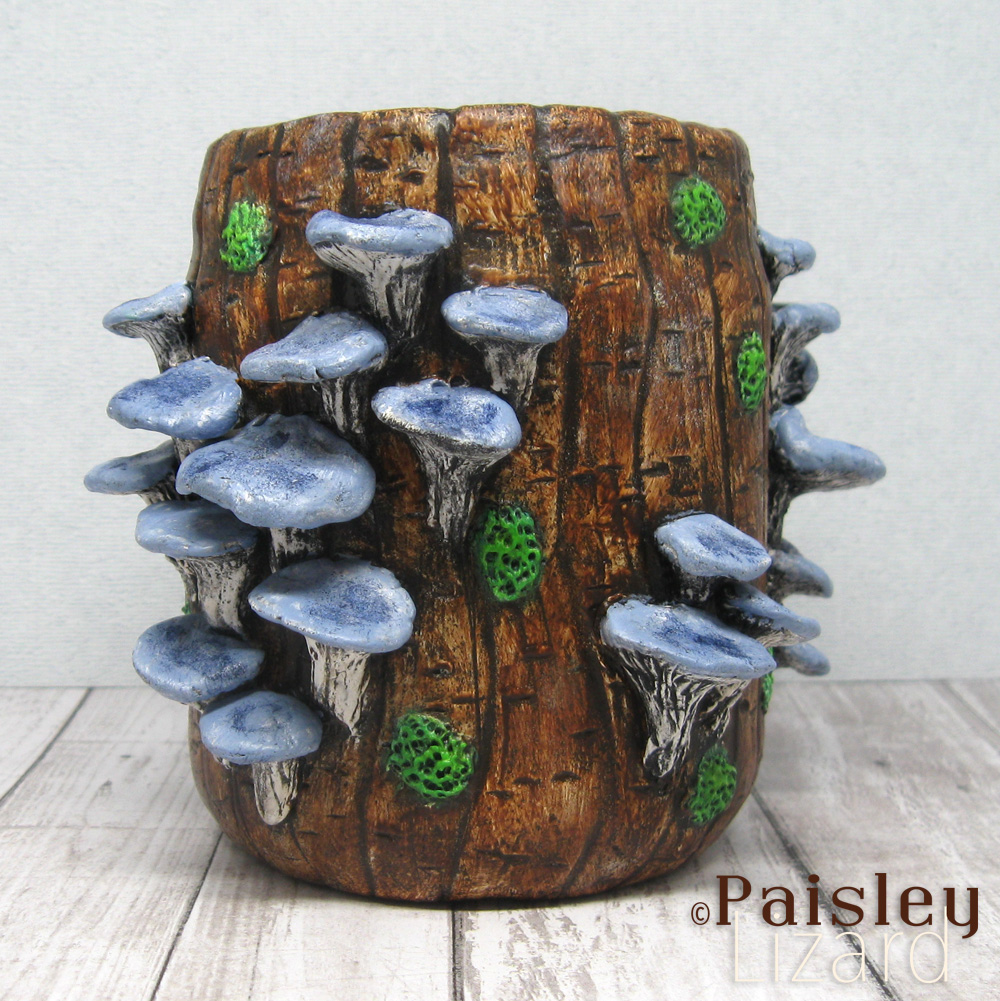
My absolute favorite is the mushroom tree, it’s wonderful!
Thanks so much, Cat. I’m very very bad at waiting. I’m looking at this medium as my opportunity to practice patience. LOL
I remember using paper clay several years ago and realised that I could not put up with the cracks. While it was easier to handle than regular clay (for me) it was still way out of my comfort zone. so Kudos to you for working with it successfully.
Thanks so much, Divya. I was frustrated by the cracks at first and now I see it as a challenge to figure out ways to minimize them. We’ll see how long I stick with it though. There may come a point where it just isn’t worth it to me.