The theme for this month’s Art Elements design challenge is forests. There are many different types of forest, categorized by latitude and elevation (tropical, temperate, boreal), the dominant types of trees (evergreen or deciduous; broadleaf, coniferous, or mixed), annual precipitation or general climate, stage of development (old vs new growth), etc. So many forests, so little time.
From the beginning, I was thinking of projects that represented a sampling of the broad categories of forests. Then I started thinking about the diversity of life in the forest and which “charismatic megafauna” best represent each forest type. And then I took a mythological tangent. Of course, I did not come close to completing projects for all my ideas, but I did manage a few.
The project I began first was a large jewelry box covered in polymer clay. When I say large I mean by comparison to previous jewelry/trinket boxes I have made. Whereas all the earlier covered boxes fit in the palm of my hand, this one covers both hands. While my idea could theoretically work on a smaller scale, I needed a somewhat larger canvas because sculpting in miniature is incrementally more difficult as the size decreases. At least, it is for me.
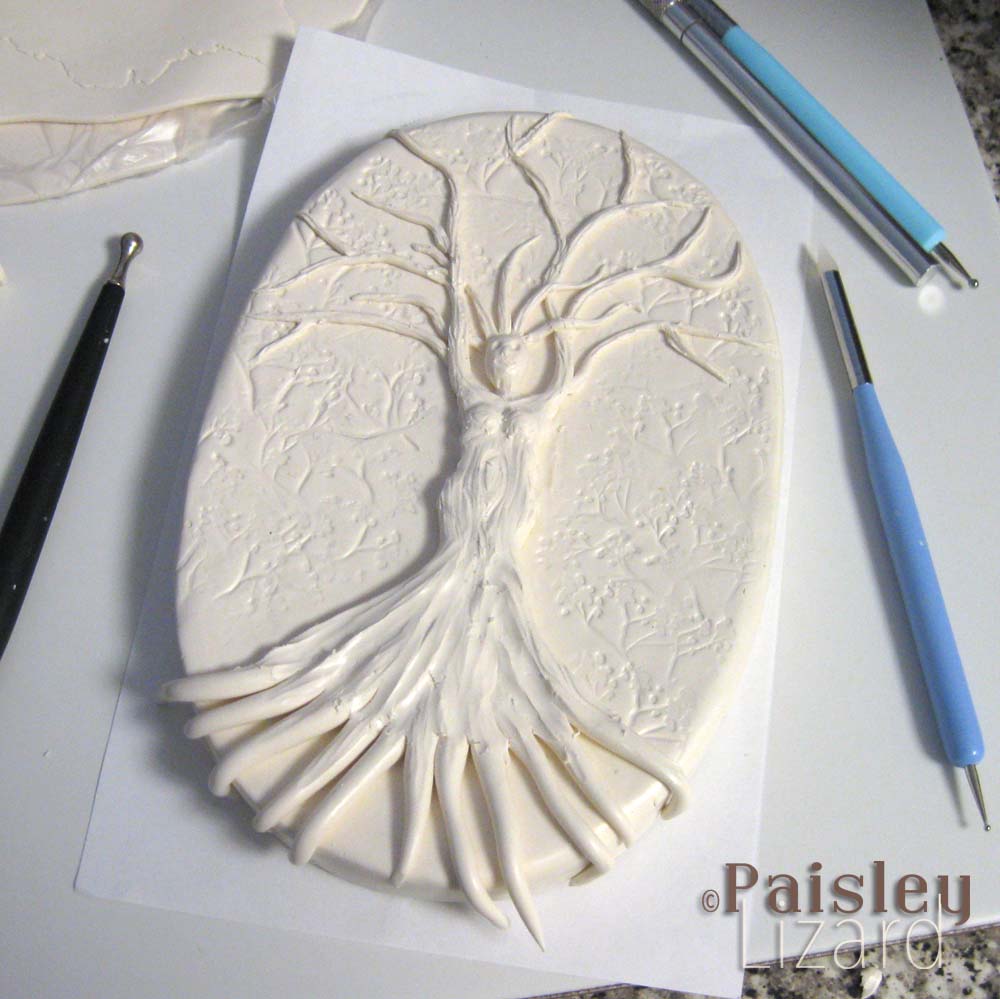
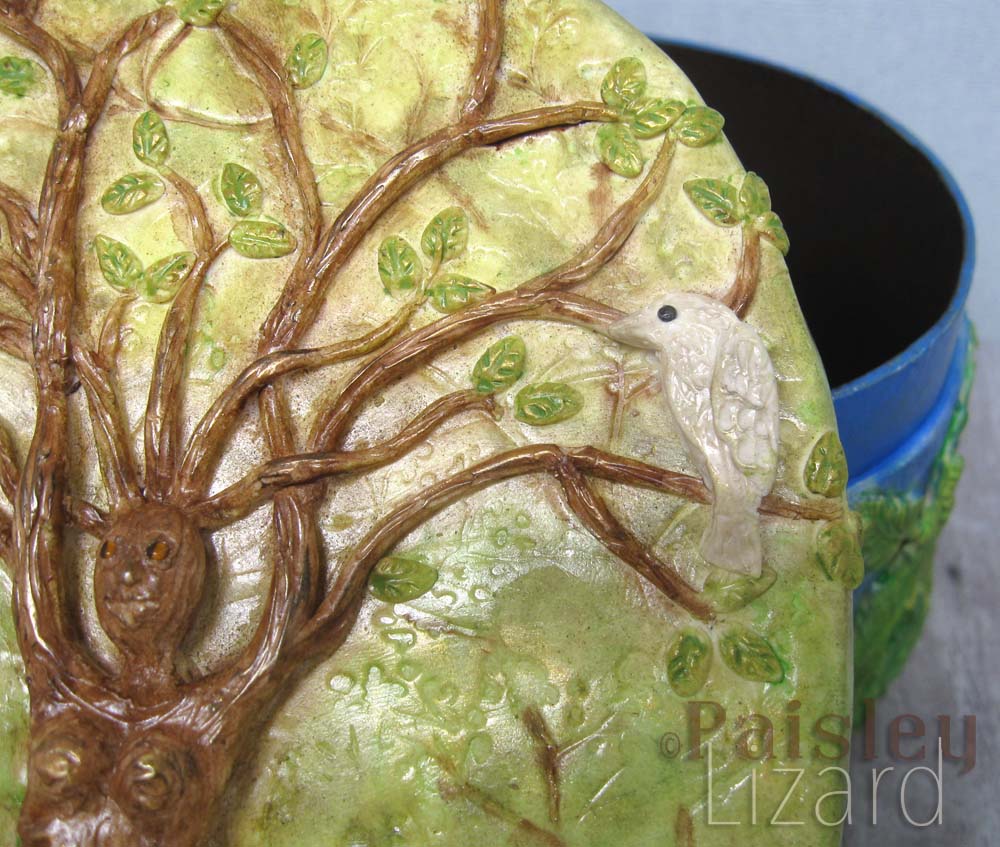
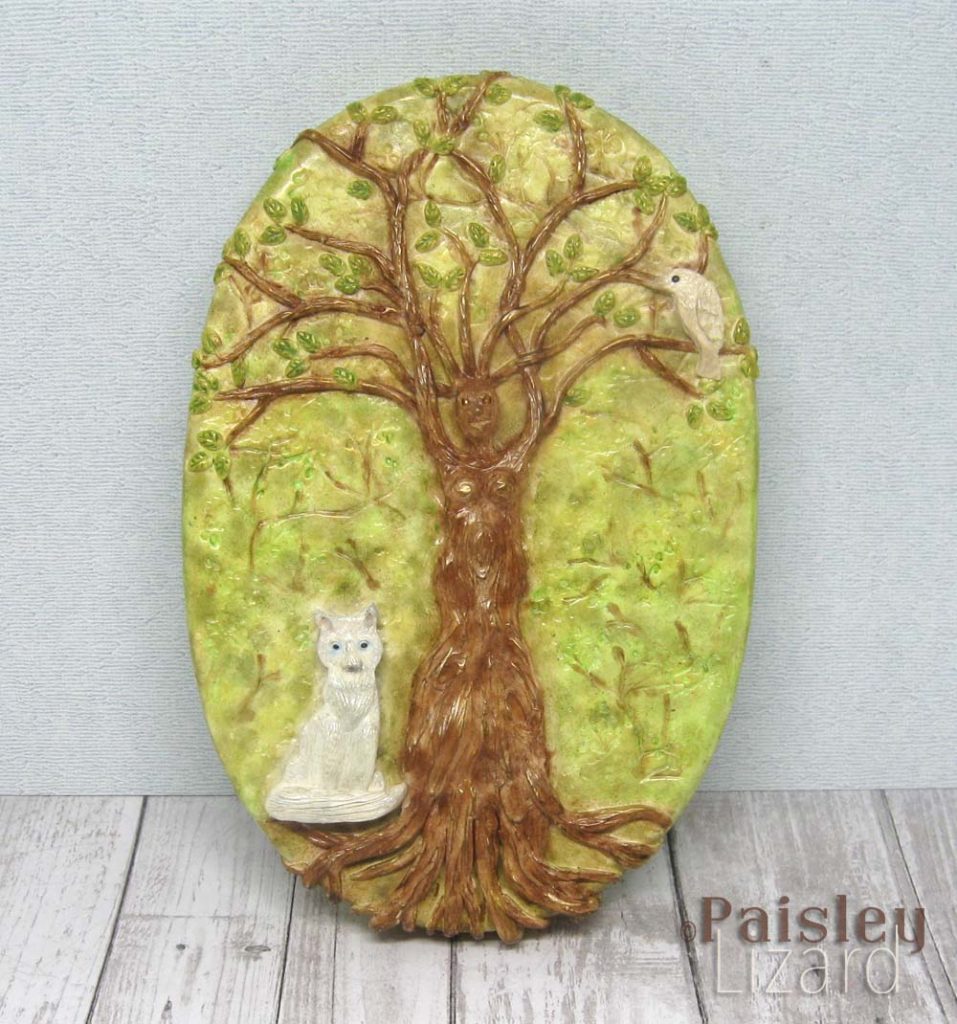
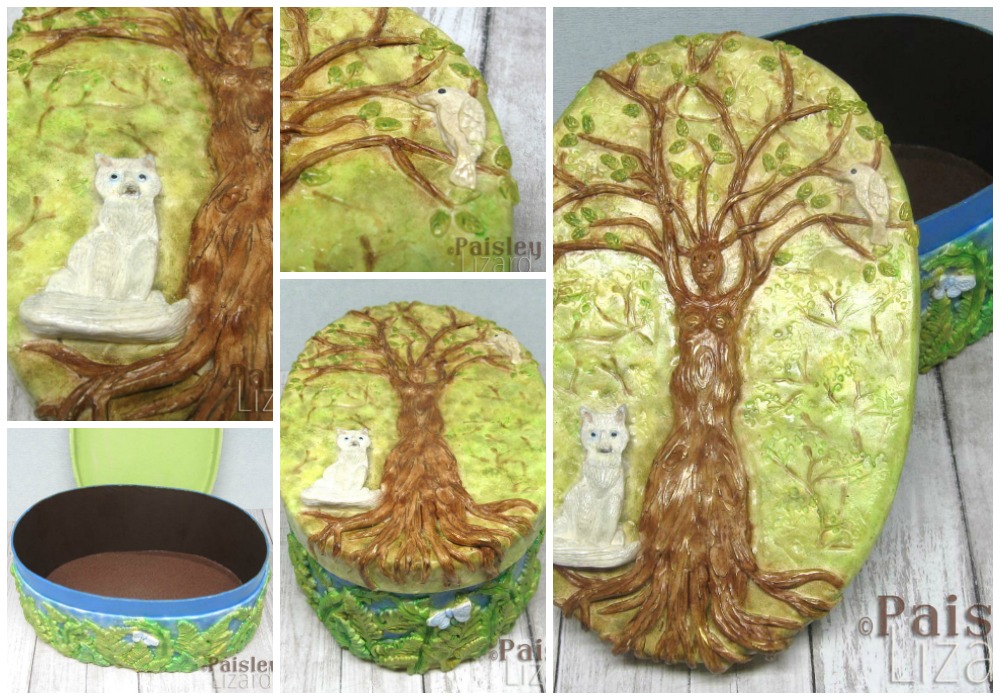
With a working title of “Spirits of the Forest” in mind, I used the additive method to sculpt in relief on the lid of the box. Creating a tree with a feminine shape was comparatively easy (maybe a 3 on a 10-point difficulty scale?) until I got to the face and just couldn’t manage human features on that small scale. As a result, I think she’s a cross between tree nymph and Groot.
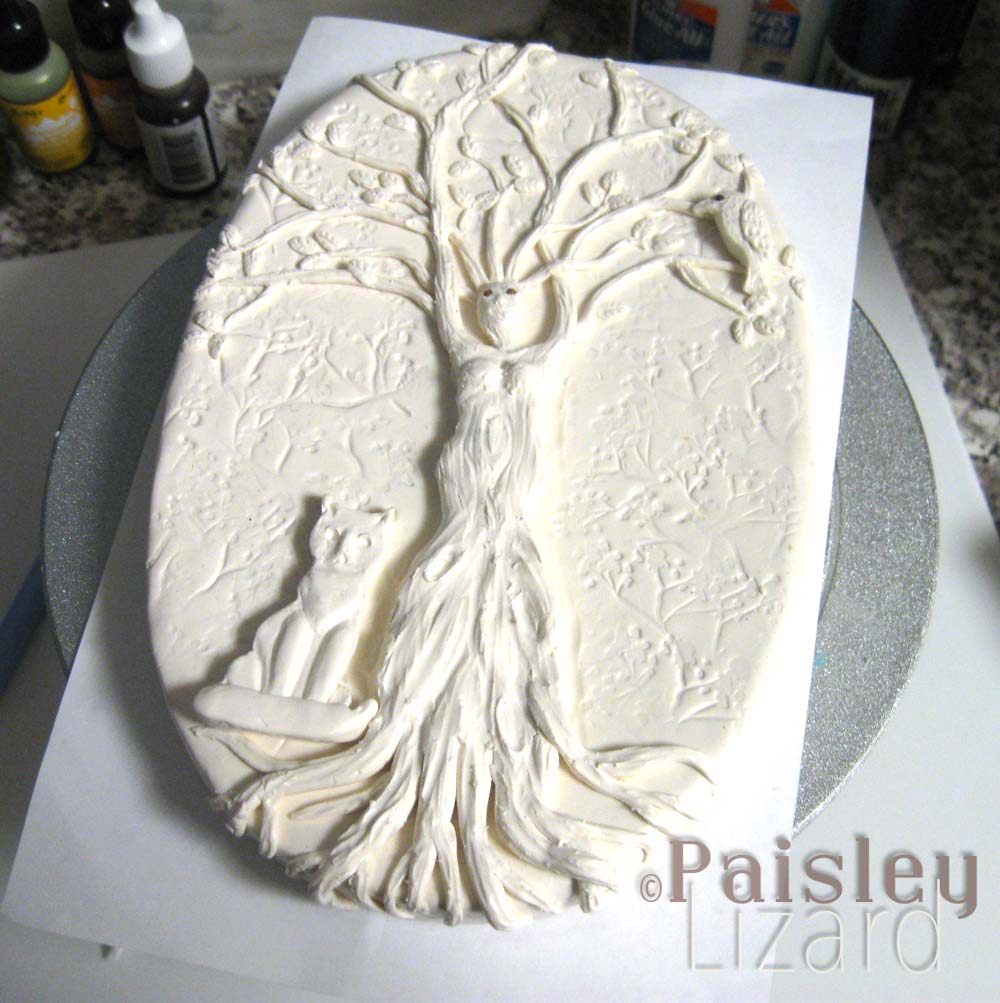
Adding a raven (yes, that bird-like thing in the branches is meant to be a white raven) was about medium-high level difficulty. Getting the wolf to resemble a wolf rather than a cat-dog-bear-monkey was the most challenging part. I simply couldn’t wrap my brain around the spatial task and get the face to project properly. At one point I contemplated making a free-standing wolf sculpture and slicing the front off to put on the box. There’s no guarantee that would have looked any better but it was nearly the only way I could conceive to do it.
After completing the top of the jewelry box, I set it aside for a week while I contemplated how to decorate the base. I got a suggestion via Instagram to cover it with tree roots, mushrooms, and insects. I liked that idea a great deal but decided I wasn’t up to the task of sculpting teeny insects. Eventually I decided to go with leaves, but fern fronds rather than tree leaves. At this point, I used a silicone mold to form each leaf rather than sculpting them. I was short on time due to a mishap with the another project I was working on for this challenge (more on that shortly) and thought the mold would make the work go faster. In hindsight, I’m not sure it did because getting the clay out of the finely detailed mold was quite fussy. I spent about 3 hours molding leaves and placing them.
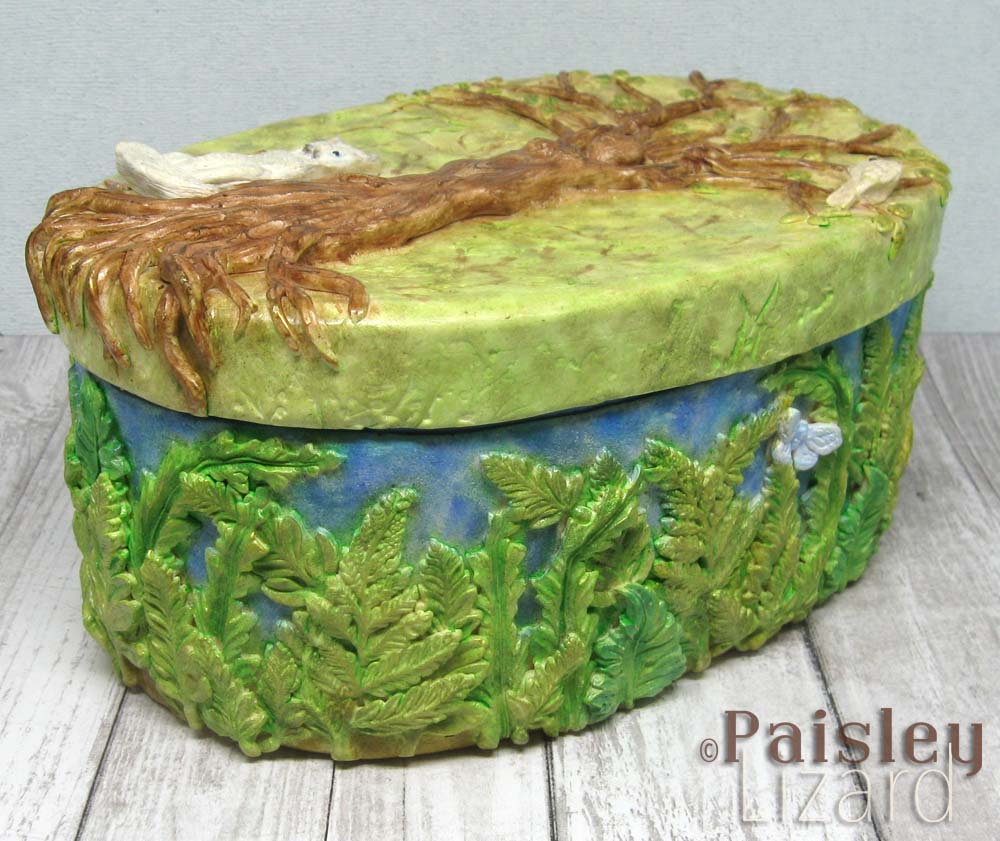
After the clay was cured in place, I painted the inside of the box base a rich brown and glued a piece of brown acrylic felt to cover the bottom. The inside of the lid is a light green that coordinates with the background on the outside. After deliberating whether to antique the box with a wash of brown paint and risk making it look dirty rather than ethereal, I decided to try something different. I made an extra-watery wash with a leafy green paint and am fairly pleased with how it subtly brightened the piece.
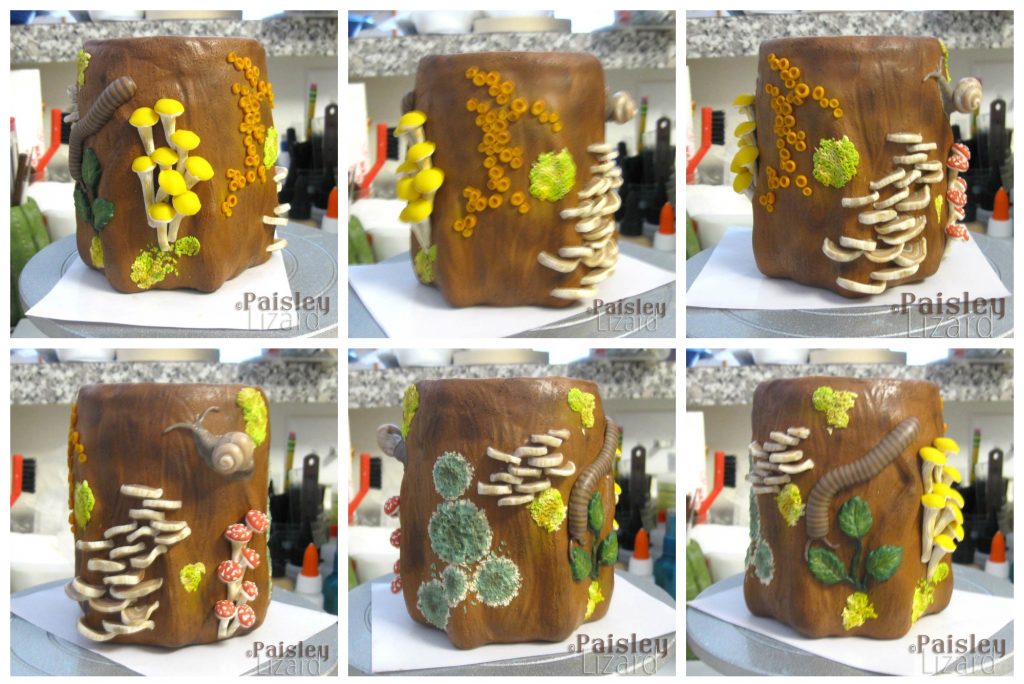
While waiting to decide how to decorate the base of the jewelry box, I began work on the second project. This time I was covering a glass jar with polymer clay to resemble a tree stump with fungus, lichens, and moss. As I’ve mentioned in other posts, I usually sculpt in white and then add color with pastels, inks, and acrylics. For this sculpture, I decided I needed to use colored clay to get the right effect. I spent hours and hours blending colors and using them to tint translucent clay. I made canes, which is something else I rarely do. From my blended colors and canes I created miniature mushrooms, shelf fungus, patches of moss and lichen. I even made a rather realistic snail and millipede (minus the many legs). It was tedious work but the overall effect was darned cute, if I do say so myself. And then, tragedy struck. Dun-dun-dun!
Near the end of the cure process (with about 15 minutes left on the timer) I began smelling clay. I thought it was probably because I was using colors and maybe some just have a stronger smell when they cure. When I opened the oven to get a better sniff, I saw smoke was coming from inside the covered pan. After I hastily pulled the pan from the oven, I checked the thermometers in there (I have two independent thermometers to check the oven’s temperature) and the temperature was well above where I set it. The oven gremlins had spiked the temperature and burned my sculpture. When I removed the lid the piece continued to smoke and darken for about a minute.
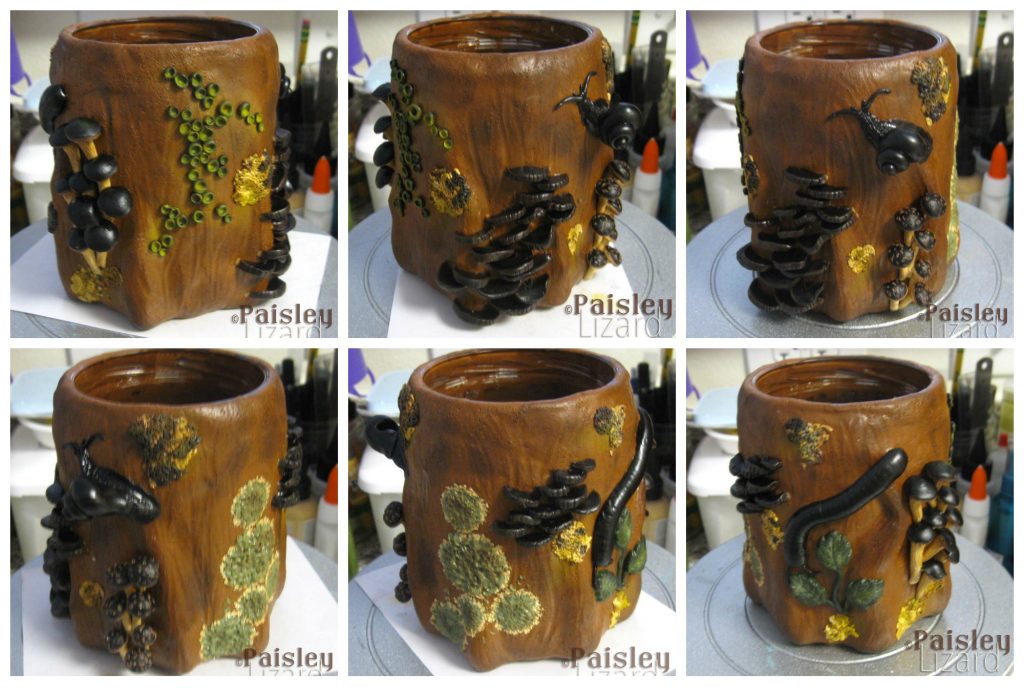
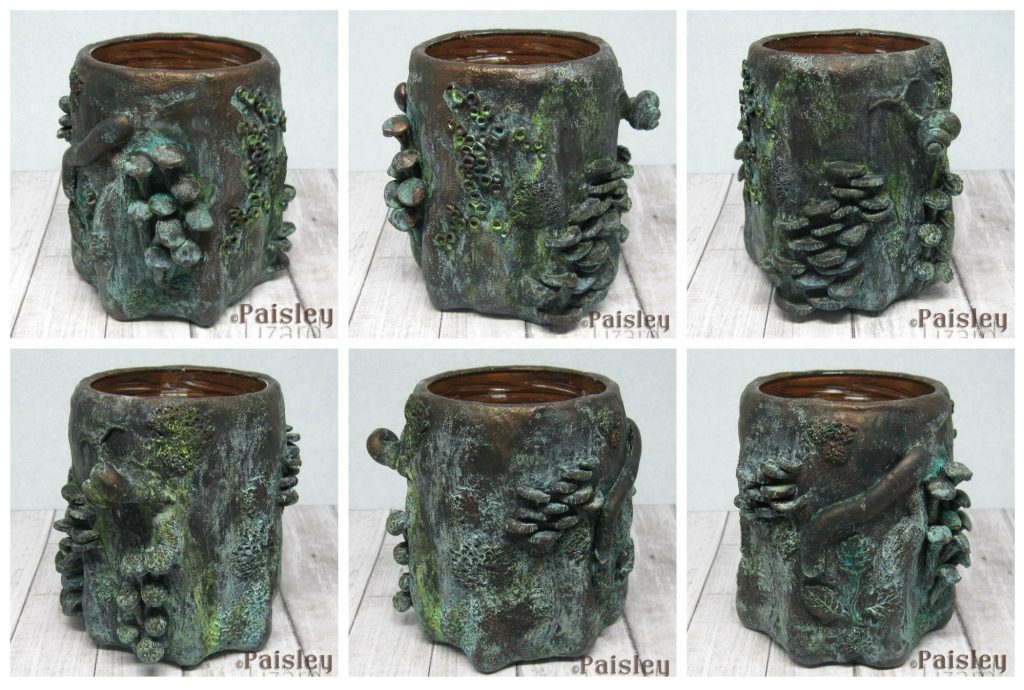
This was the first time I’ve had a polymer clay piece burn. Maybe if I had not been so lucky for the past 15-ish years I would have recognized the smell of burning clay and would have a piece only slightly scorched but still salvageable? Once the smoke cleared and the piece cooled, I took some photos and shared them on a FB group of other polymer clay artists. Oddly, most who commented said they liked or preferred the accidental charred effect. Dark group. I contemplated calling it “After the Fire” as an ode to the destructive force of forest fires. Instead, I painted it with Swellegant bronze metal coating and treated it to a blue-green patina.
With one weekend left before the reveal date and still so many ideas I wanted to try – orangutans and tree frogs in a tropical rainforest, a sloth in a mangrove forest to name a few – I instead opted for a re-do of the tree stump jar. Call me persistent. This time, I went with a lighter-colored and more textured bark. And instead of the red Amanita mushrooms, I went with my rendition of beige-ish sulphur tuft mushrooms. Because I didn’t have enough red clay left with which to make the red ones.
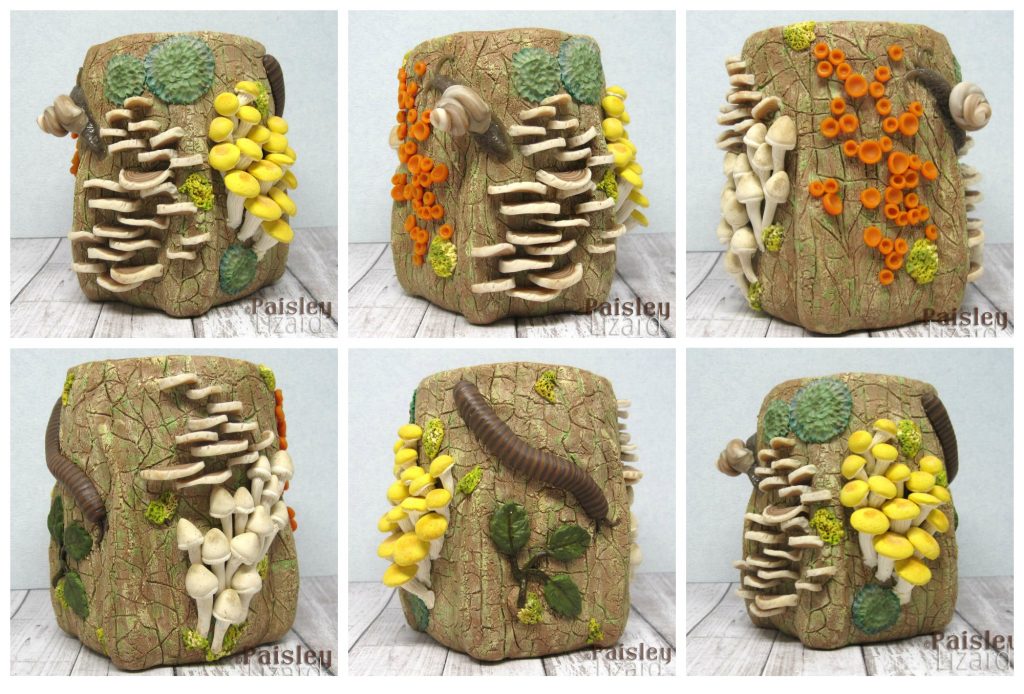
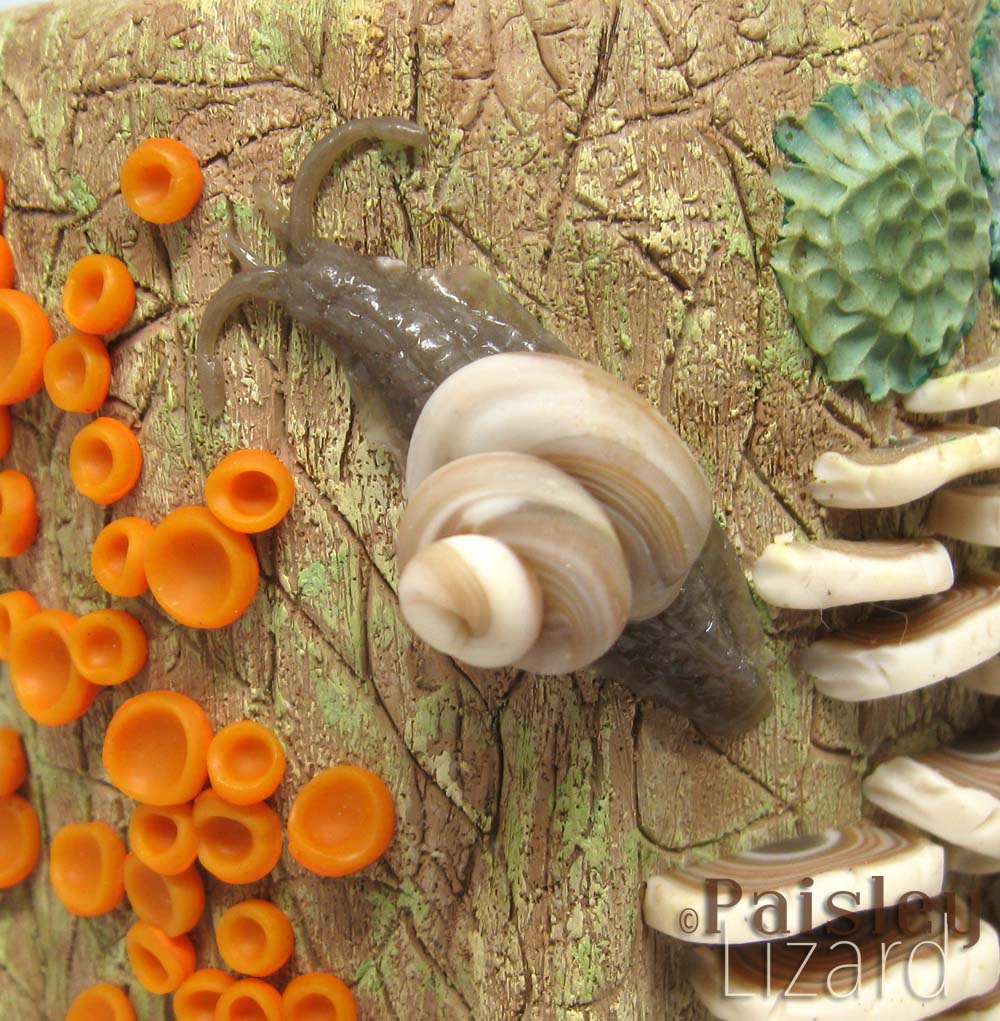
The re-do of the other components, including the millipede, were at least as good as the original. I’m not entirely satisfied with the texture and shape of the green lichen patches on either version. I will need to study more reference photos and work out how to better imitate their ruffled appearance. I think the original snail may have been a touch more adorable, but you’ll tend to have a special place in your heart for the first snail you sculpted.
While working on the projects for this theme and writing this post, I’ve thought a great deal about what forests are and do. Deforestation – the human act of clearing or dramatically thinning forests for wood products, croplands, grazing lands, mining, and other developments – has drastically reduced biodiversity world-wide. The conversion of entire forests into these other uses is also a major contributing factor to the increase in atmospheric carbon that is driving increases in global temperature.
When I hear and read about various geoengineering (deliberate large-scale intervention in the Earth’s natural systems to counteract climate change) proposals I am impressed (in a sickened horrified way) at the lengths to which humans will go to avoid making inconvenient lifestyle changes. “Let’s build facilities to remove from the atmosphere the carbon we’re producing by burning fossil fuels.” is one of the latest shiny objects to distract people from making the hard choices that must be made if we are to preserve life as we know it on this planet. They call these facilities “carbon capture plants.” Guess what? We already have them. They’re called forests. And if we stopped replacing Earth’s forests with monoculture farms, roads, housing developments, and “carbon capture plants” they could do what forests have always done: turn atmospheric carbon into organic matter. But no, let’s not preserve and restore forests, or stop burning fossil fuels; let’s build a Rube Goldberg machine instead. One that no doubt runs on fossil fuels.
That’s the end of that rant, and my post for this month’s challenge. Even with the oven mishaps and misshapen face sculpting, I had fun and am pleased with the projects I was able to complete. My sculpting skills have a long way to go but the only way to get there is to keep trying. I’m hoping there will be opportunities to visit some of my other sculpture ideas from this theme. Maybe a future theme could be all about frogs for example? Or amphibians in general because …newts! Just sayin’.
This design challenge is also a blog hop and if you want to see more interpretations of the forest theme in a variety of media, please visit these links for the other participating artists.
Guests
Tammy<–You are here!
AE Team

All your work is wonderful but your tree stump piece(s) are even more special! I actually love them both! The metall patina actually gives it so much depth and I love it! The colorful piece looks also stunning and I would have difficulties to decide for a favorite. And I so love the detail that the snail’s body looks wet!!! 🙂
PS: No problem with you side or commenting at all 🙂
Thanks so much, Claire. I like the patina too, but would like it better if that was my plan all along. LOL. Thanks for noticing the snail detail. 🙂
I love those pots and although I prefer the brighter colours I really like the effect of the ‘after the fire’ pot. You did so much for this month’s challenge I am in awe!
Thanks so much, Laney. I wasn’t planning to make the second tree stump after the first got charred. It was a last minute decision and way to avoid housework. 😉
I have been looking forward all month to see what you created and you didn’t disappoint. I know you weren’t happen with the “After the Fire” piece, but I really liked it. It does bring to mine all of the fires that happened in California the past few years.
Your first piece is amazing – I just love how you think the idea through to get it just right!
Thanks so much, Evie and Beth. I’m okay with the patina that salvaged the burned piece. I just wasn’t very happy with all that color blending going to waste.
I thought your goddess jewelry box was impressive and then I saw your stumps. OMG! They are glorious! I hate that the first one burned, I personally preferred the original version, but am glad you were able to salvage it with some paint. The detail in both of them just boggles my mind. You always seem to do that in these reveals!
Thanks so much, Hope. I was going to try to recreate the original tree stump colors with the do-over but it seemed more of a challenge to try a different effect on the bark. 😉
Um, wow! Ok, first, I personally enjoyed your rant and feel the same way. Having said that, WOW! Your first sculpted piece is fantastic, you actually short change yourself on your sculpting skills! AND the pots!!! I do actually like the first one, with the patina! And the second one is totally fantastic! I’m sorry your first one burned, but it wasn’t a waste to me. Thanks so much for participating again! I love reading your posts!
Thanks so much, Susan. I try not to put too many rants in my blogs, but sometimes they just sneak in. 😀
Just delightfully presented with terrific results…so very impressive, from your artistic ability to your writing prowess! Each of your challenges turns into such a learning process and I love that you share it. Kudos! Reading this blog post is going into my ‘gratitude’ journal today
Thank you so much, Barbara. That is the nicest compliment I’ve received on my blog every. You made my day.
When I first saw the picture of Spirits of the Forest box (before I read the post) I thought that it was based on Game of thrones. To me it tells the story of how Bran Stark (wolf) became the three eyed raven inside a tree in the Godswood where the children of the forest (female spirits) lived. Have you seen GOT – do you relate it to your box?
I have not watched Game of Thrones yet so I can’t say it was my inspiration for this piece. But maybe I absorbed some of it subconsciously because it seems everyone but me was watching and talking about it. LOL
When I saw sneak peeks of your work I couldn’t wait to see the final results. I absolutely love everything you created. The box is fabulous and she doesn’t look like she’s wearing a full skirt it definitely is a tree trunk. I loved your first tree trunk jar. Even when it was burned I loved that effect. I know it must’ve been frustrating after putting all that work into it, but you salvaged it with the patina. I can’t believe you did a full re-do! I love the second tree trunk with all it’s fungi, lichen and mushrooms. That snail is really lifelike-it looks a bit slimy;-) Well done and extra points for the re-do!
Thanks so much, Cathy. I know the burned tree stump had a cool moody look. It was just frustrating that a piece I spent so much time blending colors for was the one that burned because I almost always work in white clay and paint after curing. Thanks for noticing the snail slime. 😀
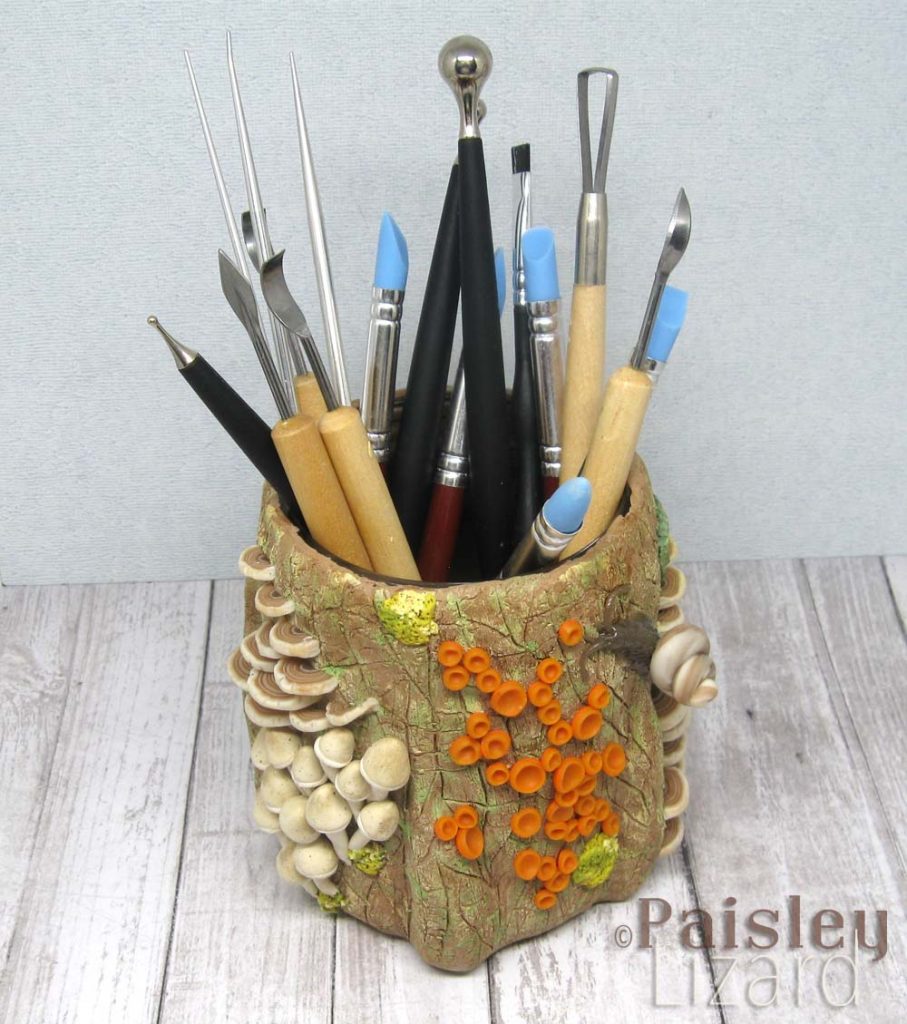
I saw these on Instagram in their making, I was looking forward to seeing them finished. I adore the little tool holder.
Thanks so much, Jill. It makes me happy to look at my tools in the jar.
Absolutely fantastic! You are so talented! I’m blown away by the level of detail.
Thanks so much for the kind words, Michelle.
Wow you really put some work in this month to great effect and congratulations on getting pheonix from the flames of your over-baking nightmare!
Thanks so much, Lesley. If I think of it as phoenix from the flames I like it even more.
Where to begin … Oh, I love this comment: ‘at the lengths to which humans will go to avoid making inconvenient lifestyle changes’. So unfortunately true, and not only for climate concerns.
I wondered what your tree goddess would be. I do see the shimmer and I absolutely love the fern detail around the base.
I admire your ‘stick-to-it-iveness’ to make another stump. I also admire your snail and centipede, both make me cringe because they look like the real thing!! Congrats on your 2nd piece surviving …
Thanks so much, Alysen. Sorry the snail and centipede were too realistic for you, but also, not sorry because I am pretty proud of them. 😀
What amazing pieces you created I can’t believe you managed to make so many and each are just stunning, but I really really love the one with the blue-green patina, I know your devastated about it getting burnt and all the lost time spent blending the colours but it looks like an ancient bronze with such detail and depth its intriguing!!!
Thanks so much, Niky. I really love the patina too and just have to try not to think about the color that was beneath it.
What wonderful pieces you created!
Thanks so much, Kathy.
I can’t believe how much work you managed! I love all of your pieces, but I think my favourite has to be the burned jar. (Love the suggested name too!) Sorry for the mishap, but I’d say it was a happy accident!
Thanks so much, Caroline. And thank goodness for Swellegant paints and patinas. 😀