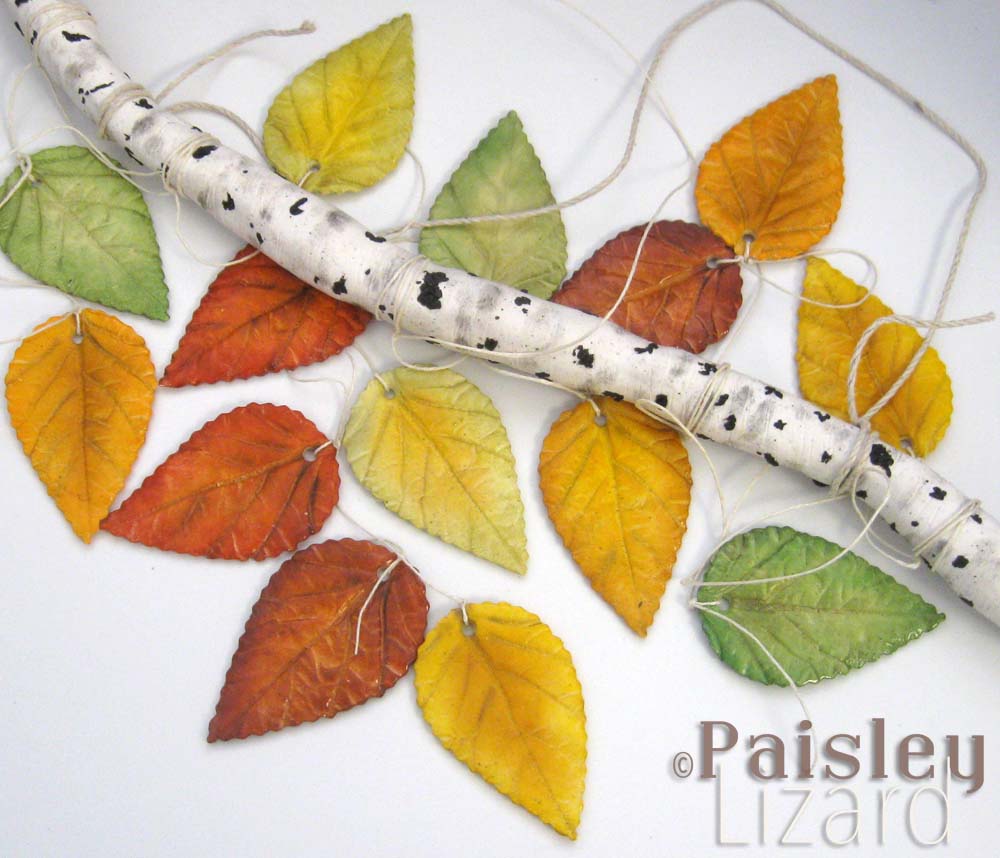
Foliage is the theme for the September challenge from the Art Elements design team. The leaves of plants and trees is a great inspiration for the first month of Northern Hemisphere autumn, even if the temperatures haven’t yet felt quite like fall. As the month is ending, leaves in my area are just beginning to turn from green to the russets and ambers of fall. Well, those that aren’t prematurely browned from the lack of rain, anyway.
We had a single not-too-hot weekend at the beginning of the month and I used it to create some foliage from polymer clay. When the temperatures returned to or remained above the mid-80s and using the oven to cure clay was out of the question the rest of the month, I picked up needle and thread to stitch a few leaves. As you’ll see, I’m much better at leaf shading when working with polymer clay than with embroidery. I blame my local craft store’s deficiency of thread colors. Never you mind that I could have gone up the road a ways to several other craft stores in search of the perfect shades of thread.
For the first project, I revisited a design sketch from a custom order for a nursery mobile. My original idea of a single birch branch with strands of leaves was rejected by the client in favor of a pair of crossed branches with strands of leaves and stars. I’m pleased with the way that mobile turned out but kept the original sketch in my list of ‘someday’ projects. This foliage challenge was the perfect reason to turn someday into today.
There are no white birch trees in my neighborhood and even if there were, I don’t see me climbing one to saw off a branch for a craft project. Birch branches are available for purchase from a surprising array of online vendors. But where would be the fun in buying a branch when I can create a reasonable imitation with polymer clay and pastels?
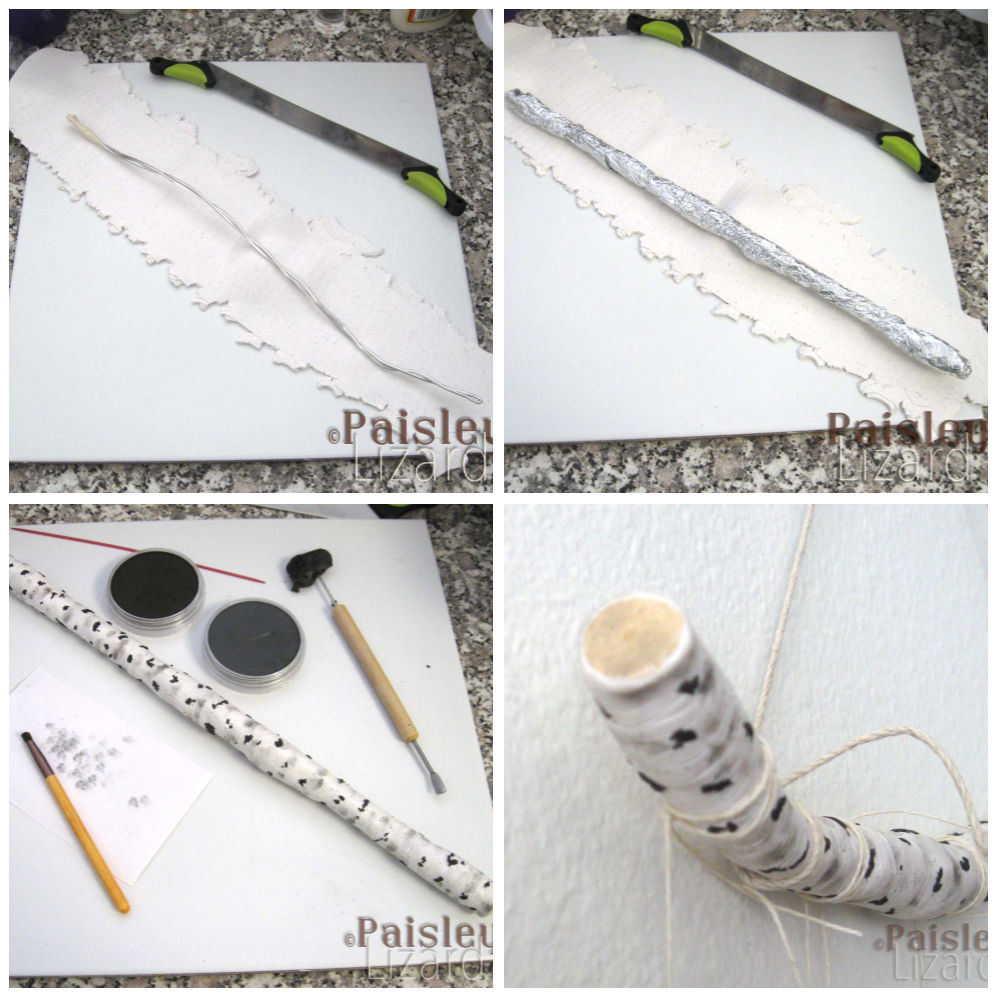
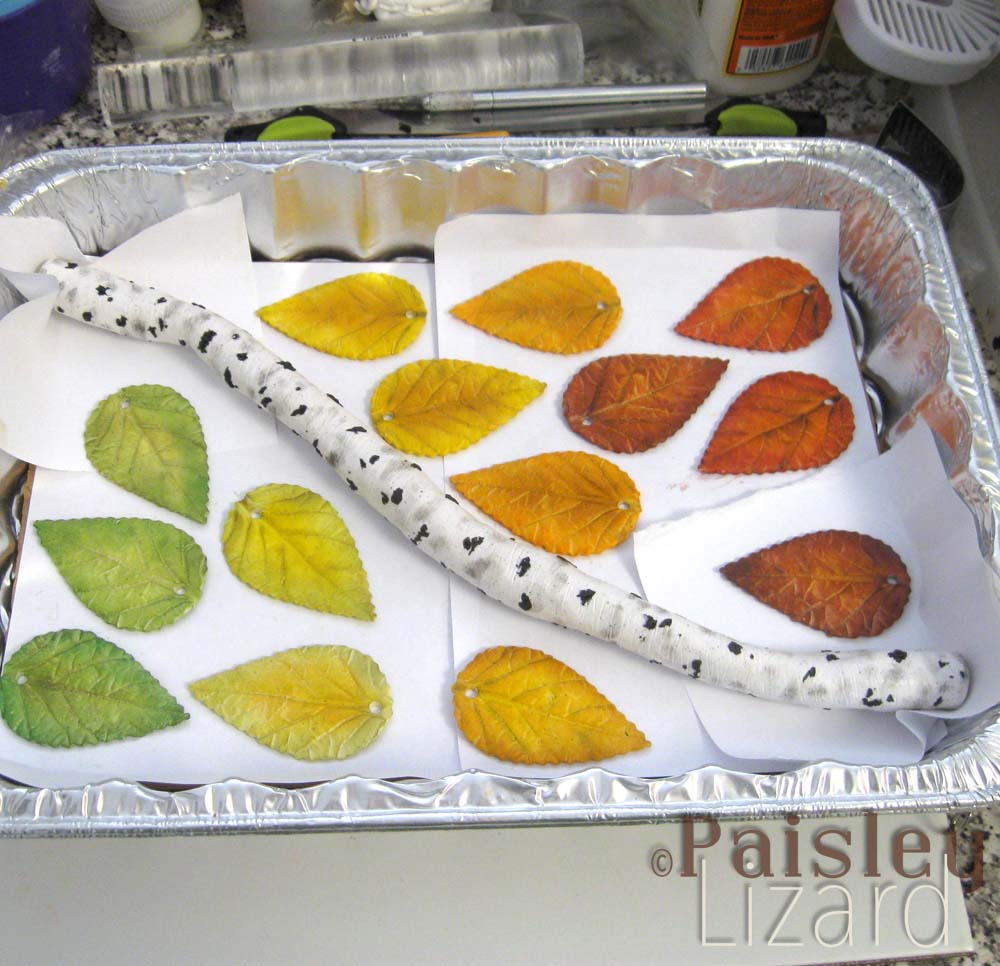
For the birch foliage, I used pan pastels to give white polymer clay the look of leaves turning from green to deep red. There was some deliberation about whether to give the leaves a matte or gloss finish. Gloss won and each leaf was glazed with liquid polymer clay on both sides. The whole leaf-making process took the better part of two days and my heat gun got a serious workout.
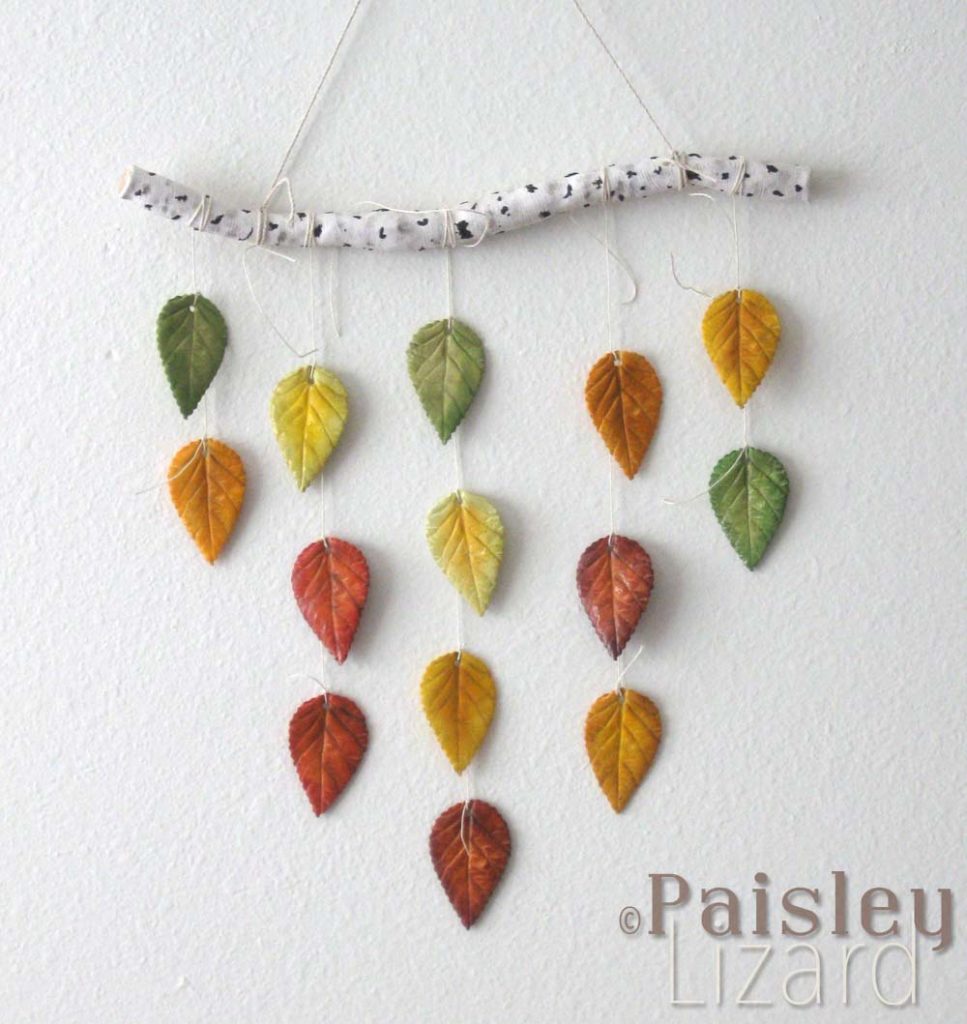
To assemble the wall hanging, I used hemp twine to tie strands of leaves to the branch, and slightly thicker twine above the branch for the hanger. My orange tabby cat, Mango, was very helpful during this assembly process. Actually, he was very well behaved and didn’t try to attack my hands or the twine after the first sternly worded ‘nope’ from me. His self-restraint in the face of all those pieces of oh-so-tempting string (he lay very near where I was working on the floor and watched every movement with paws tucked under in catloaf formation) was subsequently rewarded with pets, brushing, and treats. I wish I had stopped to take a photo of him supervising.
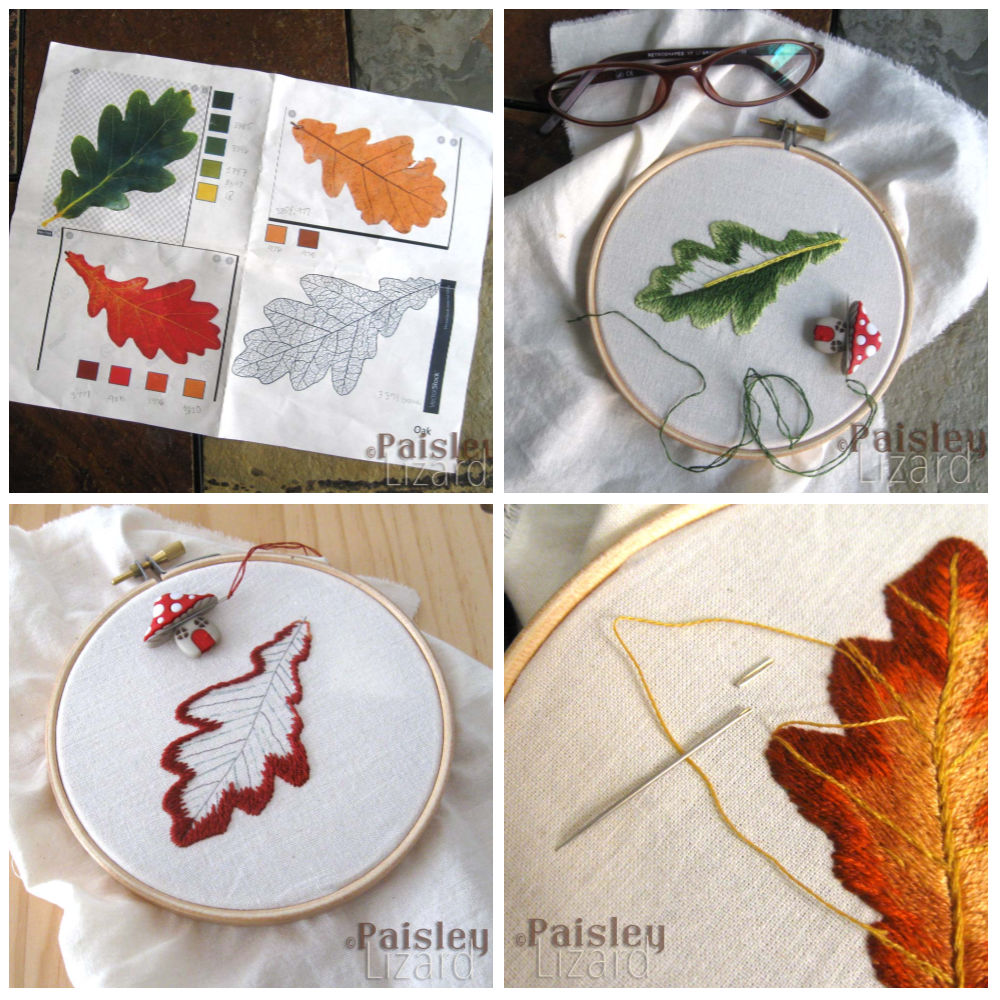
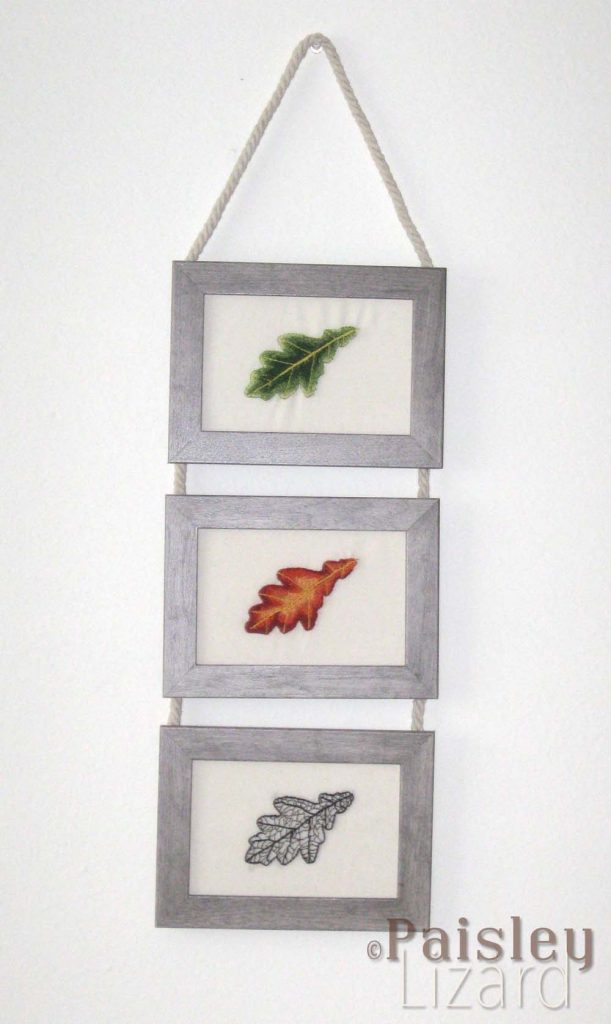
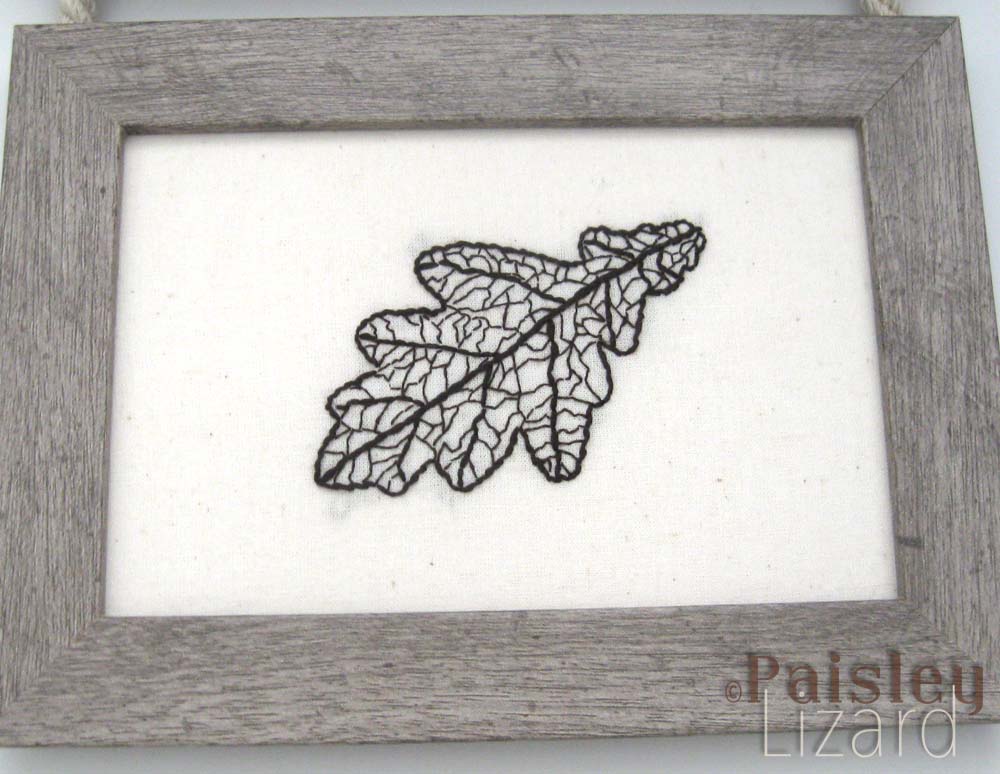
The second foliage project also happens to be a wall hanging. I have no idea what’s up with me and wall hangings this month. For this project, I embroidered an oak leaf in three stages of its life. First there was a green leaf starting to turn faded and golden. Next came a leaf in full fall colors of rust and amber. Finally, the leaf skeleton in a dark brown. The leaf shape and colors are based on clipart reference images I found online. I used the color picker tool in PowerPoint to select colors from each leaf image and used those colors to select thread colors. Or rather, that is what I tried to do. Sadly, the thread section of the local Michael’s was thoroughly picked over (and not restocked this month at all – I know because I went back several times during lunch breaks at work) and I wasn’t able to get the exact color transitions I was after.
As with the birch branch project, converting the embroidered leaves into a wall hanging required some assembly. And ironing: the fabric needed pressing before framing. (True story: the only time I use my iron is for sewing projects.) After the fabric was pressed, it was stretched and stitched over mat board cut to fit into the distressed wood frames I purchased. I used a staple gun to attach rope to the backs of frames, connecting them in a column. Ideally the leaves would have filled more of the open space inside the frames. That would have required I knew what size frames I was going to use before I stitched the leaves. And my initial plan was to frame them in 4-inch hoops rather than 4 x 6 photo frames. So, that’s what happens when you don’t stick to your plan.
I can hardly believe I only completed two projects for this theme. Yes, they are on the large side. But I also must admit to being somewhat lazy this month. I blame the heat. I am so ready for fall weather and we’ve yet to feel more than the briefest tease of any transition to cooler temperatures and less humidity. Fall is my favorite season and it seems to get overtaken by summer more each year. Here’s hoping next month is seasonably cooler.
This theme challenge is also a blog hop. Please visit the other participating artists for more foliage interpreted in a variety of media.
AE Team
Lesley Susan Marsha Claire Cathy Jenny Niky Caroline
Guests
Dawn Hope Alison Beth & Evie Laurie Kathy Sarajo Michelle Tammy (That’s me!) Divya Karen Alysen Mary Cat Jill Sarah Anita

The embroidered leaves are very pretty, but I’m so in love with the first wall hanging! All those beautiful colors speak to me as a lover of fall, and I also like the idea of a birch branch as they have always been among my favorite trees.
Thanks so much, Cat. I also love fall. And birch trees. 🙂
I love the mobile that you made. The birch is a favorite tree of mine and the branch you created is just perfect as are the leaves.
Thanks so much, Kathy. White birch trees in fall colors are among my favorites.
Love your stitched pieces but the wall hanging is my favourite, it’s gorgeous
Thanks so much, Jill.
Stunning work, I love everything… the hanging is my favourite too though. The colours are perfect. Thank you for joining us for the challenge!
Thanks so much, Caroline. I’ve been painting fall colored polymer leaves for all kinds of projects over the years and never tire of it.
I love the stitched leaves – especially the red one! I love it when the leaves turn red and orange in the fall – which I don’t think is going to happen for us in Indiana.
I remember that custom mobile you created – I think it was amazing, but I LOVE the different leaf colors you created for this mobile!
As always – I love seeing the process and what you have created.
Thanks so much, ladies. Our leaves are just beginning to turn. If we don’t get rain soon though, they will all just be brown.
The mobile is amazing! I really love the birch branch and the beautiful leaves.
Thanks so much, Karen.
Two projects is definitely a little weird for your typically overproductive self. However, it’s obvious that both of these projects include multiple steps and their own mini-projects. I LOVE the leaf mobile. It’s divine. And, the stitched leaves are lovely. I hate that you don’t like the transitions, but I think they’re great. You’ve rocked it again!
Thanks so much, Hope. I was feeling like a slacker but you’re right about the mini-projects. 🙂
I love your mobile, and the placement of the leaves is just perfect!! Also, the shading on your stitching is really great, as I’ve noted on some of your social media posts! Keep at it, you’re doing fine!
Thanks so much, Alysen. If I can look at the stitched leaves without seeing the way I wanted them to look, then I can accept that they turned out fine. LOL
Oh Tammy, i always love your posts! I love Hope’s comment too about how many items you got done for the challenge – yes, your pieces were very labor intensive. Those polymer leaves are fabulous, love the mobile! And the stitching is fantastic, I know you don’t care too much for them, but they really are very nice! And I love the skeleton leaf too, very interesting!
Thanks so much, Susan. The leaf skeleton was my first idea for this theme. Eventually I came up with the idea to pair it with phases of the same leaf.
I love the red leaf dramatic color transition – especially well seen on the large picture, rusty and red are my favorite fall colors! The birch branch wall hanging is softer and very elegant decor!
Thanks so much, Rozantia. I’ve come to like the red leaf too, but only when I stand back a few feet to look at it. LOL
Oh your work is so outstanding!!! And I was just cracking up picturing Mango trying to restrain himself from spazzing out. I just love reading about your process and seeing the finished work 🙂
Thanks so much, Marsha. Mango really was the very best boy. He’s always had good manners. Except when it comes to stealing his brother’s nap spots.
Only 2? Lazy?> NEVER. I love the grey wood on the trio of framed pieces. Very fitting, and earthy. I cannot imagine heat gunning all those leaves. There are reasons I prefer my polymer matte. It all looks great! Thanks for sticking with us. ( See what I did there? )
Thanks so much, Jenny. I really was feeling lazy despite being productive. It’s weird. In hindsight, I probably would have gone with a matte finish on the leaves. There’s always next time. 😉
That wall hanging is amazing. If I didn’t know better, I would swear that those are real leaves! I loved seeing the process of making the birch branch as well; we don’t see them often out here in the west and they are one of my favorite trees. You’ve captured the delicate, graceful lines of the birch perfectly.
I would also never guess that you had difficulty finding the thread colors you wanted for the stitched leaves as the shading/transitions look perfect to my eyes! The simplicity of three leaves, each in it’s own frame, to make the seasons is part of what makes this piece so appealing.
Thanks so much, Dawn. I’m not sure I ever saw white birch growing up in Arizona. But there were lots of aspen trees, which are similar coloration.
I love your birch branch wall hanging! The branch is so life-like and the leaf colors are gorgeous. I love your embroidered leaf wall hanging also. The transition from the green leaf down to the skeleton leaf is fantastic. Thread painting/shading with thread is a long meticulous process. You are doing a beautiful job with your embroidery needle!
Thanks so much, Cathy. I feel as though I’m getting better with each embroidery project but am impatient with the learning process.
I adore everything you made! The leaf wall hanging is stunning and when I first saw the branch I thought it was a real one, I love that you added the bullseye cane to the end such a wonderful touch! Your embroidery is amazing, I have never tried silk shading, It always looks rather scary but yours is really beautiful!!!
Thanks so much, Niky. Blending colors for the silk shading wasn’t as hard as keeping my stitches going in the right direction. That will definitely take lots more practice.
These are amazing. I love your needle work!
Thanks so much, Laurie.
I was so intrigued by the way you made your birch branch. I live live in an area where birch branches abound so I was especially interested in how you made such a realistic one. Your leaves are equally great. And the wall hanging looks so lovely. It must be fun to have these in your home to look at daily, especially after the trees are bare and ground is covered with snow. Thanks for sharing so much of your projects,
Thanks so much, Mary. I found a good spot for the embroidery hanging at the top of my stairs and do admire it as I walk past. 🙂 And I certainly do hope we get enough snow to over the ground this year. Fingers crossed.
I love your first piece – those leaves are so full of joyful autumn colour and you’re embroidery is so well done the grouping very effective.
Thanks so much, Lesley. Joyful is definitely how autumn colors make me feel. 🙂
Your embroidery is gorgeous! Absolutely love the branch and leaves wallhanging. Perfection.
Thanks so much, Michelle.
You may think it’s just two projects, but all the work that went into them definitely counts as more. The birch wall hanging is pretty neat, and your attention to detail in all the component parts is admirable. Stitching in the face of lack of colors was brave of you 🙂 – I think they look great.
Thanks so much, Anita. I’m used to working on smaller scale than wall hangings, so I felt as if there should have been more individual projects. Maybe I am working my way toward one really big project for a future challenge. Yes, I did feel brave to carry on despite having the wrong colors. 😀
I have so many comments I can’t wait to start! I love your humor in your posts. The ‘simple’ bullseye cane is amazing — You did a great job of getting all those light colors to play nice and not just look bla. The birch branch looks real, but the leaves are so realistic I kept going back to admire them! The needlework is perfect— and I like the three better than if there were another color. I don’t think the frame is over powering for the leaf, they look great!! Thanks for showing us your many talents!
Thanks so much, Alison. I think you’re right that a fourth leaf might have been too much for the grouping. Sometimes things work out better than planned.
The clay leaves are divine – they look real. So I understand why you were not satisfied with the embroidered leaves. But the trick here is to look at the wall hanging in totality and not at the leaves themselves. The piece on the whole looks great. My mom always says that all art must be admired from a distance. for if you go too close, you’ll only see mistakes. But one tip to getting your contrast colour knots neat is to knot to a stitch at the back rather than the fabric. Also weave the ends through other stitches and add a dab of fabric glue. this will solve your visibility issue.
Thanks so much, Divya. I do like the embroidery hanging when I look it from a few feet back. It’s always a challenge to look at my work and not see all the flaws or mistakes. And thanks for the tips. I think fabric glue might be the trick for that leaf skeleton because there’s not much thread on the back to weave ends through.