
The theme for the Art Elements design challenge this July was “flowers.” Even though summer is the season for flowers, I always think of spring for them. Because summer just seems too hot for anything so apparently fragile to thrive. But thrive they do. The hostess for this theme, Marsha Neal, asked us to share photos of flowers on our social media for inspiration. I’m not great at macro photography, but this theme prompted me to pay attention to the blooms in my neighborhood. I was surprised at the abundance and variety, from clover and day lilies growing wild in the vacant lot, to iris, pansies, roses, bleeding hearts, cone flowers, and more in planters. Were they there last summer and I was just too hot to notice?
Ordinarily, I would’ve taken this theme as an opportunity to sculpt some flowers in polymer clay. I have been saving flower-making tutorials for years. Most are designed for fondant and gum paste, but would likely work as well with polymer clay because of similar consistency. However, it’s been too darned hot to work with polymer clay so I decided to break my “no new crafts” rule and try some modern hand embroidery.
I am not entirely new to hand embroidery: my mom and grandparents tried to teach me the basics when I was a child. They embroidered quilt tops, pillow cases, hand towels, and, on occasion, my clothes. Not only was I never very good at it, those days are so far behind me it’s as if they happened in another century. I am also not new to needlecrafts. I’ve completed oodles of cross-stitch (mostly counted) projects and even got good enough to make my own patterns. A few years ago I donated all my cross-stitch supplies, including an impressive supply of floss, because I hadn’t touched it in over five years. Ask me how much I regret giving away my needles and hoops now that I’ve decided to try embroidery.
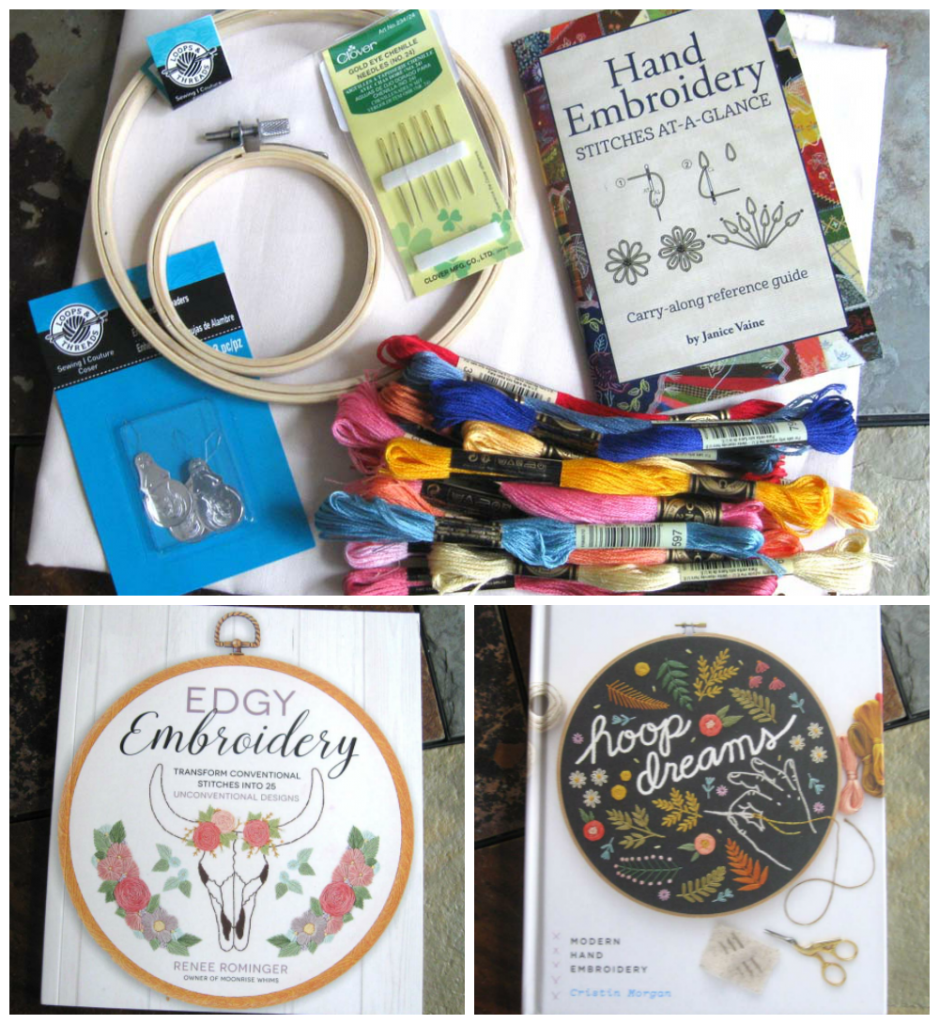
Having decided learning to embroider would be my challenge within a challenge, I thought starting with a kit would be the way to go. It probably would have been had I chosen a different kit. The one I ordered via Amazon Prime, entirely because the pattern caught my eye, came with printed fabric, floss, a hoop, and two needles. Both needles turned out to be useless: one had a defect that obstructed the eye, and the eye on the other was too small to accommodate more than 3 strands of floss (the pattern called for using 4 and 6 strands for some stitches).
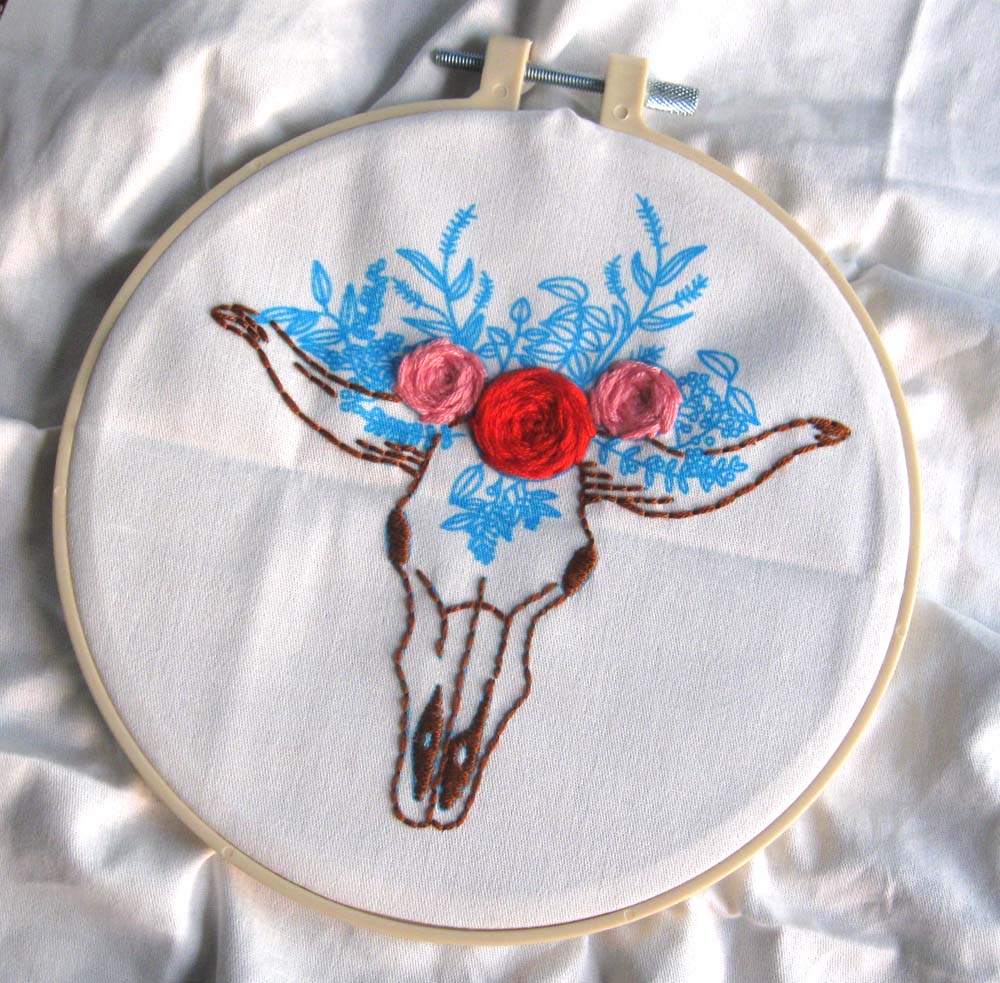
All in all, I think my first attempt at embroidery (this century) turned out rather well. Are my stitches perfect? Um, no. Did I have to rip out some stitches that went horribly awry? More than a few times, especially while making French knots. Did I call it “good enough” in places where I couldn’t decipher the pattern and made it up? Absolutely.
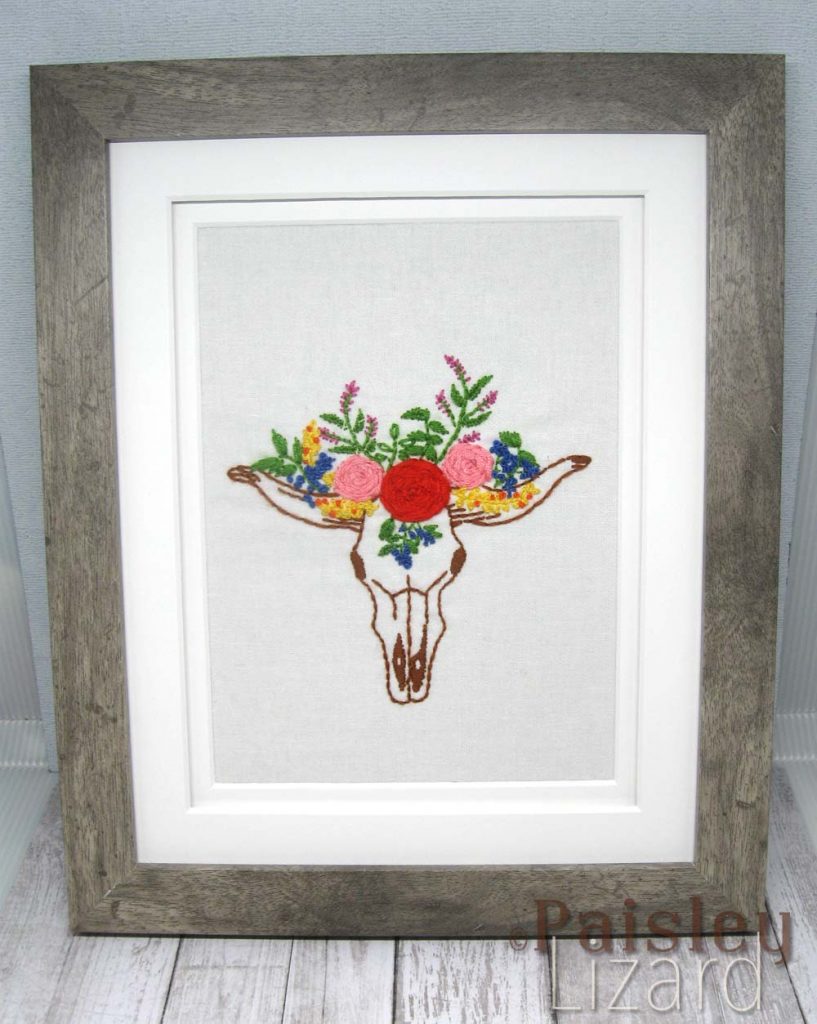
After completing that first kit I said to myself, “That was fun! Let’s go buy all the embroidery things! I’m making a list: yards of fabric, thread in every color, needles, hoops in every size, ribbon …” and Myself said, “Whoa, whoa, whoa. You do NOT need all the things. And you definitely don’t have room for another hobby.” Myself is right, of course. But really the only thing preventing me from buying all the things is that my local Michaels (less than a mile from my home) is poorly stocked. And that I am not inclined to drive even five short miles up the road to JoAnns, which likely does have ALL the things, because it’s too stinkin’ hot to deal with traffic and crowds.
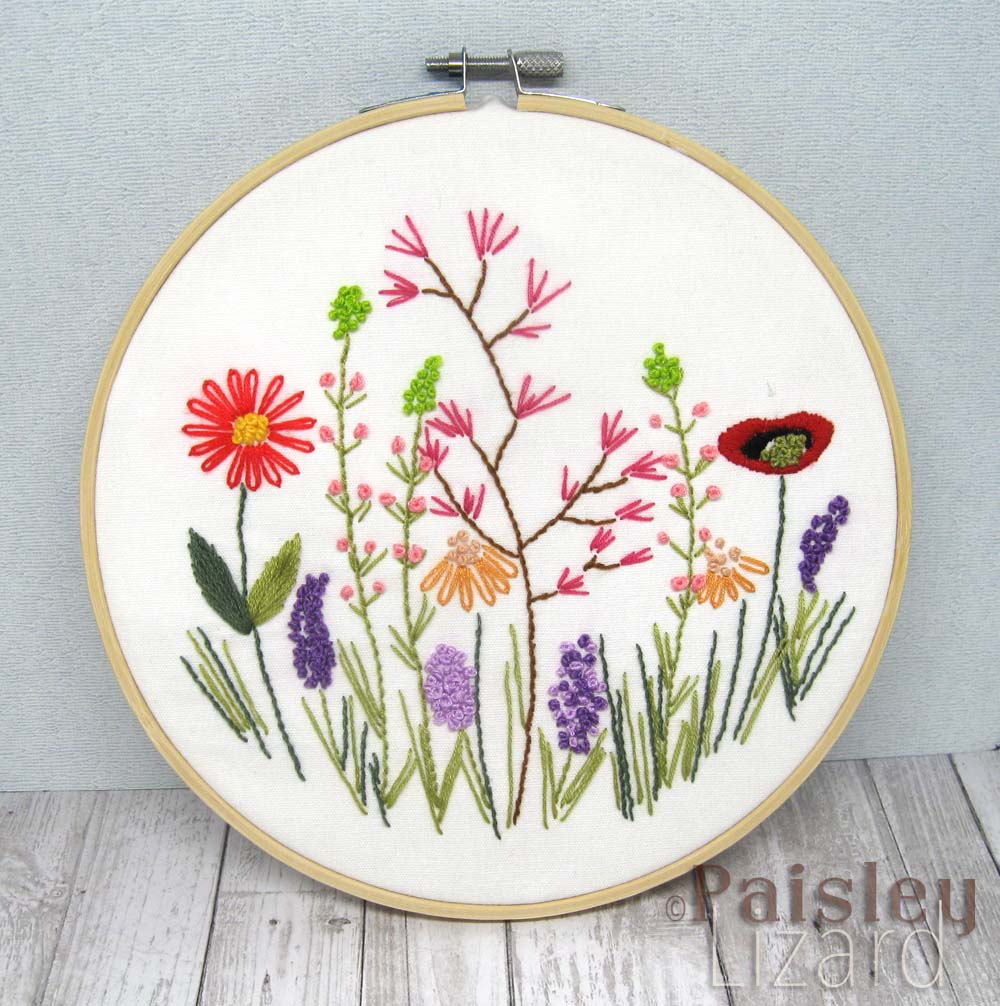
So I limited my next order to another kit, a couple of books, and a pack of assorted needles. The directions for the second kit were easier to follow. The pattern, a field of wildflowers, allowed me to practice straight stitch, stem stitch, satin stitch, and French knots. My thread kept twist-knotting while I was making the knots, making some of my knots fluffier than intended. About half-way through I remembered from my cross-stitch days that if I periodically hold the hoop so the needle and thread can dangle and unwind, the accidental knots are minimized.
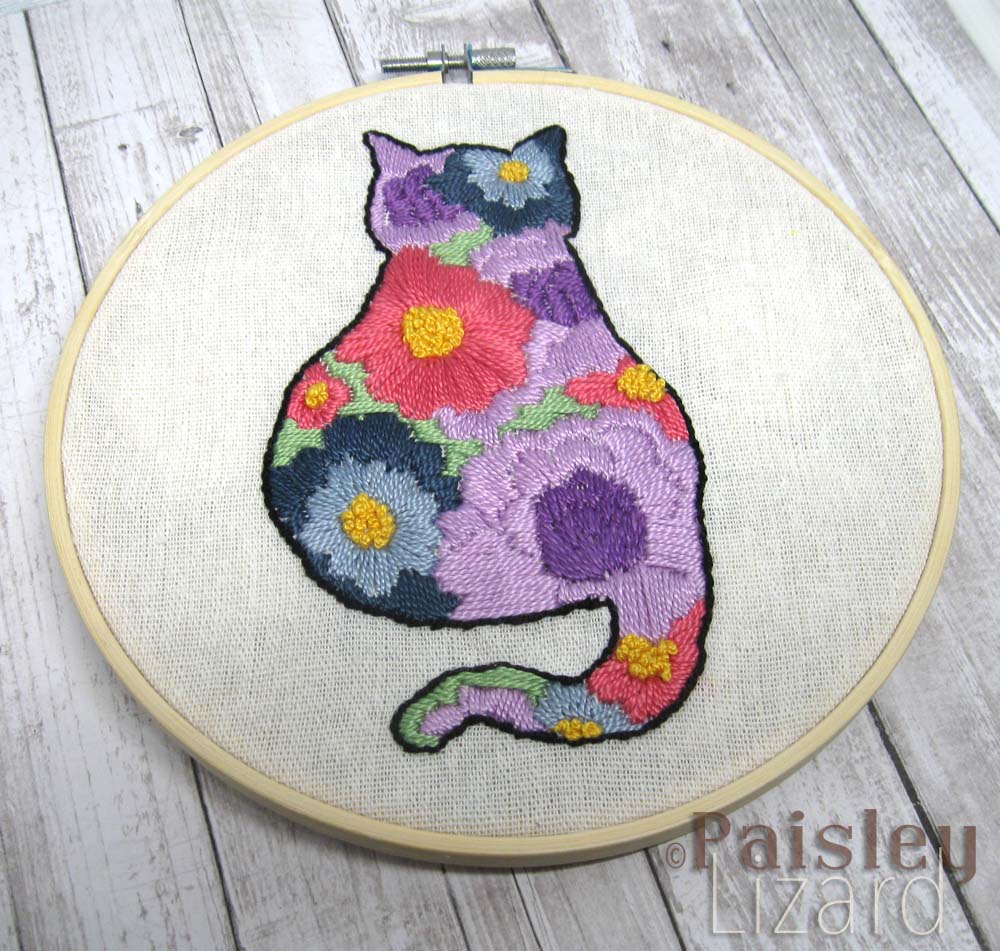
With two pre-printed kits done, I went hunting for patterns on etsy. I marked several dozen as favorites and ordered a digital of a cat silhouette filled with flowers from ellucystitches. Because, the theme for the month is flowers. I had to keep reminding myself of that: flowers, we’re doing flowers. Because there were patterns for everything from insects to llamas and I wanted them all. For this project I had to brave the heat to get thread. I walked to Micheals early one Saturday morning (they don’t open until 9, so “early” was relative) and spent about thirty minutes choosing colors. The pattern came with a list of DMC thread colors but I had to change it up. Because, you know, after completing two whole kits I was practically a pro at this. Also, the pattern called for using all six strands of stranded cotton floss. So, I decided Perle cotton thread would work about the same. Call me an embroidery rebel. Transferring the pattern to fabric was relatively simple, using my old light box and a water soluble ink pen.
After completing the two basic kits and one pattern-only purchase, and now having a supply of better quality thread and needles, I opted to try making my own pattern. Because why not jump into the deep end on your first day at swim camp? This isn’t for a grade. If I mess up, no one gets hurt. And all it would cost is a few dollars worth of fabric and thread. The one obstacle to making my own pattern was my drawing ability. That problem was semi-solved by searching the interweb for images. After finding the perfect skeletal hand drawing, I added some poppy and desert lupine flowers (or rather, my simplistic version of flowers inspired by those varieties) around it and traced it onto my fabric with the water-soluble fabric marker.
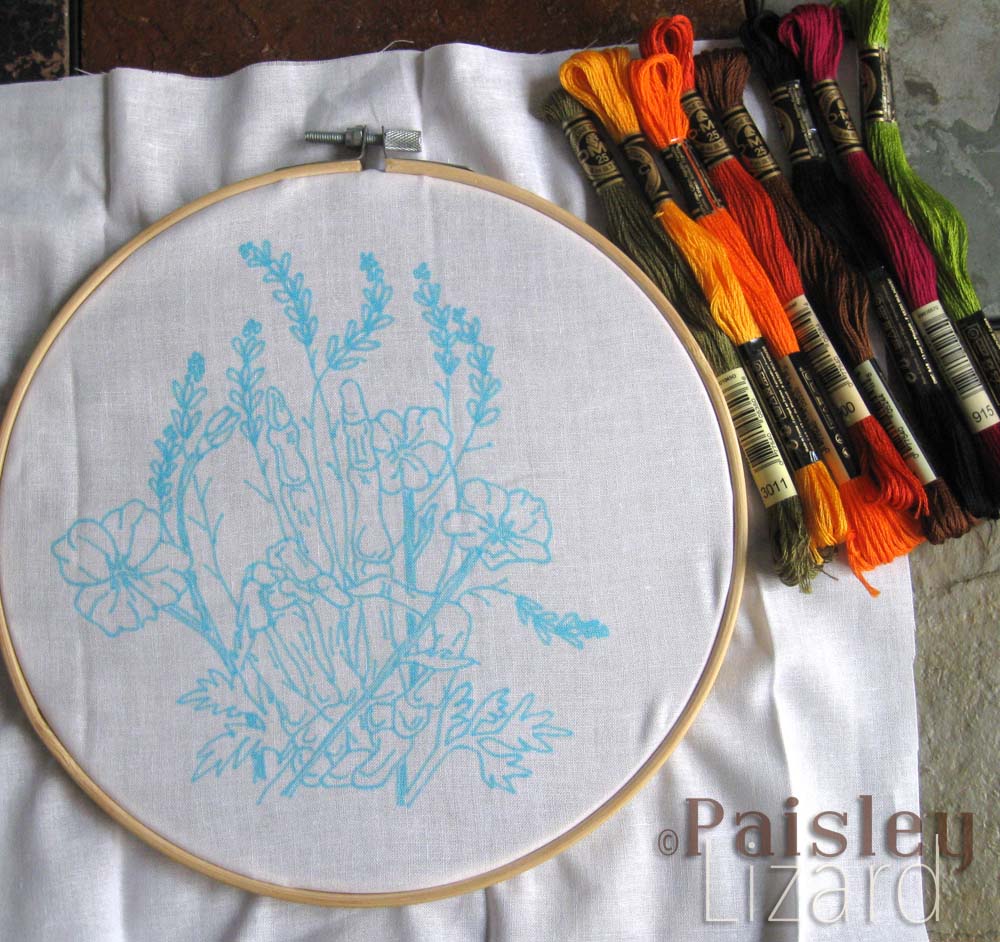
As I began stitching, I realized making my own pattern means deciding not only what colors to use but which stitches will give the desired effect. I referred to photos in the books I purchased, and went with lazy daisy and French knots for the lupine flowers, stem stitch to outline the hand, and long-short stitch for the poppy petals (with pistil stitch in the centers). I used a heavy chain stitch for the poppy stems and satin stitch for those leaves and the flower bud. I saved the broad leaves for last because I wasn’t sure what stitch would go best with the irregular shape. The examples in my books were not much help making that decision. Eventually I outlined and filled them with stem stitch and then back-stitched vein details with single strand of darker thread.

Among the lessons learned during this month of beginner embroidery is the one where I shouldn’t stitch in a dimly lit room. I was trying to conserve energy and keep the room temperature down during a heatwave so I didn’t turn the bright overhead lights on in the evening. In the morning light I could see the holes where I missed stitches. Having older eyes was no doubt a contributing factor and I have added higher power reading glasses to my embroidery supplies shopping list. The perfectionist in me wanted to rip out the stitches and start over. The lazy part of me wanted to fill in the holes with some short stitches. And the impatient goal-oriented part of me wanted to call it “parts of the flower the insects ate” and get done. The perfectionist won but I didn’t rip-out any stitches. I started over with a different piece of fabric. The final piece is on tea-dyed cotton from the fabric stash in my garage. I had to fight the spiders for it.
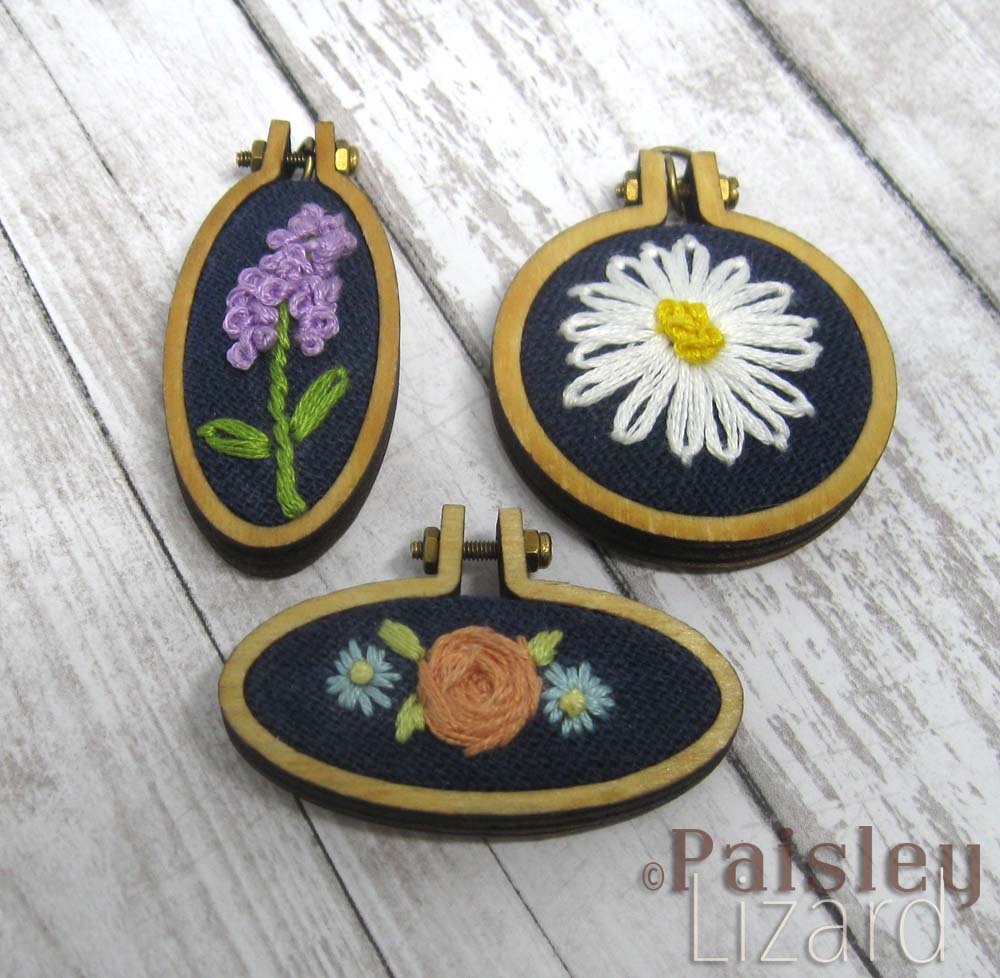
While I was searching for embroidery books and kits, the sneaky Amazon algorithm thought I might also like a set of totally adorable mini-hoops small enough for pendants or brooches. Impulse buy! As a semi-professional embroiderer (What? Isn’t that what you call someone who has completed two kits, one pdf pattern, and one diy pattern?) I hooped some navy linen fabric, threaded a needle, and free-handed some simple flowers to fit the mini-hoops. You might call them messy; I say they’re organic. I also say there has to be a better way to mark dark fabric than chalk pencils that rub off almost as quickly as you sketch out the shapes.
What I really want to do with embroidery is embellish my clothes, starting with the perfectly faded Levi’s denim jacket I’ve had since college. And thread painting. I really want to do thread painting. But I should master the basic stitches before I dive into something so ambitious. Or not. Patience is not one of my virtues. For now, my challenge is to resist buying “all the things” for embroidery, as is my want anytime I try something new. I don’t need to get all crazy about embroidery because it’s just a thing I’m doing while it’s too hot to work with polymer clay. Summer won’t last forever (It won’t, right? Right?!) and when the cooler fall temperatures set in, I’ll be back to playing with polymer clay. Or maybe I can still embroider in the evenings, while watching tv? So, yeah, I definitely need all the things.
This challenge is also a blog hop. Please visit the other participating artists to see how they interpreted the flowers theme in a variety of media and techniques.
Visiting Artists:
Tammy <–You are here!
Art Elements Blog Contributors:

Love all your flower stitching, they must have taken you ages to do, or I’m slow at stitching 🙂
Thanks so much, Jill. I wasn’t keeping track of the hours invested, but I did spend most of my after-work and weekend hours on them.
First, you made me laugh out again. The desire to order loads of supplies after finishing one piece, impulse buying, feeling you are on your way to professionalism after a few pieces, it all sounded very familiar.
Second, I love your results! I am quite fascinated by embroidery, not to the extent that I want to try it myself (I remember a very ugly stitch sample book from elementary school), but to watch others do it. Thank you for sharing, even if I didn’t understand half of it 😉
Thanks so much, Cat. I’m convinced buying the things, and curating them, is a hobby unto itself. I didn’t see the appeal of embroidery when my mom and grandma tried to teach me back in the day. Probably because I had the same fugly stitch sampler. 😀 But this “modern embroidery” movement has shown me the possibilities and I think I may be hooked.
I forgot to say that the cat is my favorite (obviously)!
I had just got my Mary Poppins books out which I love dearly, and your cat reminded me of the chapter about the porcelain cat with the little green and blue flowers that looked at the king and visited the queen ^^
I really enjoyed reading your blog. It brought back memories of my embroidery days. I keep thinking of returning to them. My mother embroidered all during her life. I kept her collection of threads. I just love the cat that you embroidered. I may just need to make it. I also love the mini hoops. I think turning one into a necklace is a wonderful idea. As always, great job!
Thanks so much, Kathy. My mom and grandparents made many many cross-stitch and embroidery quilt tops over the course of decades. I have a couple of the completed quilts in storage and wish I had a proper way/place to display and admire them. They’d make great wall-hangings but my apartment has an open floor plan and large windows so … no wall space.
‘parts of the flower the insects ate’… I LOL’ed at that!! I think Art Elements as a team is very instrumental in getting you to purchase supplies and ‘have a go’ I know since joining the team I have invested in more supplies that I have in the last 10 years! that said I am glad you did buy those embroidery bits and bobs, I think you are well on your way to being a professional embroider and I look forward to seeing those thread painted clothes!
Thanks so much, Laney. Yes, I would count the AE Team as enablers when it comes to an art supply habit. So much temptation and yet, I keep following the blog. 😉
For someone who claims to be impatient you have done a great job of persisting at embroidery, improving your skill pieces after piece. I used to embroider during my college days and have had an interest to dabble at it again. Your work motivates me to consider using embroidery for my next collection. Only thing, it requires a lot of time to do it perfectly.
It’s true I am impatient, and tend to be goal-oriented about rush through some projects. But I am also stubborn with perfectionist tendencies. It’s a challenge to balance all those conflicting sides. 😀 I would love to see your exploration of embroidery in a collection. I’m sure it would be stunning.
Thank you for participating this month Tammy! I love that you focused on embroidery this month and can relate to this in so many ways. I love that pop of the tight fabric too when the needle goes through – so satisfying! And as I was squinting reading this I remembered that I now wear reading glasses… it is quite an adjustment to remember them and to make sure lighting is really good now that we are approaching that “more experienced” stage of life – lol. Your work is so beautiful and I really have a hard time seeing any imperfections in it. It is fun to see your in progress photos via social media and then to see them completed here (that dark line in the leaf pattern really makes that part stick out – great choice!).
Thanks so much, Marsha. I did think karma was paying me a visit with these projects because I remember making fun of my grandmother when she couldn’t see to thread her needle unless she turned the table lamp on in addition to the overhead while I was there proclaiming “I can see the eye from across the room, Grandma!”
I didn’t share close-ups of my stitching because it definitely isn’t perfect. But, as I said, it’s good enough for a start and from a distance. LOL
I love that you broke your rule of “no new crafts” to embark on embroidery. You know it’s near and dear to my heart!
You did a fabulous job and I am impressed that you dove right in with no fear. I don’t know if you remember seeing an Art Elements blog post I did about embroidery last year but I offer up some great books for not only beginners but for anyone that loves embroidery. Here’s the link https://www.artelements.net/embroidery-anyone/
Kits are a great way to learn but I have to say that just jumping in and creating your own pattern, picking your own colors and stitches are definitely the best way to go. And FYI, when drawing a pattern on black or dark backgrounds I use a white gel pen. It wears off a little but not like chalk.
Thanks so much, Cathy. Seeing what you and some of the other AE Team do with thread and fabric is what inspired me to give embroidery a try. I did read that post but had forgotten about it. I am adding some of your recommended books to my “all the things” shopping list. And thanks for the tip about the gel pen. I have one and didn’t think to try it.
Love your creative, fearless spirit — which I share, BTW. Like you, I just HAVE to try things my own way. Thanks for the amusing story and especially for the inspiration to explore more needlework (after all, I DIDN’T pitch all my flosses, needles, or hoops, and I just recently found and collected them in a studio/supply purge/organize day). And I have 2 bins full of fabric & quilt batting and clothes set aside to embellish. You’ve convinced me to dig in again!! Thanks.
Thanks so much, Karen. In my experience, if I get rid of something I will inevitably need/want it shortly thereafter. It’s been my rationale for keeping neglected art supplies for years until I ran out of space and my home was starting to look like a candidate for that hoarders show on tv. I hope you have fun getting back in touch with your fabric and floss. 🙂
Beautiful work… those little hoops are fabulous. I wouldn’t have been able to resist those either!
Thanks so much, Caroline. I may have ordered a second set of the mini-hoops before I even used the first. Because you never know. LOL
Gee, I have to remind you (us) that it WAS another century when your parents/grandparents tried to teach you embroidery :/ …. same Century my Mom was trying to get me interested in knitting & tatting. I chose ceramics, painting & graphic design!
Anyway, that small fact aside, I love love love your Flowered Cat with your oh so mod color choices! And Peace Out is just my style and not too shabby atoll atoll. I do believe you’ve more than succeeded at your new-found old craft.
One of the first things I thought of when seeing your post was when daughter was earning her DMA (Diplôme des Metiers d’Art). It was a 2-year rigorous program and she just hated the embroidery studies. She got through them with merits even but I remember her agonizing over it all when I visited.
Thanks so much, Alysen. It is funny to be able to say “I did that last century.” It tends to confuse the millenials though. LOL
Lovely!
Thanks so much, Martha.
The Cat! My absolute favorite! I’m not good at embroidery as proven in my early school years but still dream of doing some one day as a clothing makeover project. Your persistence and writing are inspiring 🙂
Thanks so much, Rozantia. I didn’t think I was any good at embroidery when I tried it decades ago. It doesn’t seem any easier this time around but I am more motivated to master it.
Tammy you were obviously meant to be an embroidery artist! I too had a decades gap before I got back into it and my first work was nowhere near as good as yours! Stick with it – these pieces are lovely.
Thanks so much, Lesley. I think it’s safe to say I’ve caught the embroidery fever. I’ll just need to figure out how to manage my time, and supplies space, so I can continue with it. 🙂
Embroidery rebel!!!!
I love your writing style. You had me laughing. I love it all. The Inktense shading on the bones – genius. I also really like that once you went pro you started designing your own pieces – way more creative! Well done, you! Thanks for over-achieving – I mean – joining us this month. ( Giggles. JK)
Thanks so much, Jenny. If I were to do it over, I’d paint the fabric before stitching. I managed not to paint over any of the threads but it was a close call in some areas.
First off, you ALWAYS inpress me with the amount of projects you are able to complete in a single month. It really puts me to shame! I can understand wanting the time off for the heat. It’s been a scorcher of a summer.
Now, for your projects – they’re all so amazing, so frickkin’ amazing. I have a deep love for embroidery, and you’ve got my hands itching to get back into it. Alas, most of my embroidery books are STILL packed away, and like you, I just don’t want to buy more supplies since I have SO MANY already. I’ve got most of what I need right here, but maybe a few patterns wouldn’t hurt 😂😂. You’re defiitely acting as enabler! I have to tell you too that those roses on the crown of the skull are really fab. I’ve never tried something so complex, and knowing that you did that as part of your first project puts me to shame. It looks like you have been embroidering since childhood. Way to go!!
Thanks so much, Hope. You’d probably be less than impressed with the tidiness of my home, which gets neglected in favor of doing all the craft things. 😉
As usual, I just love your post! I used to be a cross-stitch pro myself! I haven’t done it for a while, and just purchased a kit several months ago but didn’t start yet. I LOVE all you did! Your DIY is fantastic, those little amazon impulse buy frames are soooo cute, and I love love love the kitty and how you used the pearl cotton! Great job again!
Thanks so much, Susan. I have to admit that cross-stitch was sort of stressful for me. I felt compelled to complete a certain number of rows or squares before taking a break for any reason. I still have one partially completed piece in a box. It’s on 28-count cloth and uses about 4 dozen shades of thread. Definitely need better glasses if I pick it up again.
Wow! For someone who was somewhat of a novice, you can’t tell it by these pieces. All of them are beautiful and well done!
Thank you so much, Michelle. Notice how I did not share any close-ups of my stitches or the backs of the pieces. LOL
I have a hard time seeing you as impatient with all the involved polymer clay work you do and now this collection of floral embroidered beauties! These are all so great! I especially love the kitty and your mini pieces. So fun!