The theme for this month’s Art Elements design challenge is “faeries” and as often happens with these challenges, I had a difficult time narrowing my ideas for what to create. This is yet another very rich theme that can be taken in so many directions.
The first fae I can remember as a child is an animated Tinker Bell flying in front of a castle, leaving a trail of pixie dust, during the introductory title as The Wonderful World of Disney began on television. I don’t recall how old I was when I read Peter Pan, but I know that Disney-fied image of Tinker Bell was in my head as I did.
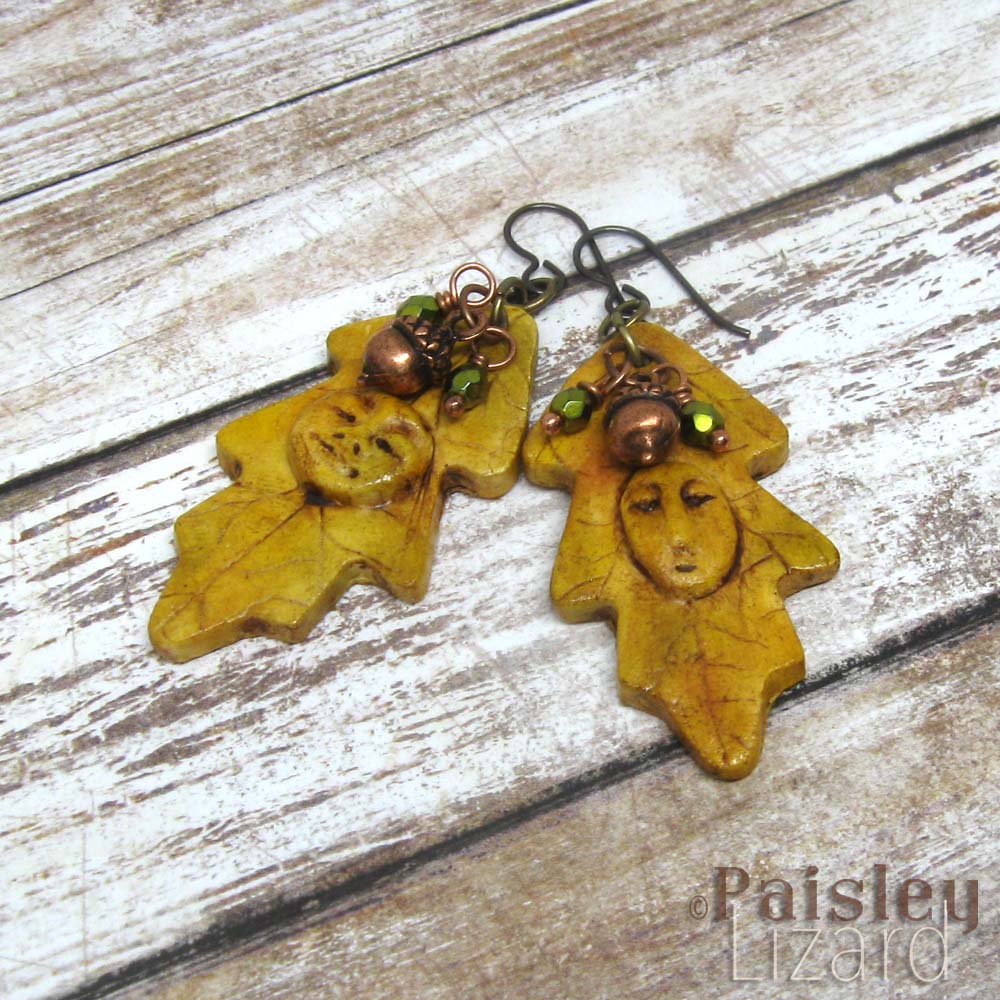
These oak leaf dryad charms have whimsical faces painted in fall colors. The polymer clay leaves are accented with a cluster of beads and acorns.
Tinker Bell is likely based on a type of fae creature sometimes referred to as a pixie. All pixies are fae, but not all fae are pixies, as I came to learn from reading assorted fantasy novels. I am partial to the idea of fae that have sharp teeth and pointed ears and slightly grotesque proportions to their limbs but can glamour humans into finding them irresistibly beautiful and trick them into giving up their wealth, or their lives. Some of my favorite fae stories have to do with the darker side of the realm, and fae that are mischievous or outright malevolent, such as the Wild Hunt, changelings, and kelpies.

Fall colors oak leaf dryad charms with green verdigris acorn dangles. The polymer clay leaf charms are hand painted with pan pastels and glazed with liquid polymer clay. The brass acorns were colored with Swellegant dye oxides.
I’m also drawn to the idea of elementals, which personify forces of nature, and to which I was introduced in stories of Greek mythology. Inspired by dryads, elementals that bind themselves to trees, I created some leaf-shaped earring charms and pendants with whimsical faces. I didn’t think my skills were up to the task of sculpting a tree with humanoid features or vice versa, but I knew I could manage leaves. The faces were made using a push mold that is widely available, so you may recognize their shapes and expressions. I painted the dryad leaves in fall colors because autumn is my favorite season.
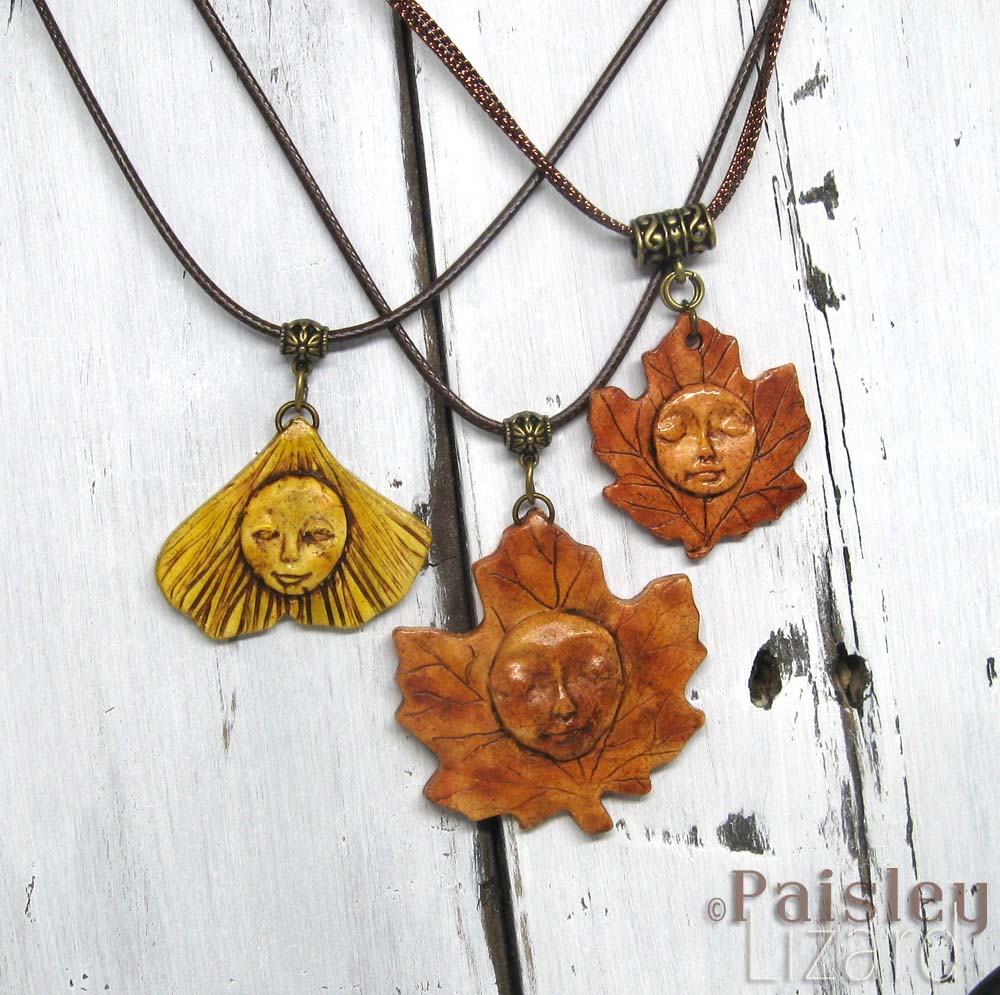
Maple and ginkgo leaf dryad pendants on simple cording. I resisted the urge to put the pendants on my usual beaded chain necklines. It was not easy.
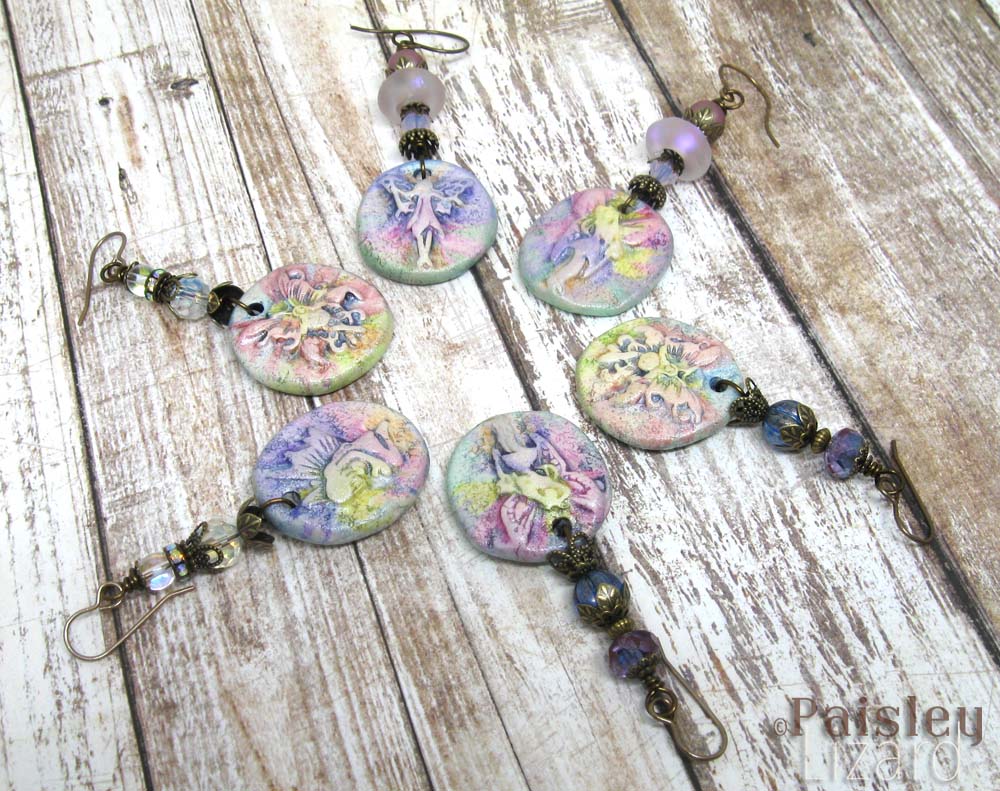
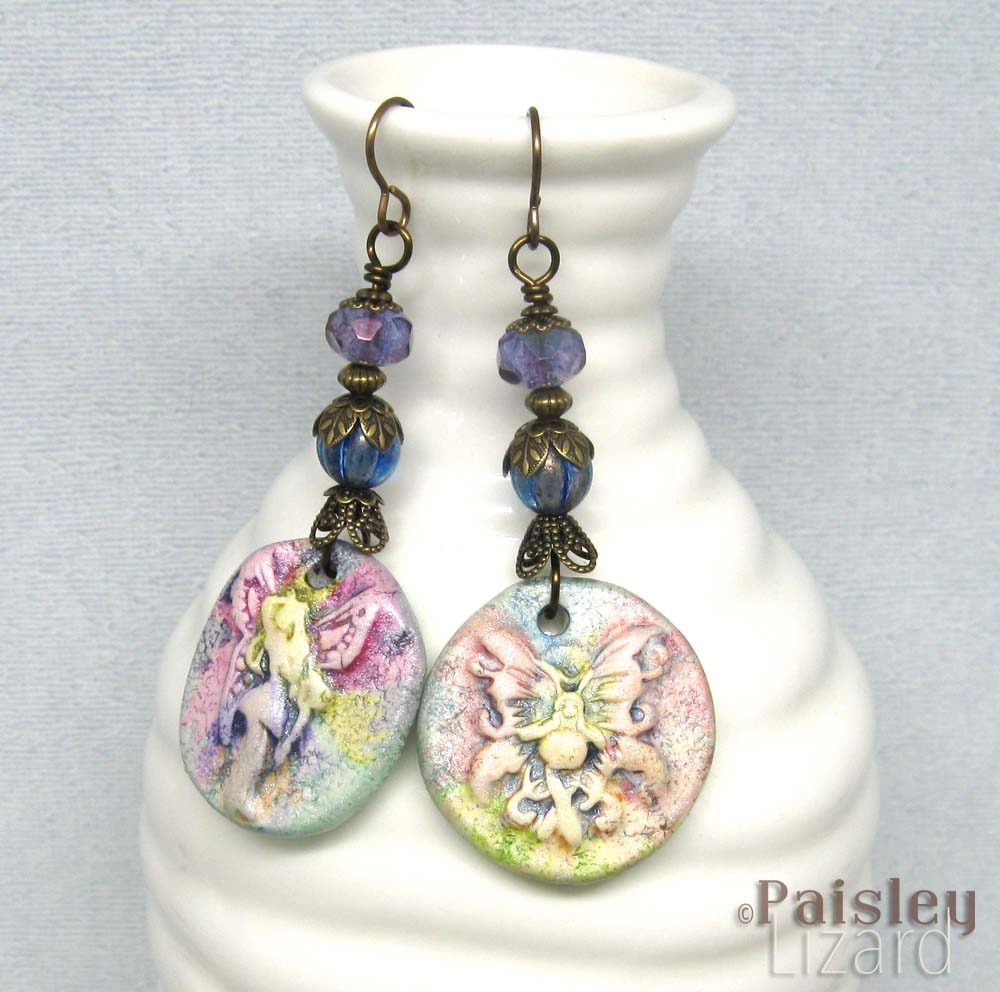
Another set of earring charms for this theme were inspired by the illustrations in Lady Cottington’s Pressed Fairy Book by Terry Jones and Brian Froud. Jenny wrote a great post on Froud’s fairy art, which is definitely worth a read. For my components, I made molds from some metal charms and used my hardbound copy of Lady Cottington’s book for color inspiration when painting the polymer earring charms.
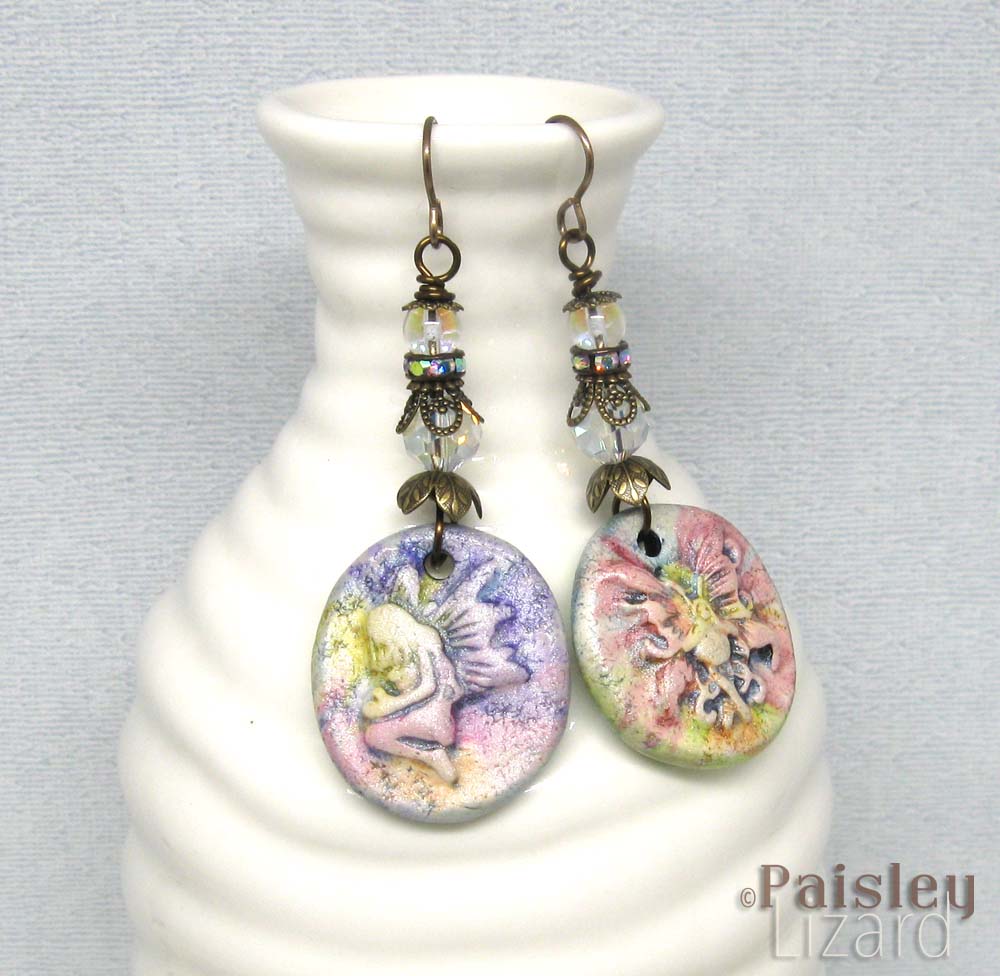
My version of pressed faeries for these earring charms have the “squashed bug” splats of color inspired by Froud’s illustrations. I can look at them and imagine Lady Cottington snapping her journal closed to squish faeries between its pages. But the best parts of Froud’s illustrations are the surprised, irreverent, and defiant expressions on the fae faces. Which I definitely did not capture here.
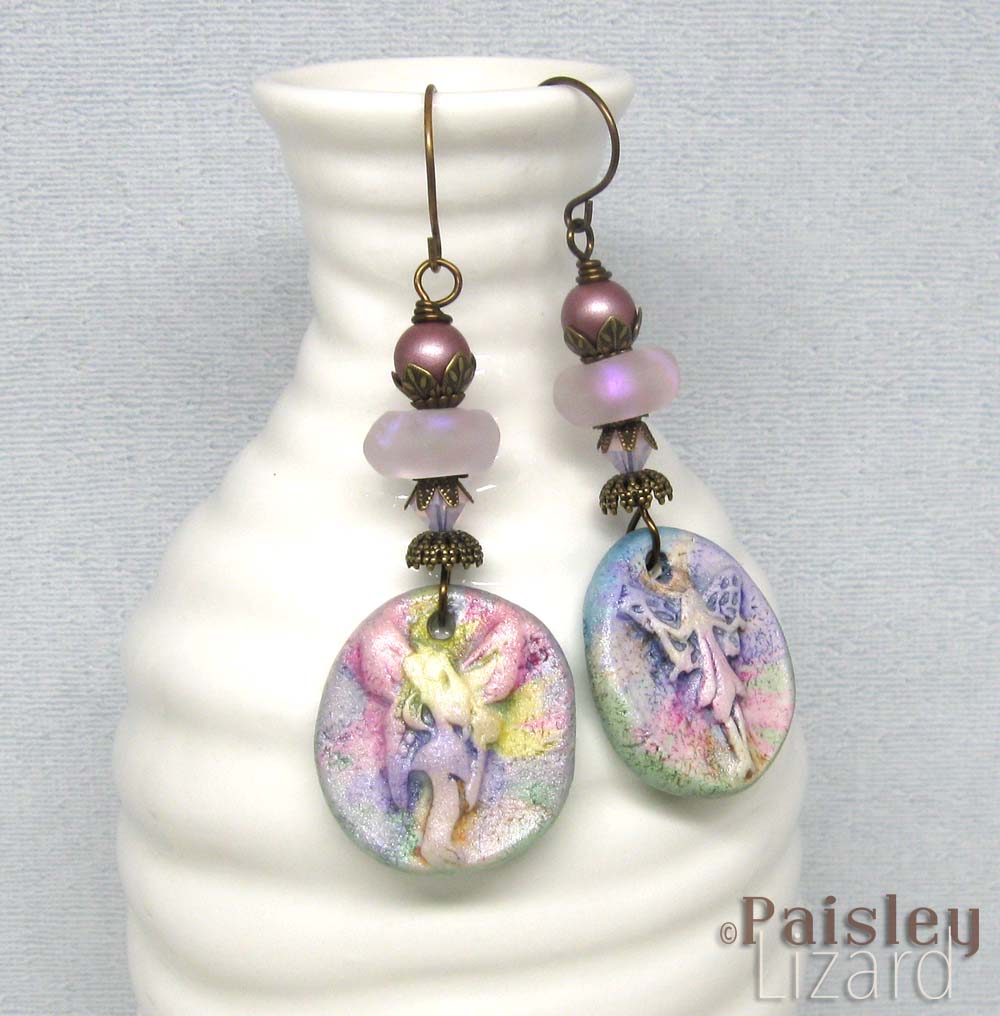
This pair of pressed fairy earrings pairs my polymer clay charms with assorted brass caps and glass beads, including some ethereal iridescent lampwork rondelles from uglibeads.
I knew I wanted to do more than some simple jewelry pieces for this challenge. I’d been contemplating a faerie sandcastle sculpture since earlier this year. I’ve seen various faerie houses (and tooth fairy jars) made from a variety of media, including polymer clay. Earlier this year, I attempted my first faerie house sculpture when I turned a small glass jar into a barrel cactus-shaped home. Why a cactus? Where else would a desert-dwelling pixie make a home?
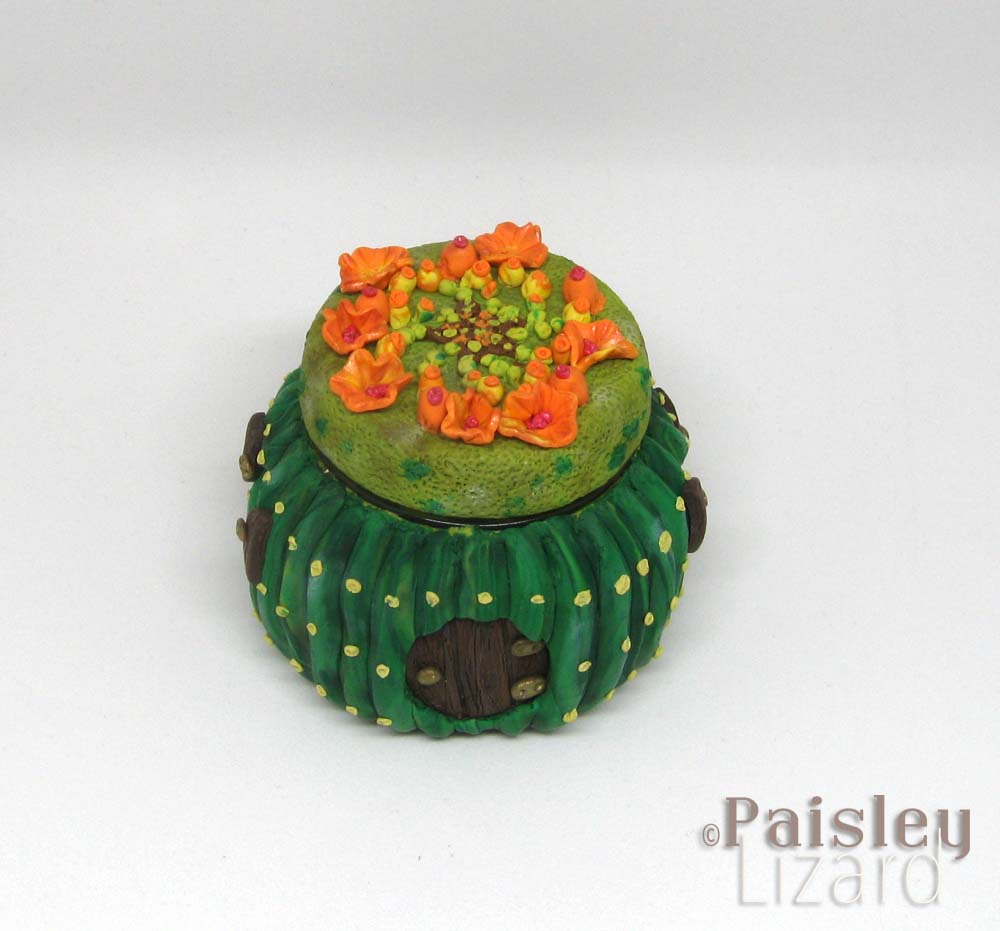
This fairy house is based on a barrel cactus in bloom. It’s polymer clay sculpted over a small glass jar.
There were two versions of the cactus faerie jar. Version number two incorporated things I learned while making version one. I might have done a third version for this challenge, because there are still a few things I’d like to change or improve on now that I’ve had time to think about it more.
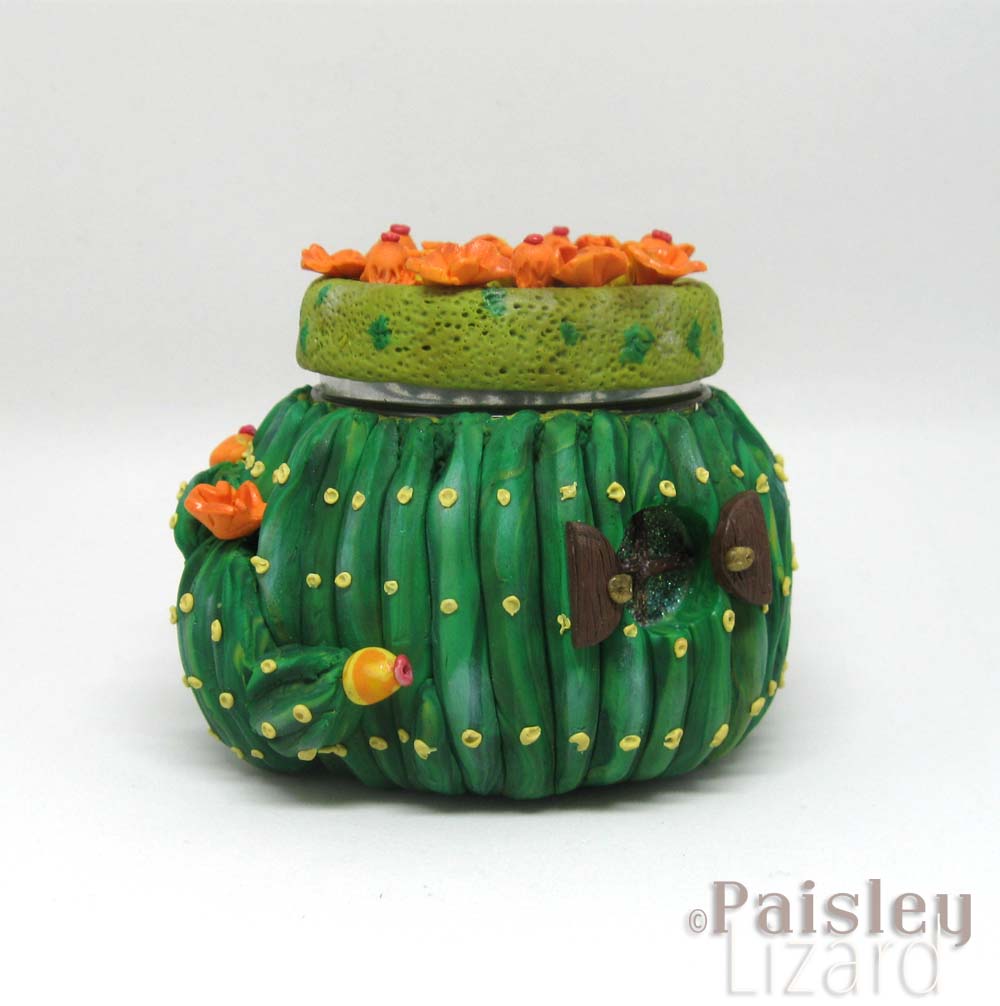
I contemplated using plastic coated wire to make prickly cactus spines. I decided against it because I imagined this being something a child might handle.
However, I have a list of other faerie house shapes I’d like to try. One of them is a sandcastle. You know, for the fae royalty who live at the beach? This was going to be the largest piece I’ve attempted with polymer clay. I’m relatively new at sculpting and am self-taught, so I knew there would be trial and error.
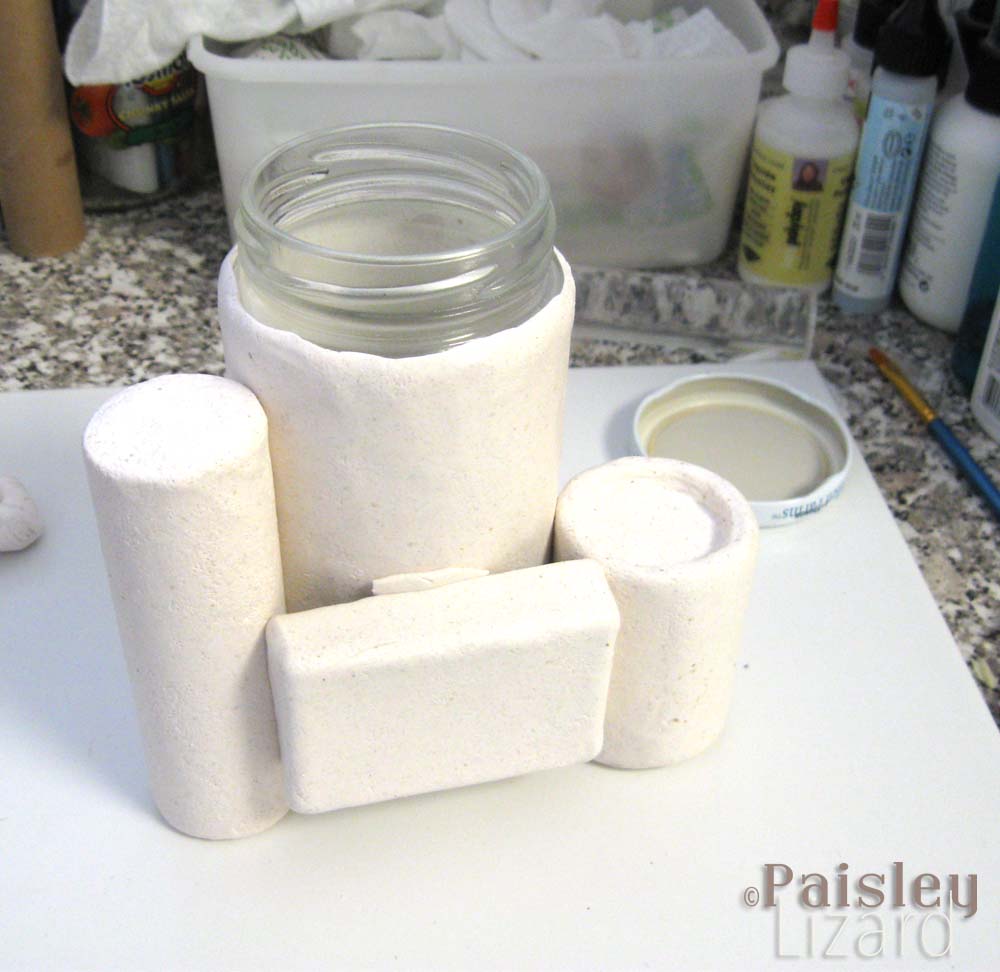
My faerie sandcastle began with a glass jar, some cardboard shapes, and aluminum foil (not shown.) I had a general idea of the layout before I began applying the clay, but the final details emerged as I worked.
Error number one is actually something I’ve experienced before: a bubble formed during curing. Because the piece was large, I did a partial cure after covering the armatures with the first layer of clay, heating it just long enough to set the clay. I thought I had been careful to press all the air out as I was smoothing the clay over the glass jar and paper tubes. But I missed a spot and ended up with a boob-shaped dome on one of the side towers.
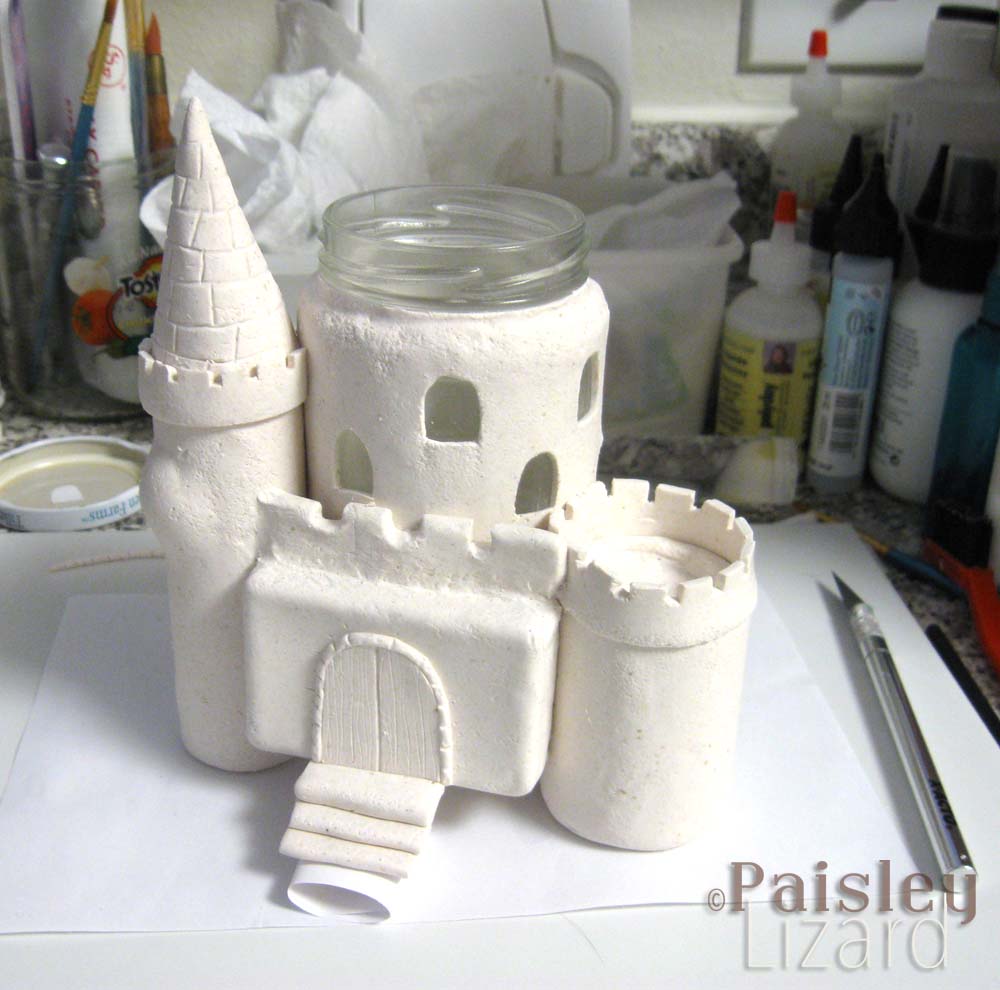
This is what happens when there is air trapped between the clay and the armature, or between layers of clay. I think I’ve had large bubbles like this form in about 25 percent of the pieces I’ve sculpted. Just when I think I’ve got the hang of smoothing, and even when I poke holes just to be sure, bubbles happen.
Luckily, the bubble was easily excised with a blade while the clay was still warm. I patched the spot with more clay and re-textured the “sand” in the area so it was barely noticeable. I later decided to put a scallop shell there as a decorative touch. In hindsight, I could have skipped the bubble removal and patching and simply put the shell directly over the bubble.
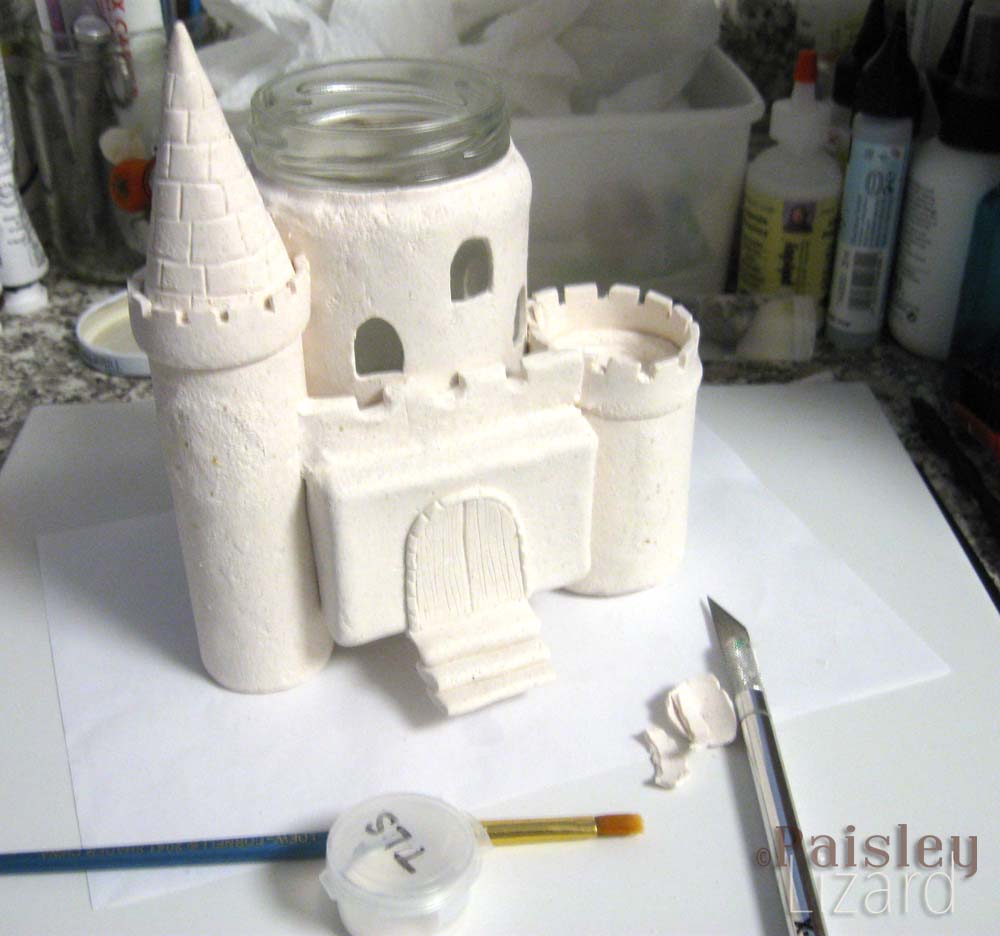
While the clay was still warm I used a craft knife to remove the part that was bulging away from the side of the tower. Then I pressed raw clay onto the bare spot on the cardboard and blended it into the edges of the cured clay with the help of some liquid polymer clay.
Another error happened when I was adding details to the partially cured castle. The front door and stoop fell off while I was trimming the windows on the back of the castle. Ruh-roh! Because the clay was not yet fully cured, it was brittle and subject to cracking at stress points. The clay around the door also was “scored” when I used a needle tool to draw the door’s outline. That, plus the unsupported weight of the steps hanging about an inch from the base, caused the perfect weak spot.
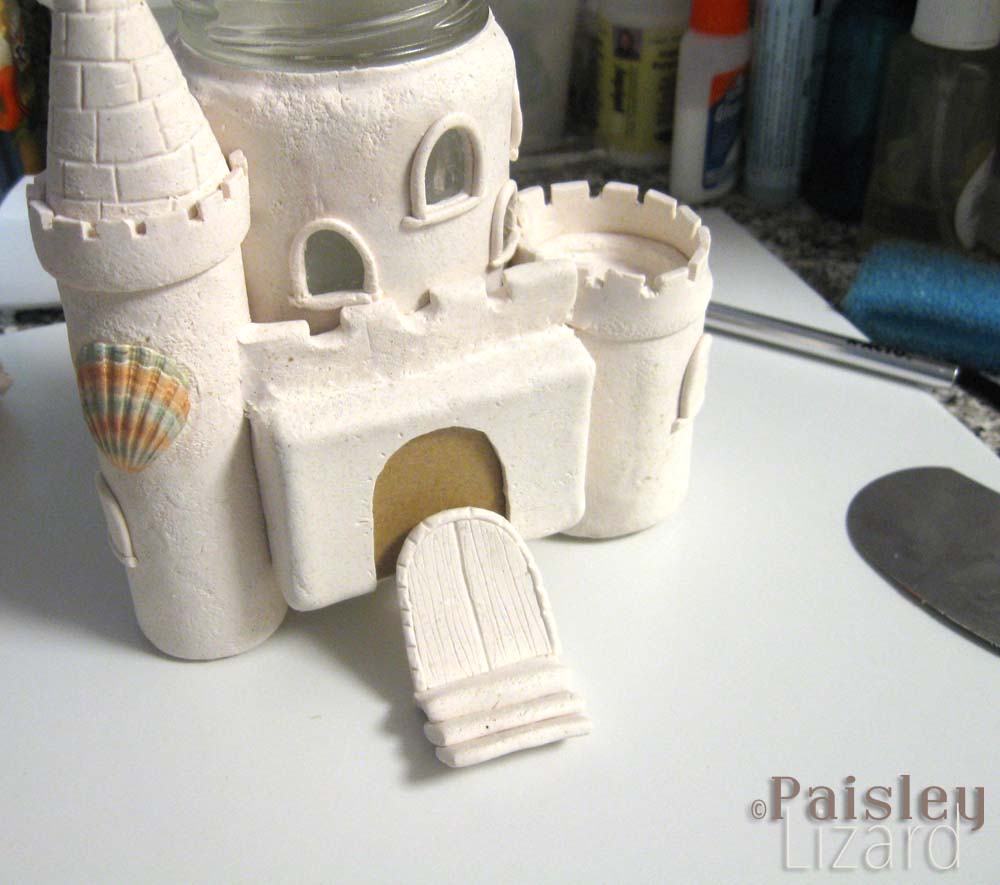
They’re not visible in this photo, but there were hairline cracks extending out in several directions below where the door fell off. I had not noticed them on the piece until after the door fell off. My guess is there were “stress fractures” that I pushed to the point of failure as I was manipulating the piece to add more details.
As with the bubble, this problem was resolved by adding more clay. I had planned to trim the door and add a drift of “sand” under and around the steps anyway. By the time I was done adding “curb appeal” to the front of the castle, the patched spot was impossible to detect. Unfortunately, the door is bowed a bit at the bottom, which I didn’t notice until after the final full cure. I probably caused that when I was packing clay under the steps and around the base of the jar to make the drift of sand.
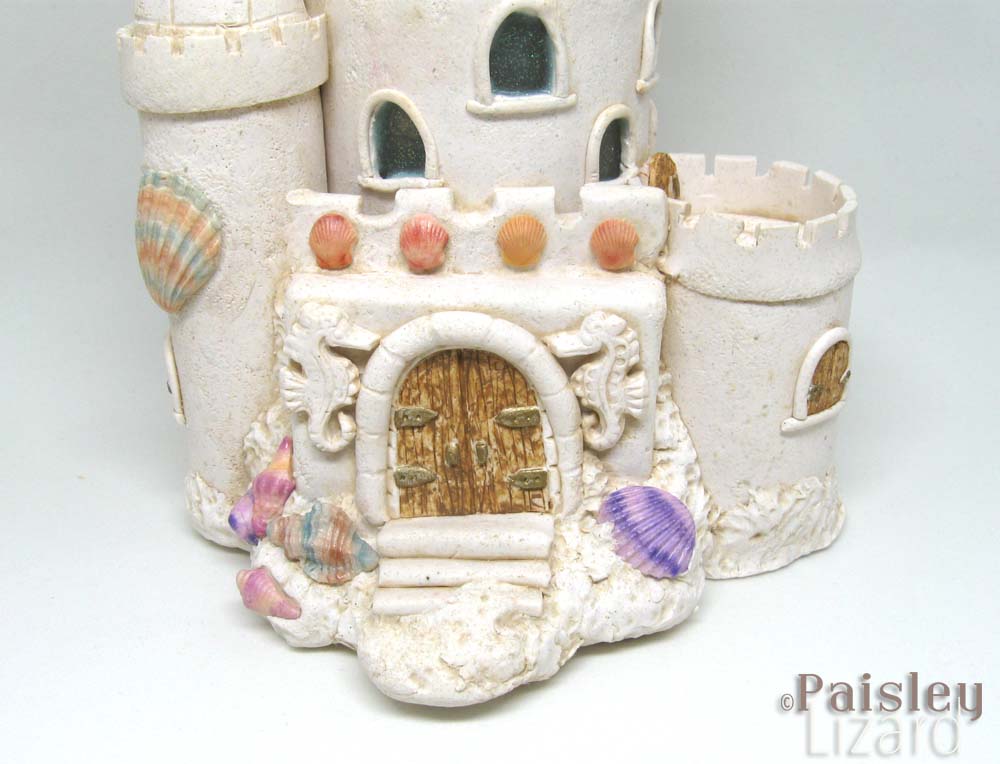
After re-attaching the front door and smoothing some raw clay into the cracked spots on the entrance, I added a thicker frame to the door. I also added hinges and handles to the door. Perhaps if those details had been in place before the partial cure they would have held the door in place. I framed the doorway with a pair of seahorse relief sculptures. There are also some sea shells, collected by the castle inhabitants, on display above the entry and in the sand drifts by the entrance.
Some other construction errors couldn’t be helped given my process. For example, I attached the side towers to the main jar tower before trimming their tops with parapets. Which made it a challenge to wrap the parapets in a straight line all the way around. Little things like that might have been avoided if I had made a sketch of the piece before I started sculpting. It’s a lot easier to erase and redraw a line than remove cured clay.
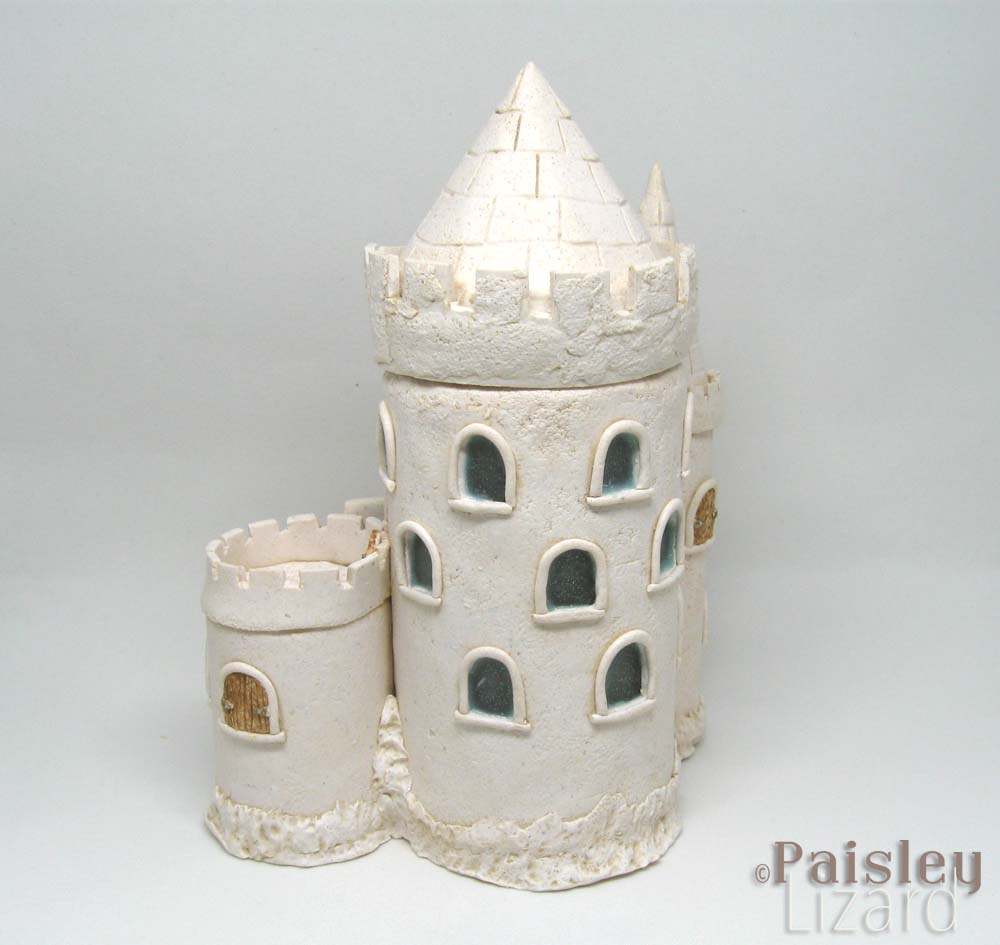
The windows in the main tower are all cut-outs that will allow light from a candle (LED only, no actual flames please) to shine through the glass jar. I made closed shutters for the windows on the side towers, including one that leads out from the main tower to the top of the smaller side tower. The open windows are glazed with liquid polymer clay tinted with ink and holographic glitter (aka, pixie dust).
I think the finished castle is not bad for a first draft. After a full cure, it is structurally sound. Finishing touches included adding a wash of acrylic paint to bring out details in the sand texture, putting a glittery blue glaze on the open windows, and painting the door and shutters a driftwood brown with gold hardware. When an LED tea light is placed in the jar, the light sparkles out the open windows. I think it could make a sweet night light.
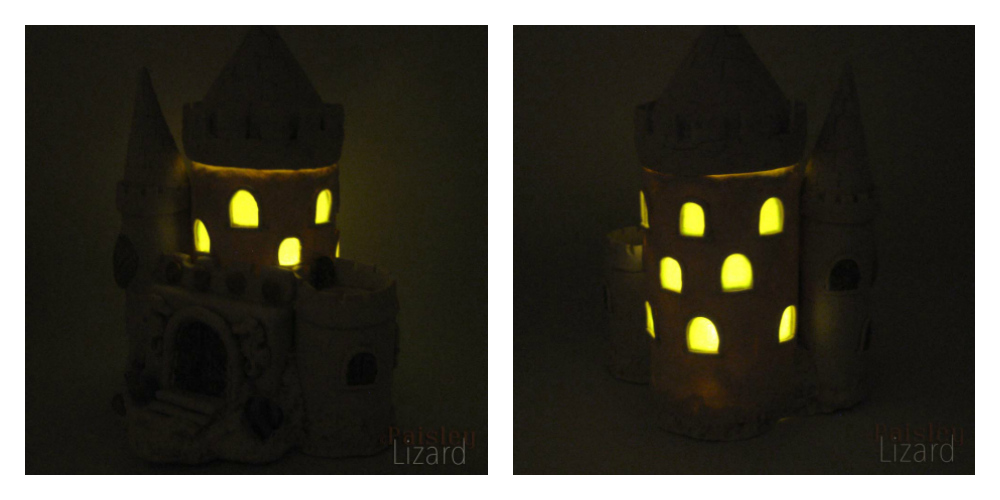
These are my best shots of the castle – front and back – lit by an LED candle. The candle flickers – presumably to imitate a real flame – and it was a challenge to time the camera shutter to the flicker.
At the last minute, when I should have been processing photos so I could list the jewelry in my etsy shop in time for the blog reveal, I decided to make some fae wing earrings. Not the lacy butterfly or dragonfly-like wings you’d imagine on a “nice” little pixie flitting among the flowers of your garden. More like the leathery wings you’d find on a sharp-toothed carnivorous fairy that eats worms and beetles.
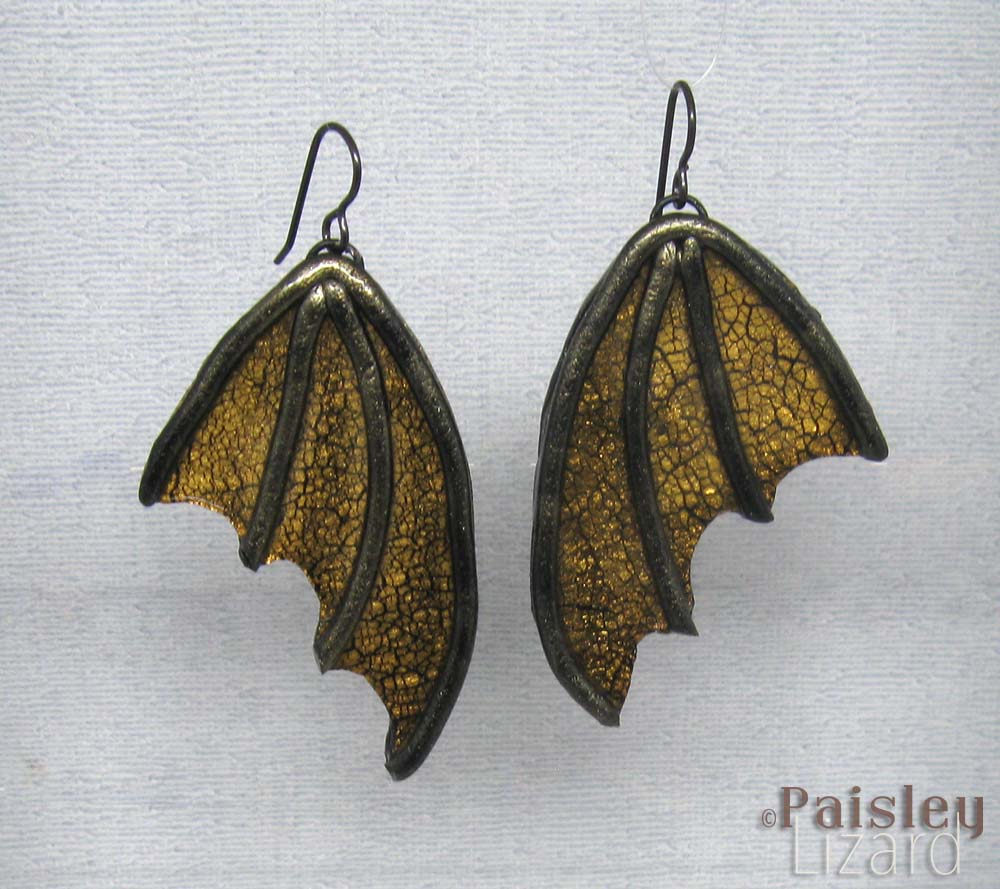
I used gold leaf foil on black clay to get the crackle “scale” effect on the wings. The rest of the clay was dusted with gold mica powder. After curing, I glazed the wings with liquid polymer clay to preserve the gold leaf and mica powders. It also gives a glossy shine. These wings illustrate why polymer clay is a great medium for making large earrings. Despite their substantial size, the earrings are very lightweight and comfortable to wear.
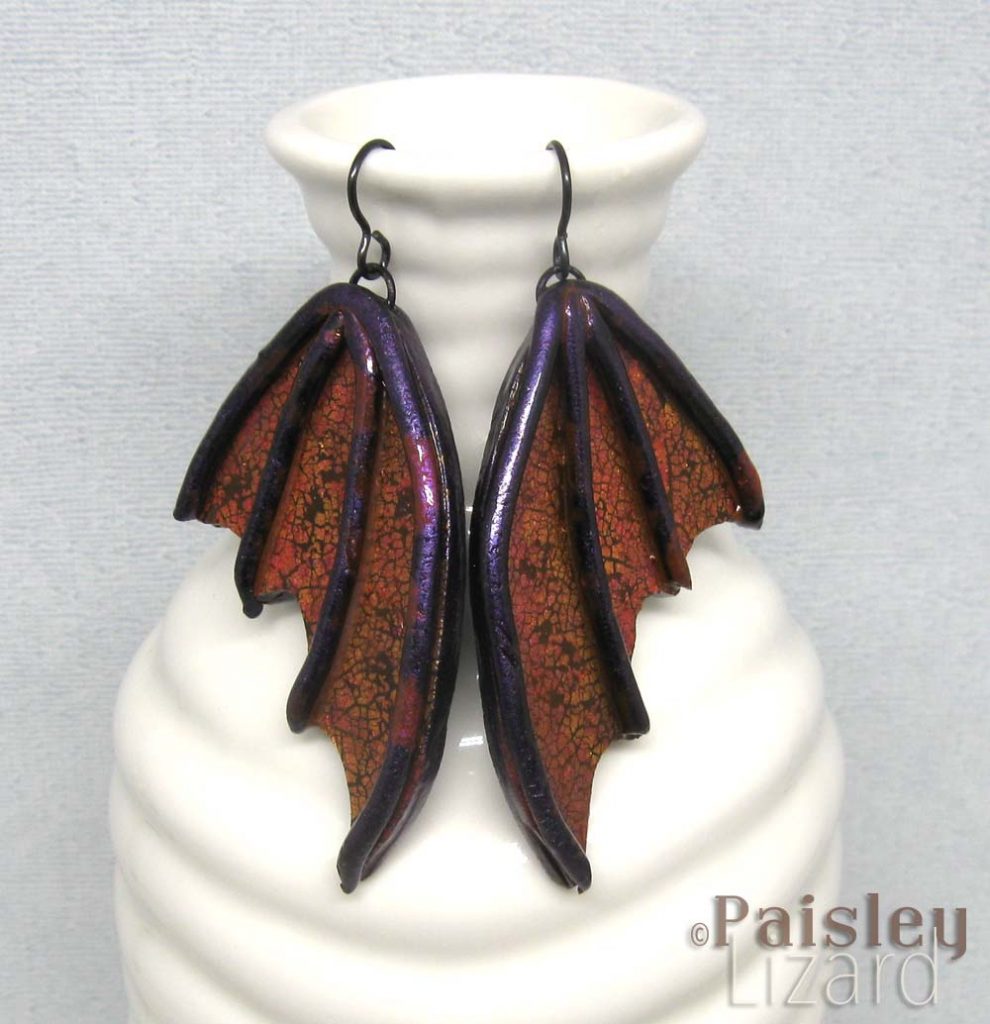
These wings have alcohol inks dripped over the crackled gold leaf foil. And purple mica powder on the other surfaces. Alcohol inks tend to change colors when heated. They don’t just get darker, they can actually shift color. Although these didn’t end up the same colors they began, I do like the final colors.I started with all shades of purple and ended with pinks and oranges framed by purple.
I had so much fun “researching” this theme, and by research I mean browsing the photos in some of the fairy anthologies in my collection and revisiting novels from some of my favorite urban fantasy authors. If you’re looking for a fun alternate history/universe to get lost in, I suggest The Hollows series of novels by Kim Harrison. It’s got pixies, fairies, elves, werewolves, witches, demons, vampires, and a laugh-out-loud narrative with a very well-developed world. There’s even an appearance by Tinker Bell herself.
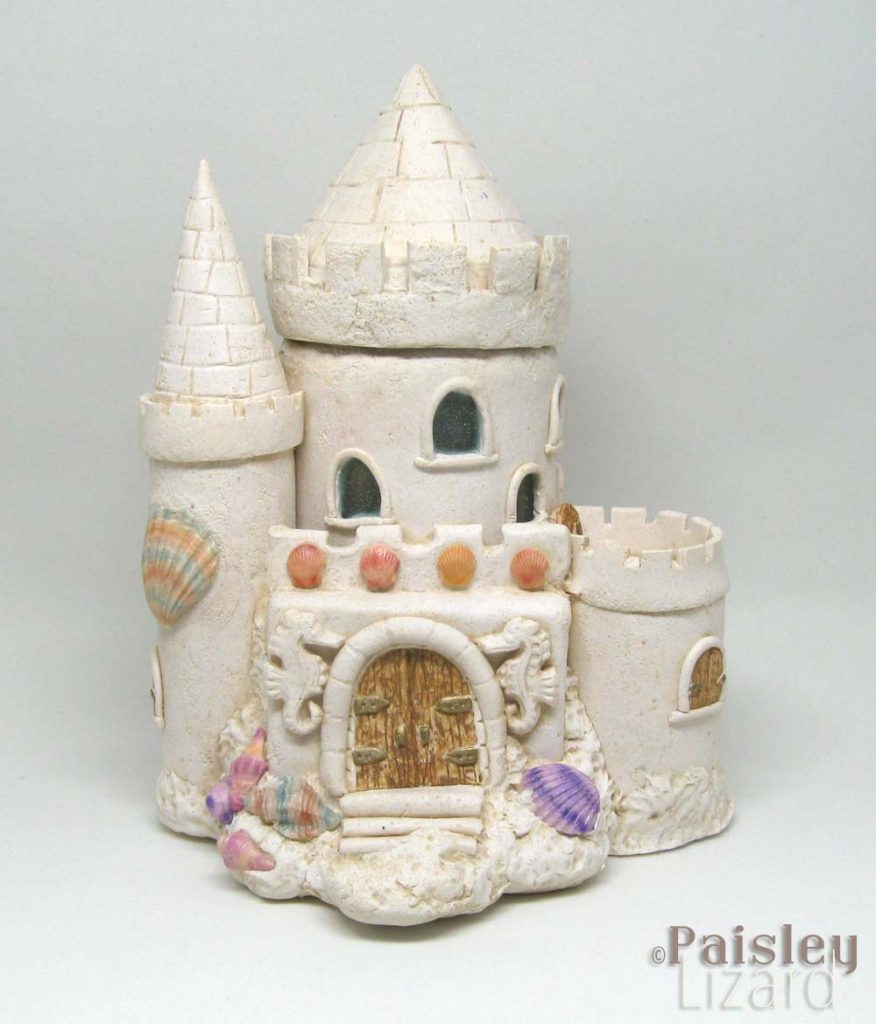
If I don’t get distracted by something else, I would like to try a second draft of this idea. There are a few things I’d do differently stylistically, and others I would do better from a construction perspective. You probably can’t tell from the photos, but the “sand” has flecks of sparkle from the embossing powder I mixed in. I think version 2 would have more sparkle, and the sand might be a different color.
For more faerie-themed art in a stunning diversity of styles and media, please join the hop and visit the blogs of the other participating artists.
Guest Artists
Vic
Divya
Alysen
Kathy
Tammy <– you are here!
Hope
Alison
Cat
Sarah
Art Elements Team


Dryads and leaves are a perfect pairing. Love the concept. And your fairy house turned out great! Can be used at Halloween, Xmas, any time of year.. The crooked door adds a sort of ‘je ne sais quoi’ …
Thank you, Alysen. There’s a lot of je ne sais quoi in my castle. LOL
Wow!! you were busy!! I love the cactus sculpture and the idea that desert fairies have to live somewhere, they must be the kind that wear those fabulous ‘leathery’ styled winged earrings 😀
I am partial to the desert, because it’s where I grew up. So it was natural to imagine cactus fairies. 🙂
As always, I love what you created for the monthly challenge and stunned at the broad variety of projects! My favorite is your sand castle, it turned out wonderful! 🙂
PS: Yes, I own the same push mold and used it too! 😉
Thank you, Claire. I don’t know what I’d do without that mold. Maybe learn how to sculpt faces? Hahaha.
Wow, wow, wow! You have been so busy and it’s all so wonderful!
I love the little face leaves and that castle is superb!
Thanks so much, Cat. I have a month’s worth of house work to catch up since I spent all my weekends making faerie things.
Loved reading about your process with the fairy castle… you did a wonderful job, it turned out brilliantly! The leaves are stunning, I really love the colours you’ve used, and the earrings and charms are wonderful too. All really inspiring!
Thank you for joining me in the challenge!
Thanks so much, Caroline. This was a super theme that took me on a fun journey.
You always have such a great design sense and I love to see the work that comes out of your hands! I just realized that I need to get the wings out of my artist bead bin and make some earrings (maybe update my post!). Keep on making beautiful work!
Thank you so much, Marsha. I look forward to seeing what you make with the wings.
And the award for doing most pieces for this challenge goes to…..Tammy!! Seriously you have explored so much for this reveal that I am so inspired and itching to create something. The castle is really cute but I am more partial to the cactus jar.
Hahahaha! Yep, I did get a little carried away. I prefer the cactus over the sandcastle as well.
Just WOW!! I love your pressed fairy charms and your leaf dryad charms but OMG that fairy sandcastle is hands down my favorite!! I love that you added process photos to show how you corrected minor issues and also it shows just how much work went into creating it. And those dragon wing earrings….I want a pair of those!!!
Thanks so much, Cathy. I had a lot of fun with all of the pieces, but the castle was the biggest learning experience.
Wow! You created so many projects with this theme in mind. I guess we’ll all a bit partial to the Fae! I forgot all about the smashed fairy book. I think I had that many years ago, but I think I ended up giving it to a friend’s daughter because I knew she’d enjoy it too. I definitely remember flipping through that book many times. How could I forget about it? Dang. Anyway…your pieces are so great. I’m particularly smitten with the leaves, especially that Ginko one. Oh, and the wings are awesome. They have a dragon-wing feel to me, but as fairy wings are totally in the darker realm. You really have a way with clay.
Thank you, Hope. I was partly thinking “dragons” of the teeny tiny variety when I made the wings.
Wow what wonderful creations, Your castle is just amazing! and I love the look of the squashed fairy book!
Thanks so much, Niky. The squashed faery book makes me laugh every time I open it.
Oh how fun! You were busy this month. The pressed fairy earrings are my favorite. You got the colors perfect! I am also impressed with your fairy sandcastle, what an amazing piece!
Thanks so much, Alison. I was rather happy with how the colors on the pressed fairies turned out. It was an accident that I figured out how to get that effect.
Wow you have been busy with the challenge, I love the little castle
Thank you, Jill. The castle is the biggest piece I’ve made with polymer clay. I think it’s worth trying a re-do one day.
I love your fairy sandcastle! The fact that it has glass windows and can light up make it perfect in my mind. Really cute!
Thanks so much, Kathy. The windows are my favorite part – with the flickering candle they remind me of Tinker Bell in her little house.
Wow. I am in love with the fairy houses. The sand castle is epic – but that cactus! Straight out of DeLint or Windling novel set in Arizona. You really put in some time with this theme. The smashed fairies made me laugh out loud – fun!
Thanks so much, Jenny. I just discovered those authors a couple weeks before this reveal. Where have I been that I didn’t know about them years ago?! The smashed fairy earrings make me giggle. Apparently, those illustrations are also popular tattoo designs.
I love everything, the Faires, the cactus is adorable and the wings love them. And I agree Kim Harrison’s Hollows books are brilliant.
Thanks so much, Vitoria. Nice to know another Hollows fan. 🙂