 So many horses, so little time. The theme for this month’s Art Elements design challenge was “horses.” I had soooo many ideas for this theme. Wild horses, rocking horses, carousel horses, four horses of the apocalypse, night mares, sea horses, horsing around, hold your horses, gift horses, high horse, dark horse, winged horse, unicorns, and on and on. As usual, I had far more ideas than time. So I focused on just two of my ideas: wild horses and water horses.
One of the horses in the inspiration images for the challenge was a kelpie, or water horse. Kelpies are one of my favorite mythological creatures, right up there with selkies. Kelpies are shape-shifters that live in lochs and other bodies of water in Scotland (you’ve heard of the Loch Ness monster, yes?). They can appear as horses or humans, and are believed to lure humans into the water, where they drown and devour them. Naturally, I had to find a way to make a kelpie for this challenge.
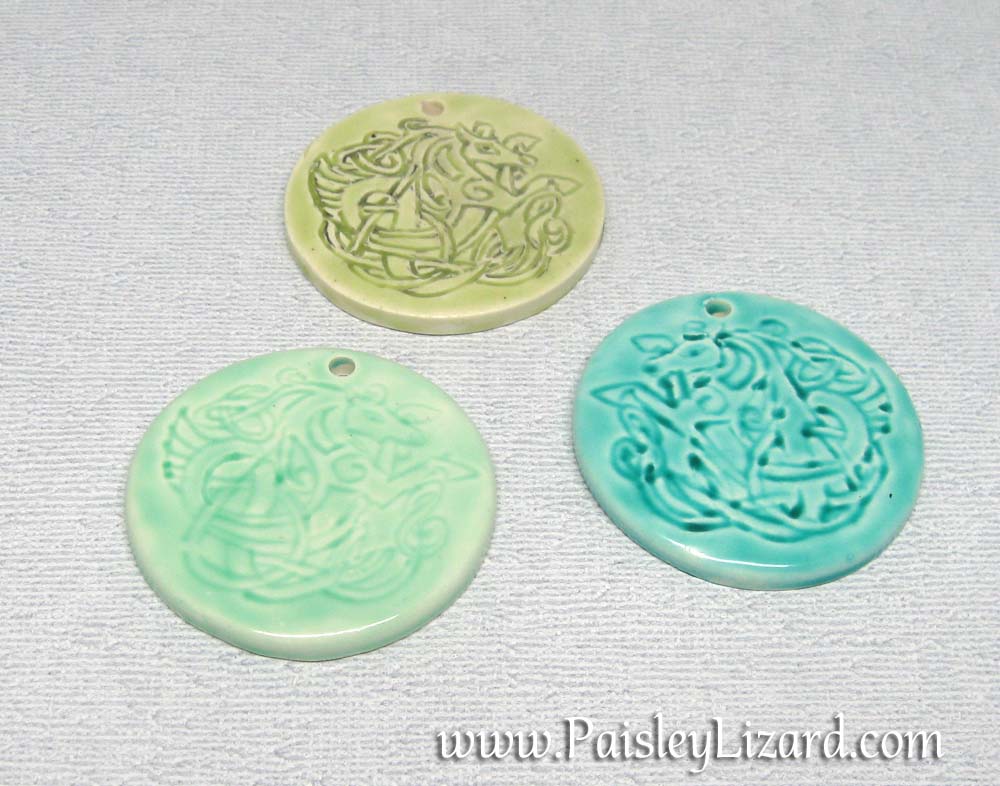
These are three of my experiments in making faux ceramic pendants with the celtic knot kelpie motif. The one on the bottom right came closest to what I was hoping for. Alas, I did not have time to turn it into a necklace for this post. (It’s about 45 mm diameter.)
At first, I thought I would try sculpting a water horse in polymer clay. I had planned to have it kneeling (so I wouldn’t have to worry about armature for wobbly legs) and with its mane looking seaweedy. That didn’t happen, because I ran out of time for such an ambitious endeavor. I have a page in my “someday” book dedicated to the idea, and maybe I will find time to give it a try.
Instead of a sculpture, I came up with a less ambitious plan for rendering a kelpie. I found a celtic-knot kelpie design all over the interweb. It was the exact same design, rendered in various media from silver pendants to cross-stitch. I wanted to use it to make faux ceramic pendants. I experimented with a few low-tech methods of transferring the complex design onto polymer clay, including tracing through a piece of paper. I didn’t spend any time perfecting my technique on this because I got distracted by another idea. But I would like to come back to it, and also find out where the design originated.
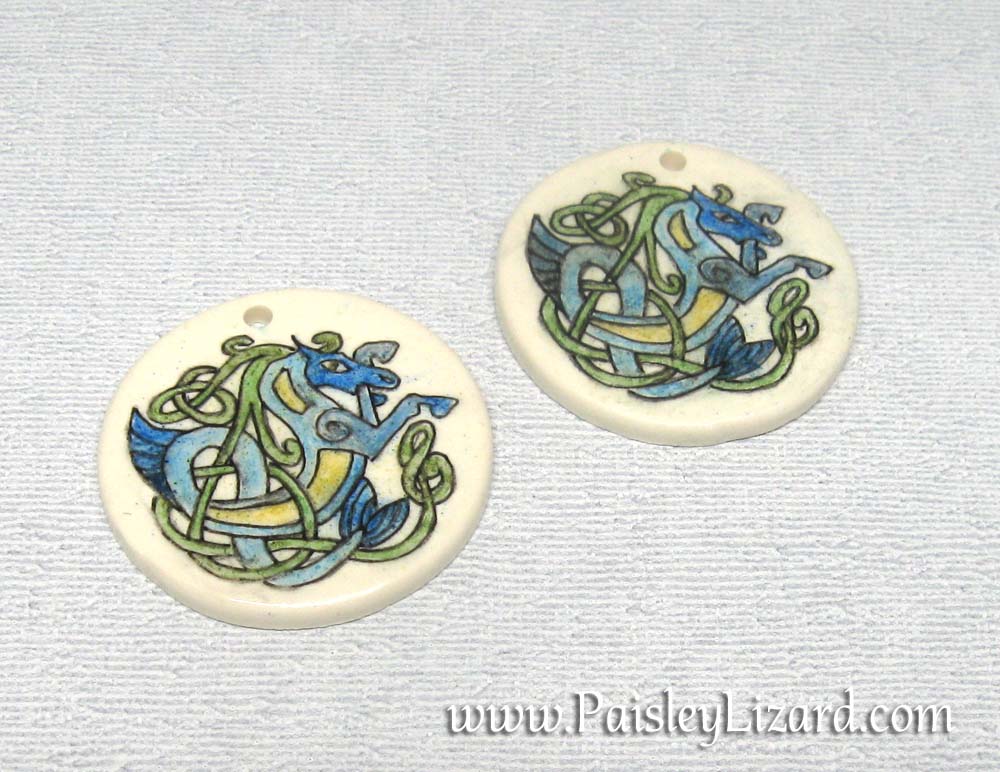
For the second version of the faux ceramic pendants with the celtic knot kelpies, I used colored pencils to fill in the design. This method needs some refining. When I brushed on the “glaze” (aka liquid polymer clay) it picked up bits of the pencil wax and smeared them across the white background. I may need to get some spray fixative before I give this process another try.
Another of my ideas for this challenge was to carve horse stamps, which I could use to make a bunch of horsey charms, pendants, and bracelet bars. Stamp carving is my new technique for this challenge, as it is a thing I had never tried before. I watched some video tutorials, I bought a book, and I dug out the linoleum carver I’ve had in my polymer clay toolkit – unused – for ages. Oh, I also bought some rubber erasers and a few small pieces of Speedy-Carve Blocks. I wanted “all the things” having to do with stamp carving – including some nicer carving tools, but I resisted and stuck to a few basics. If I decide this is something I will do more of in the future, I can invest in more toys, I mean tools, then.
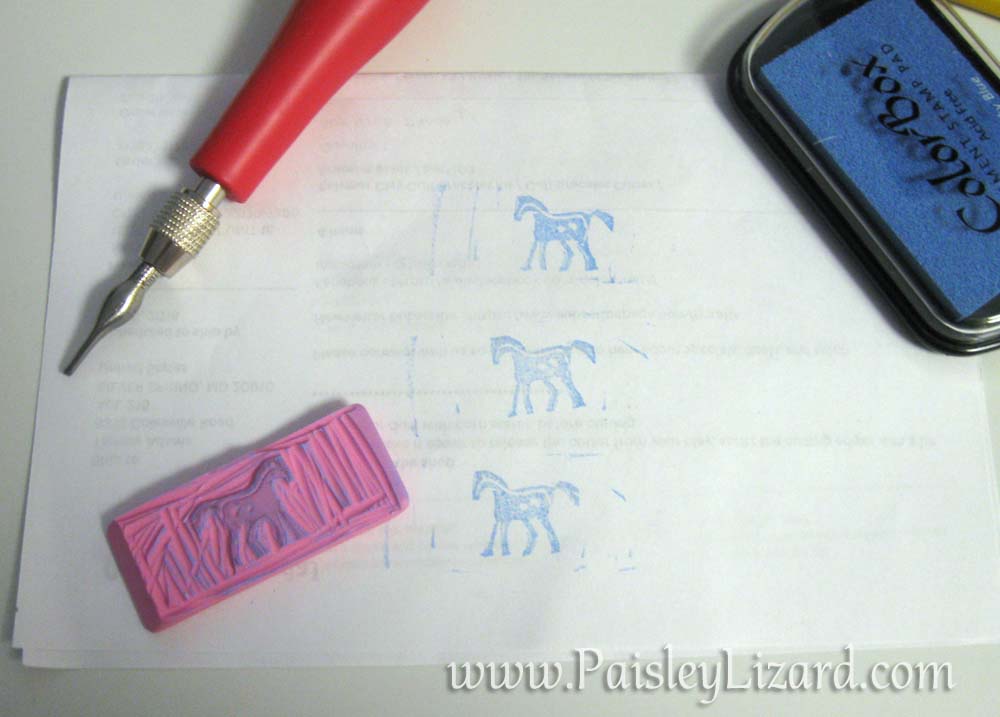
When carving a stamp, you have to ink it and make an impression to check whether you’ve cleared enough of the background material away. I had to clean up a few spots around the edges as you can see from the lines outside the horse.
I sketched a primitive horse shape, transferred it to the eraser, and started carving. I went with a primitive shape because I thought it would be the most forgiving for a beginner stamp carver. Also, while I had “wild horse” as my inspiration, I don’t know how to draw realistic horses. Anyhoo, the carving was both easier and more difficult than I expected. Easier in that I managed to carve more or less the actual shape I was going for on my first try. More difficult in that I think the carving tool was dull so I didn’t get the finer details I wanted.
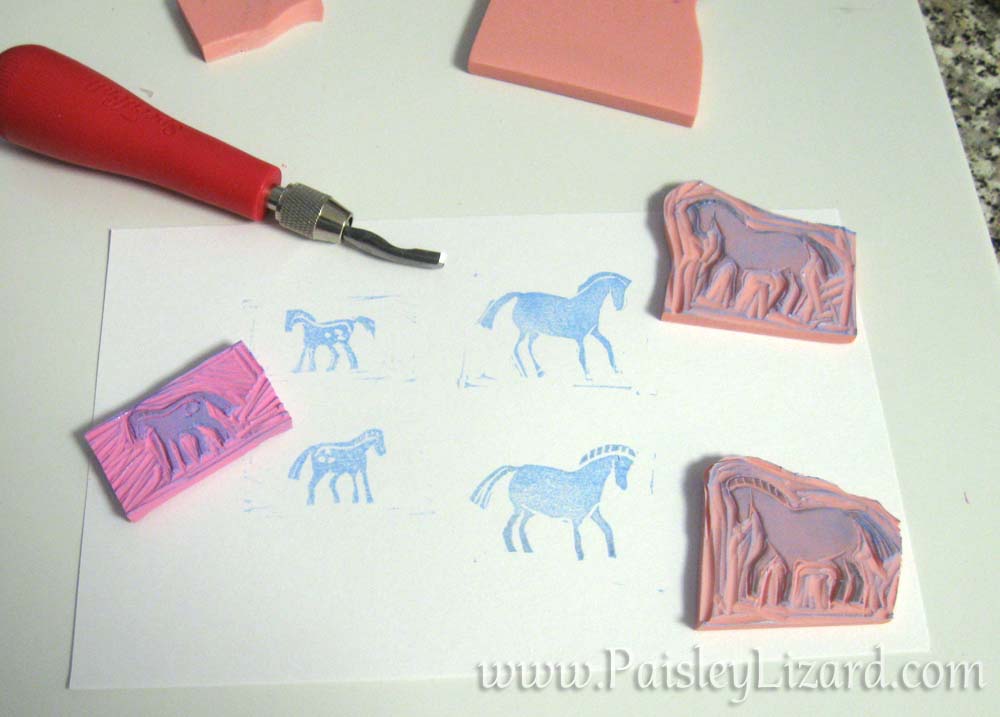
These are my four horse stamps. Really, there are four stamps in this photo. The small eraser stamp on the left is double-sided. They needed a little more cleanup in some background spots, as you can see from the lines surrounding the blue stamped images.
I knew I wanted to make earrings, among other things, with my horse stamp. I wanted to have mirror images, so I flipped my sketch over and carved it on the opposite side of the original stamp. It didn’t come out exactly like the original, because my tool was not sharp, or because I am a beginner, or a little of both. But that’s okay. I didn’t need them to be exact mirror images, I just wanted them facing opposite directions.
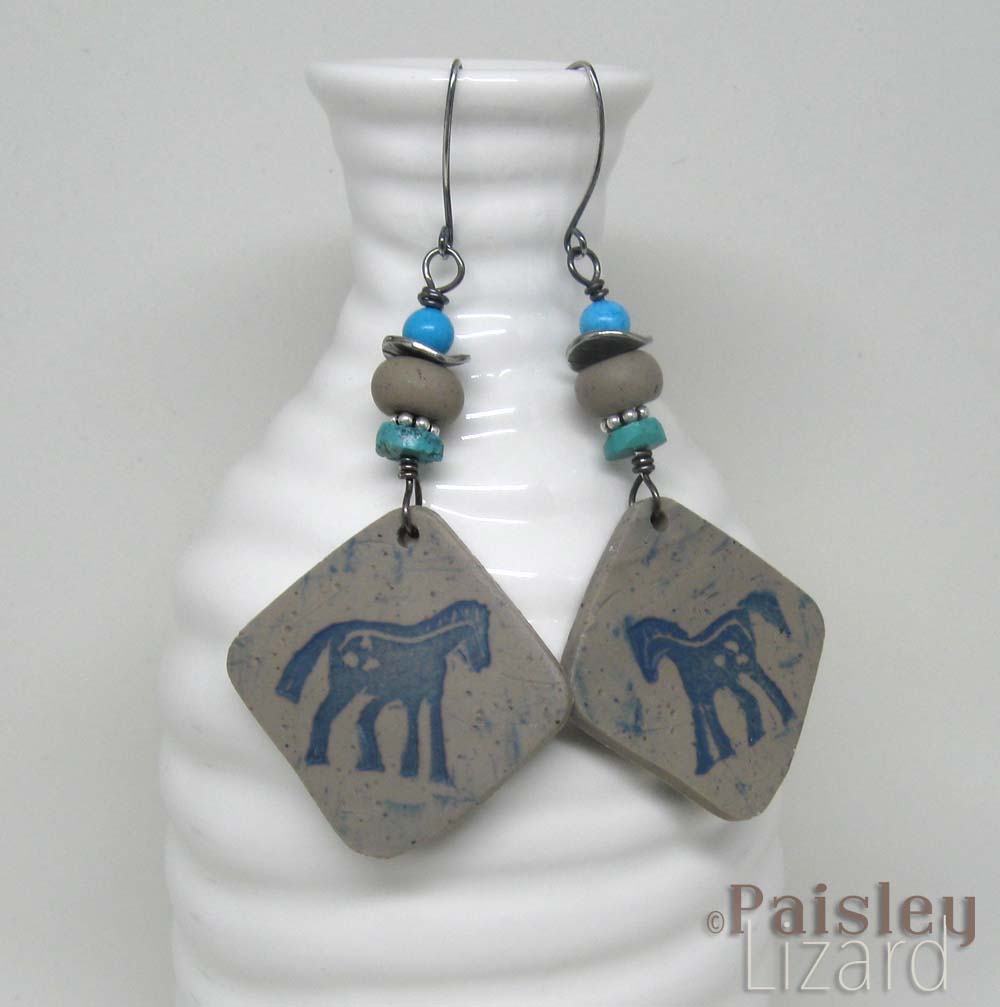
I used the stamps I carved, and some archival ink, to transfer my primitive pony images onto polymer clay. I added some purposeful smudges of ink around the horses, along with some tool marks, to distress the “stone” charms. The charms are paired with turquoise beads, some rondelles made from the same “limestone” polymer clay mix, and dark oxidized silver wire.
After my initial success – or beginner’s luck – with the eraser stamp, I tried carving a larger horse on a piece of the Speedy-Carve. It carved smoother than the eraser but I still had trouble with the finer details. So maybe it’s not the tool and I just need more practice. But let’s just say it’s the tool, okay? I made two larger horse stamps, both from the same sketch, and neither exactly alike in detail. I was now ready to use my stamps on some polymer clay.
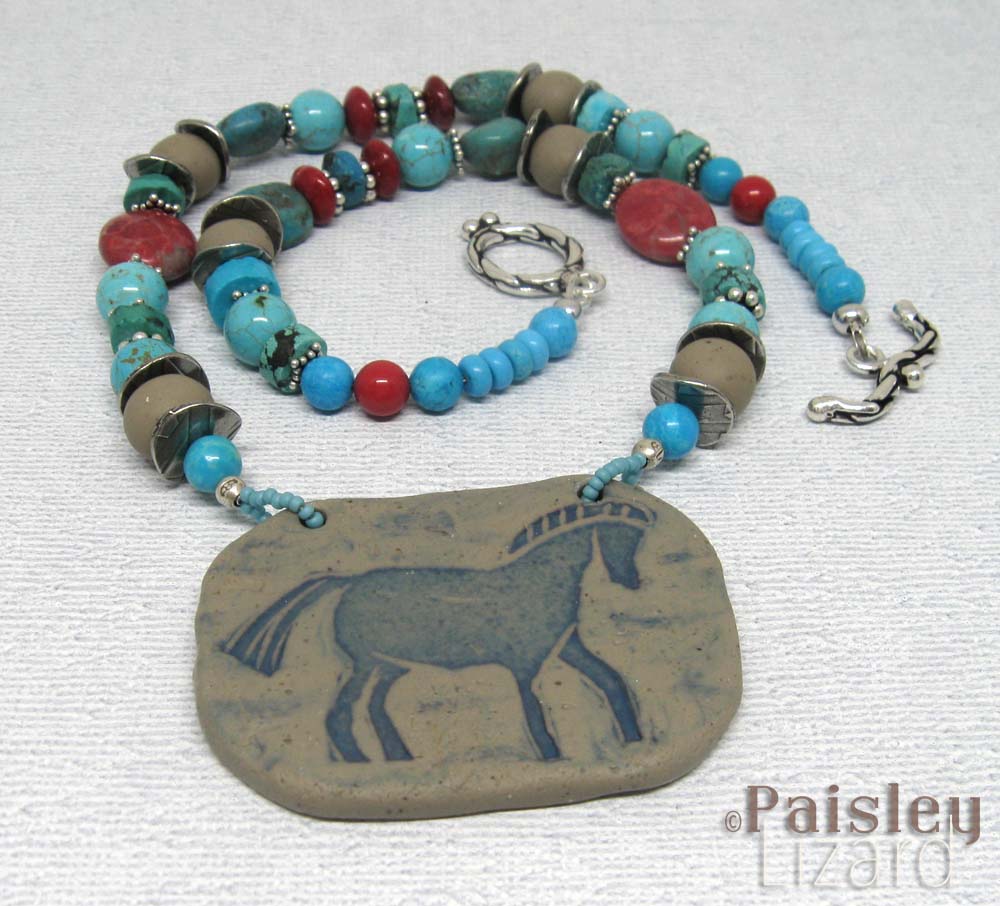
The faux stone on this necklace was made with one of my larger carved stamps. I smudged some additional ink to distress the “stone” pendant. It is strung with an assortment of polymer clay beads (from the same “limestone” recipe), turquoise (stabilized natural and dyed chalk turquoise), red dyed stone, and sterling silver accents.
Because the horses on my stamps are primitive-looking, I decided to go with a “cave painting” effect for my beads. I mixed polymer clay colors resembling a tan limestone and red rock sandstone. In some cases, I inked the stamp before pressing it into the clay. In other cases, I added acrylic paint to the bare impression from an un-inked stamp. I liked both versions.
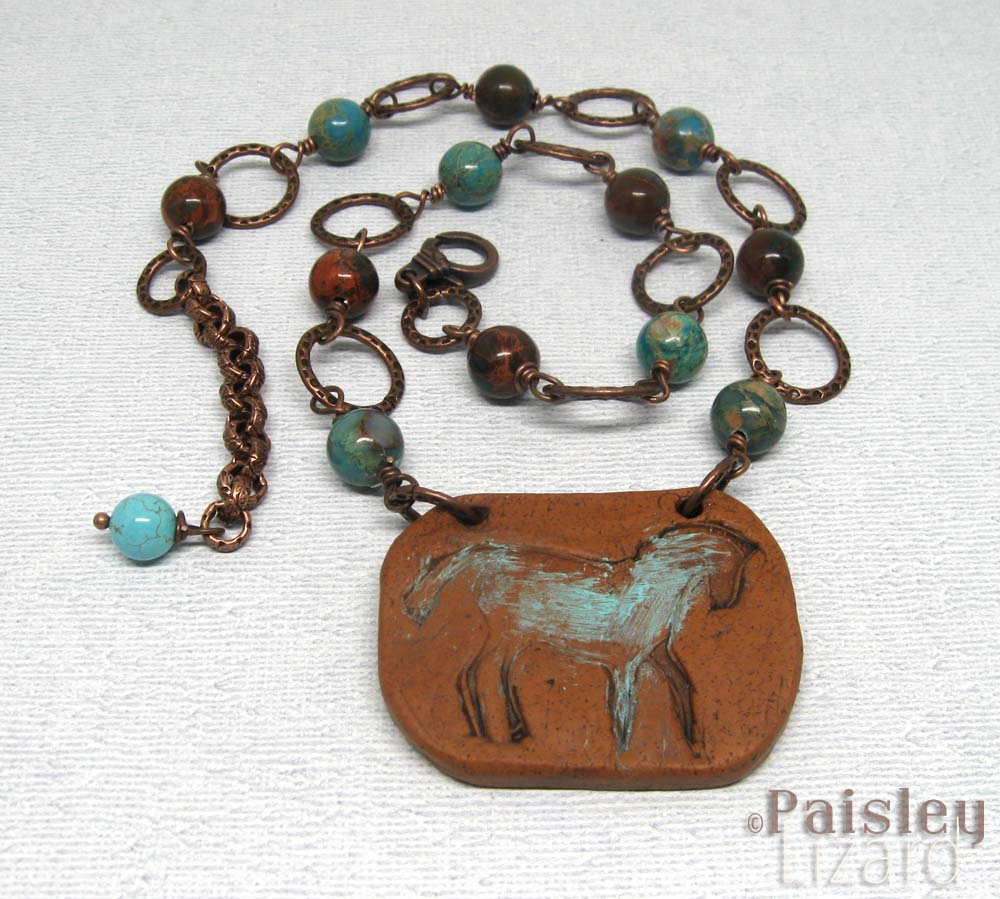
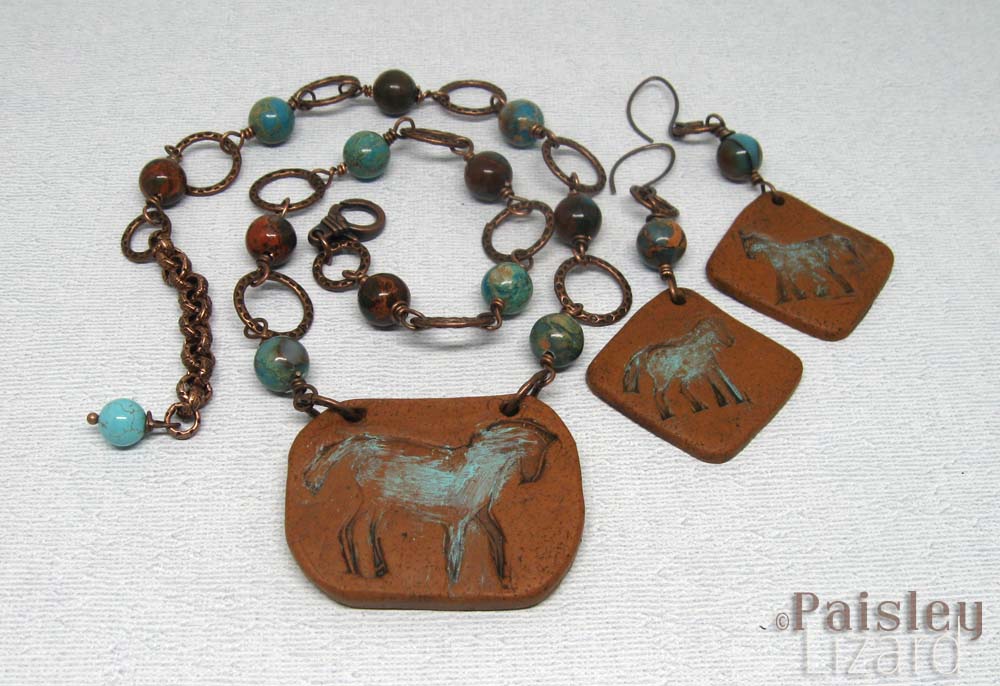
The pony on this pendant was stamped into “red rock” polymer clay and distressed with acrylic paints. The necklace is dyed jasper and antiqued copper beaded chain. I’m not sure I like the beaded chain with this pendant. It might look better with strung beads, like the other necklace.
Finally, I sculpted some horse beads from polymer clay. Keeping with the primitive horse thing, I made some little horse beads from a “terra cotta” color blend. After the beads were cured, I distressed them with turquoise acrylic paint. Actually, I made one bead, cured it, made a mold from 2-part silicone putty, and then used the mold to get the basic shape for the other three beads. I added details to each molded horse before curing. They are a little too small to use as a pendant – at least small for my taste in necklaces, but they will be perfect for earrings. When I find time to use them.
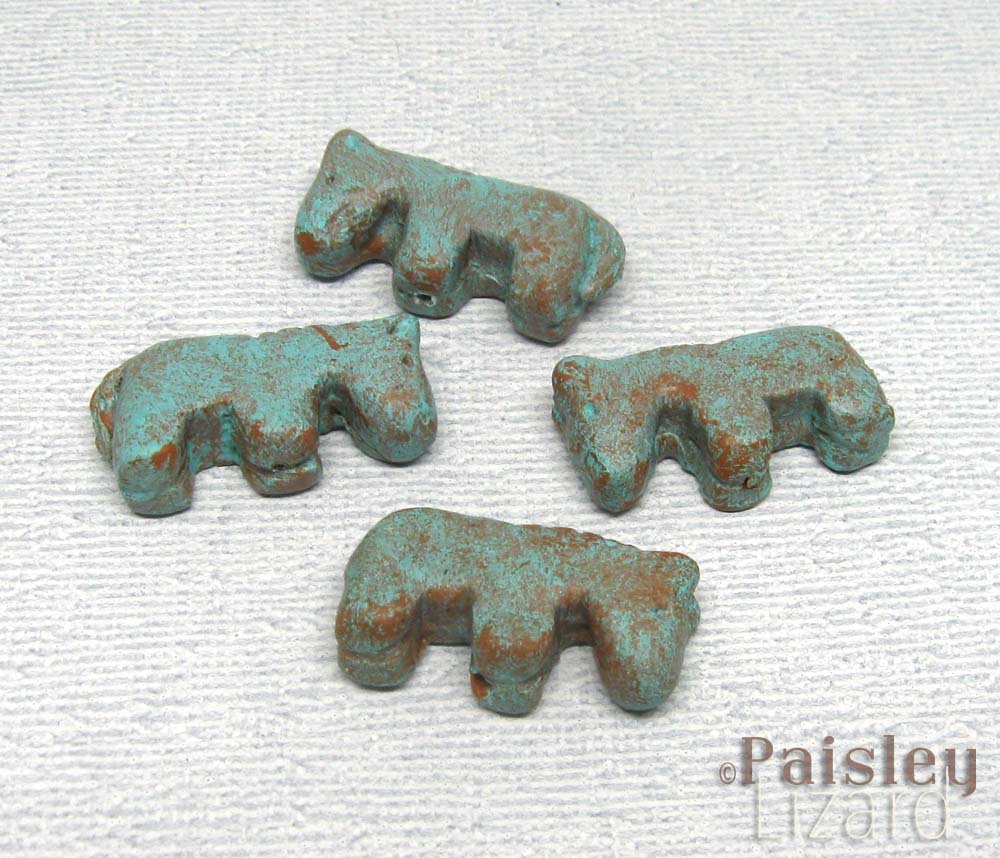
These little horse beads are made to look like painted terra cotta that’s been worn with age. They are about 25mm long, with a hole running top to bottom. I planned to make earrings with them, but ran out of time.
Many thanks to the Art Elements Team for the opportunity to participate in these monthly challenges and push myself to try new things. And special thinks to Jenny for choosing this theme. This is a blog hop, which means you should visit the links below to see more horse-themed designs by the other participating artists. Giddy up!
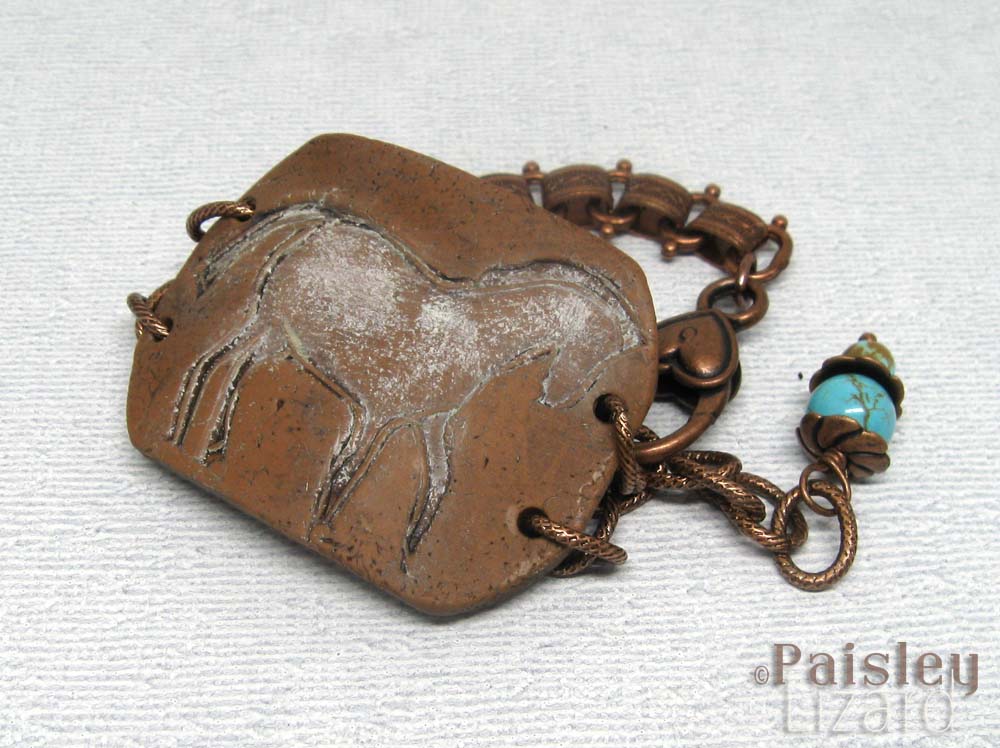
For this bracelet bar, I used my horse stamp to make an impression into polymer clay and then distressed it with acrylic paint. The bracelet has antiqued copper chain in a variety of styles, with a turquoise beaded dangle on the end of the extender.
Guest participants
Alysen
Anita
Beth
Catherine
Jill
Sarajo
Tammy <– you are here!
Paulette
Raven

You’re quite the amazing experimenter, and I love your results! The horse-with-seaweedy-mane makes me think of my take on this challenge, although it’ll be a while before I try sculpting. 🙂
Good luck for your future stamping attempts! (I do like both the beaded chain and strung bead necklace versions from the larger stamp!)
I really love to see what you created as well as reading about your process and experiments! My favorite faux ceramic pieces is also the turquoise one but the light green one is also lovely! The faux ceramic effect turned out just perfectly! With the stamp carving, yes, it is training but even more a good tool (which are expensive sadly). I love carving stamps and also used a broad range of material. One day I gave in an bought better tools… what a difference! Yes, I also still need to train more but with a complete different focus (like taking safety more serious, always cutting away from me and my hand/fingers 😉 ). The shape blades go so easily through the material that now I really have to learn how deep to cut, when to come back “up” again, what angle to use…. before it was more about force. A compromise is to buy new blades only for the hobby tools. But keep in mind they can’t be sharpened and as soon as they turn dull, get new ones. My absolute favorites from all your creations are the tiny horse beads! They are just wonderful with their dimensional and primitive look!
Beautiful work, you have been busy
Thank you for sharing your techniques. The last 2 pieces are my favorites. Well done!
I just love your Celtic Kelpie that is fabulous! I have a book here about Celtic designs and origins and it is on my list to ‘one day’ explore the art more. You have been really busy with horses!! Thanks for sharing your thoughts and techniques too 😀
Wow – you are prolific… I love the rustic feel of your pieces and great techniques employed.
I love that you made your own stamp (love the primitive horse inspiration). Your pieces are magnificent. The colors and textures all go together in a great design! Wonderful work Tammy!
Gosh what a beautiful collection of things you created! I love your faux ceramic pendants they really do look like ceramic and the colours are stunning and then those stamps! That are amazing!
These are simply fabulous! I love that you created your own stamps. I took a class on this while in college, and it was my favorite art class that I participated in. The carving part was so therapeutic. Your sweet horse designs are just adorable, and they are gorgeous on your clay pendants.
I am amazed at all the different things you managed to fit into the month! This was obviously a great challenge for you. I love your celtic pieces and don’t think the smears of color outside the lines takes away from the pieces at all. I like it. But I understand sometimes it’s difficult to like something when we get a different result than what we wanted.
And that’s awesome you tried carving your own stamps. They turned out amazing! I do think tools make a difference. I have the speedball carvers with the multiple tips, but to do fine detail work, I sprung for a Pfeil, which is an expensive tool: https://www.amazon.com/gp/product/B0032Z3E7Q/ref=oh_aui_detailpage_o08_s00?ie=UTF8&psc=1
If you don’t want any lines straying outside your design, you can trim off the excess using a box cutter. I’m not sure that works with what you carved on the back, but if you have excess, get rid of it! I kind of like stray lines in some of the stamps, so will sometimes augment those lines.
Great job, everything turned out amazing! Thanks for participating in the challenge. Hope to see you again in May!
They’re all wonderful designs, the little terracotta horses are my favourites… they’re so cute!
I have added Celtic Kelpies to my mythological faves! And, who knows, maybe they’re not myths! Your eraser carvings are such a great idea and now another one of your accomplished media projects (& gave me new ideas too).
I love all of your pieces but have to say the ‘cave’ painting effect is my fave, followed by the beads.
Oh my- You had fun with this challenge!! I just love the kelpies but the stamps you carved and the faux stone pendants that you created using the stamps are just magnificent. you make it look as though stamp carving is easy! And I know it isn’t;-)
Your horse beads are also wonderful. Great idea to make a mold after your first one. All your finished jewelry is beautiful but the red-rock one with the distressed turquoise paint is my fave!
Thanks for participating.
WOW WOW WOW! You had so many ideas, they are all awesome, fantastic!
I love your experiments – I think your carvings came out wonderfully!
The earrings are gorgeous and the necklace is perfect! I think you captured the primitive horse theme perfectly!
wow! You certainly ran with this theme. You did an amazing job on the stamp carving! I love the finished pieces you came up with, and I do love that beaded chain that you’re not sure about. Did you make the chain?
I love the printed horses! Your carving are great in that scale! The kelpies are great too. And so many Options! Sorry I missed the reveal, glad you liked the theme!
I’m so impressed with your carved stamps and the amazing pieces you created with them! The primitive horses are so perfectly wonderful. I especially love the necklace you made with the links and wouldn’t change it to being strung. Your Kelpies are pretty neat too… I think my favorite is the top one in the first picture.