 Earlier this year I experimented with two new-to-me polymer clay techniques: the Sutton slice and Swellegant metal paints.
Sometimes I make things that don’t turn out as planned. Sometimes, the results of an accident or a change in plans are better than what I first set out to create. And sometimes, well, they’re just bugly.
When the bugly thing is beads and wire, I take it apart and move on. When it’s polymer clay, I put it in a box. Because I somehow think a way to salvage it will come along. That’s how I ended up making a paisley textured copper cuff bracelet out of a purple paisley bracelet bar.
The Purple Paisley Sutton Slice Bracelet Mishap
If you’re not familiar with the Sutton slice technique in polymer clay, it’s a way to embed colors of clay in a pattern that is raised on a background of another piece of clay. It’s not complicated, but it does require some finesse with a very sharp blade. I was pretty impressed with my first – and so far only – attempt.
I decided the bracelet bar, while lovely, was too large to use as is and set about making a wide cuff out of polymer clay to serve as a base and background for it.

This is the Sutton slice bracelet bar attached to the cuff. Two things went wrong here. One, the bar cracked during baking and a brass lizard I had attempted to attach didn’t, so there’s clay and glue residue.
I don’t have much experience making bracelets from polymer clay. I’m sure there was a better way to go about it than what I did. Which was to make the cuff, use Sculpey Bake & Bond to adhere the baked bar to the raw cuff, and bake. I also tried to attach a brass lizard, painted purple, to the center, with more clay and Bake & Bond. Sorry, no photo of the purple paisley lizard endeavor, just the unfortunate cracked and scarred polymer clay aftermath.
Yes, during baking, the bar that was glued to the cuff cracked from the stress of being bent too far out of its way. Polymer clay is flexible. But only up to a point. Also, the lizard popped right off when I tried lifting it with a finger nail. And then the bar came off the cuff with very little effort. I guess I can chalk that up to first time-user error with the Bake & Bond?

This is the cuff and bar after baking. You can see some of the adhesive residue on the cuff, where the bar was attached.
The Patinated Copper Paisley Cuff Bracelet
So much for Plan B. (Plan A was to make a bracelet with the bar by itself, remember?) Now I have a cracked bracelet bar with adhesive residue, and a cuff bracelet with adhesive goo. What to do? I could probably repair the crack in the bar with some Liquid Polymer Clay. And I was able to sand the goo residue off both pieces.
By then, I just wasn’t feeling the purple paisley vibe any longer. I was in a rustic copper mood. Enter the Swellegant Metal Coatings. If you haven’t tried these, and the patinas and dye oxides that go with them, you’re missing out. You can give the look of rusted, patinated, crusty aged metal to almost anything you can paint.
The metal coatings come in copper, silver, brass, bronze, and iron. Copper is my all-time favorite metal. And I thought the paisley cuff would look excellent with a blue-green patinated copper finish. Step one was to cover the purple polymer clay in metal coating. This isn’t metallic paint. It’s actual metal in a suspension of some kind of magic.

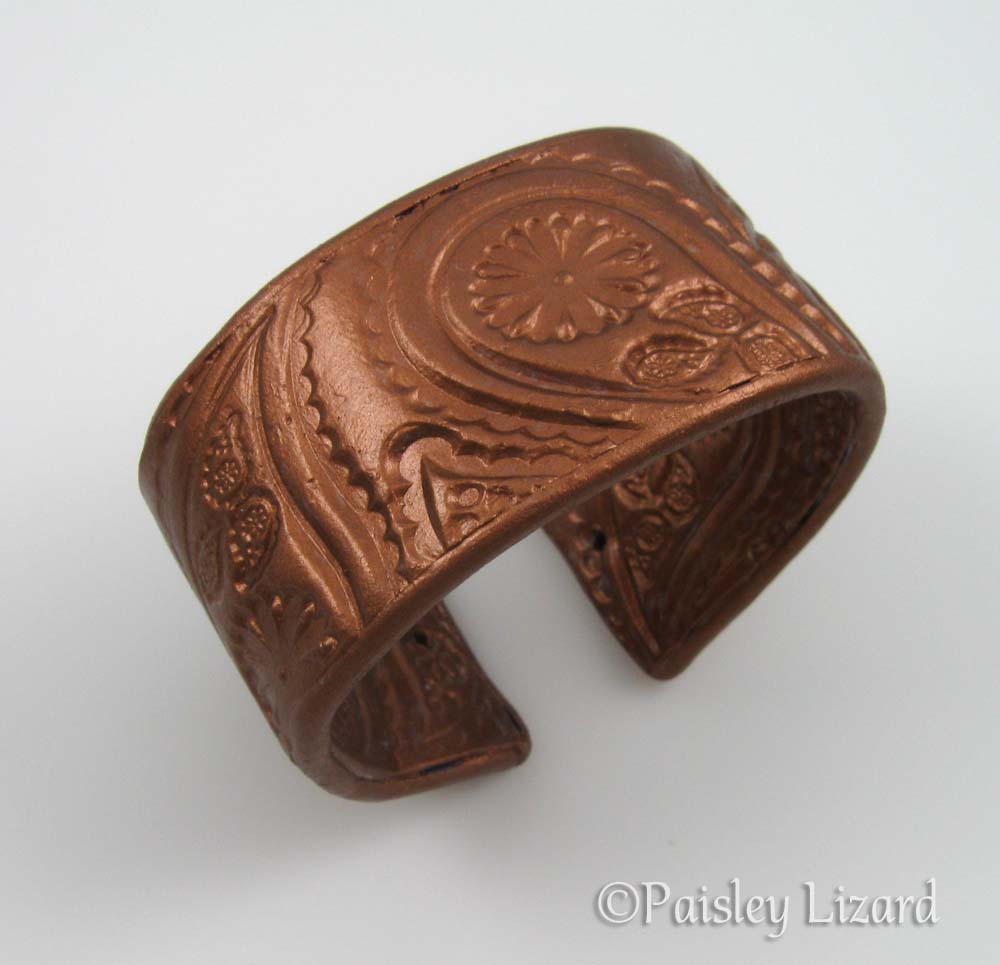
This is that purple paisley cuff with three coats of copper Swellegant metal paint. It looks a lot like stamped metal, don’t you think? Or maybe tooled leather.
Once all traces of the purple polymer clay were covered in copper, I used the Tiffany Green and Sky Sapphire patinas. These are chemical patinas that react with the metal coating. They can be used on solid metal, and some plated metals too.

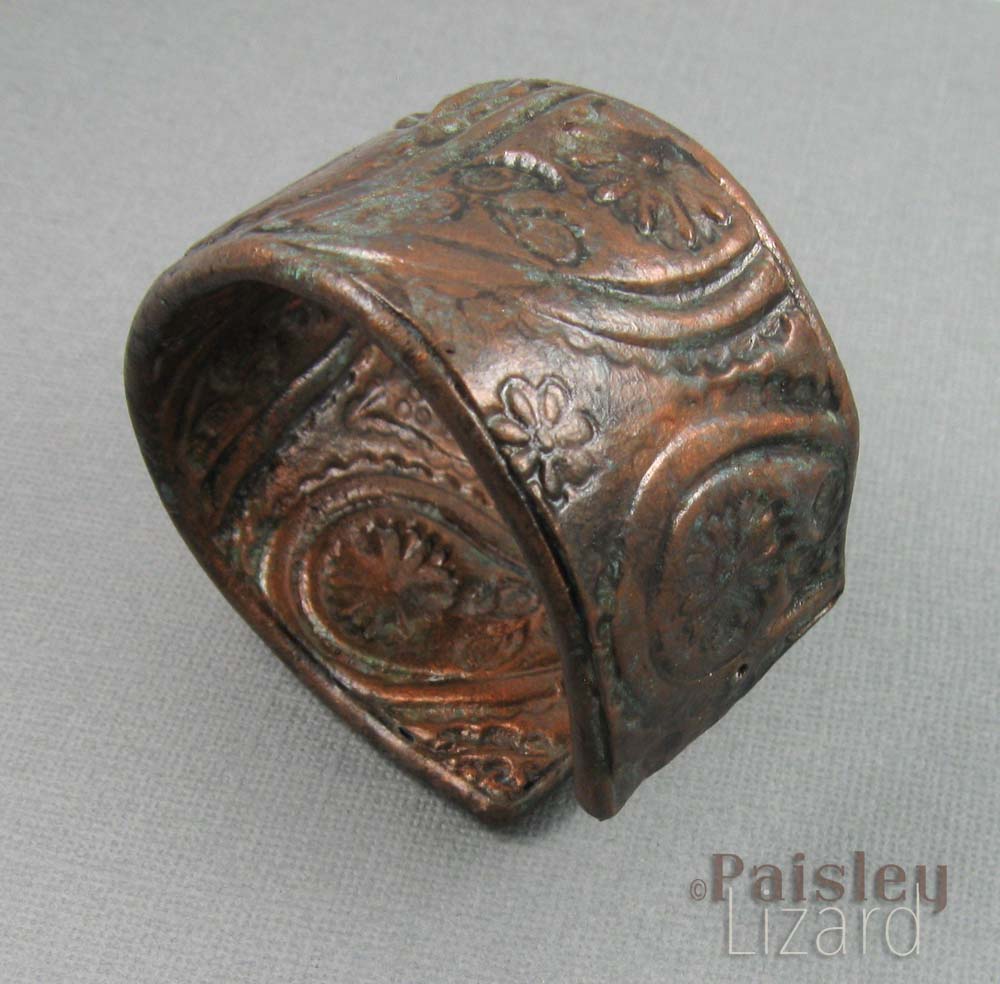
The patinas did their thing, turning parts of the cuff blue and green. I applied them all over, but they have a mind of their own about where and how they choose to react.
I have to say that at this stage, with the almost moldy looking patina on the cuff, I wasn’t sure Plan C was any improvement on A or B. After stopping the patina reaction, I set this aside for weeks. I was going to give up on it.
And then I decided to paint over the patina with a new layer of copper, and try again with the Darkening patina, which does just what the name implies, it turns the copper from shiny bright to darker brown. I figured I could then use some of the dye oxides to try to add a less moldy looking blue-green patina effect.
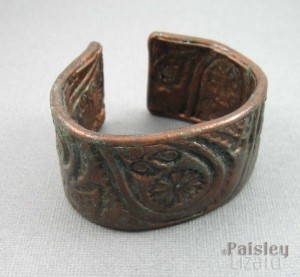
And that’s when the magic happened. When I added the Darkening patina, some of the blue-green patina re-bloomed, but in a more subtle coverage that was enhanced by the darkening. This was the aged rustic look I had envisioned.

Another coat of copper metal paint and then the darkening patina were just what this cuff bracelet needed.
Even though I rarely wear bracelets, I think I’ll keep this one in my personal collection. The copper patina finish is yummy, but the piece still has some warts. For one thing, the curve on the back side isn’t perfect. The two ends flare out and away from the wrist a teensy bit. I had put holes in each end when it was purple paisley, planning to attach a magnetic clasp to make it adjustable.
The holes are still there. And I have no idea where I put that clasp after it arrived in the mail. It fits fine without a clasp and isn’t likely to fall of unless the wearer has very small wrists. But the holes are visible if you look closely. Maybe I will add some beady dangles. I do love me some beady dangles.
That’s the story of how my purple paisley Sutton slice bracelet bar became a patinated paisley copper cuff. The morale of this story, in case you needed one, is don’t give up on your bugly polymer clay creations. There’s almost no such thing as ruined or unsalvageable when it comes to polymer clay. You can paint over it, coat it with metal, use it as the base for something else, and even break or chop or shave it into bits to use as inclusions in other polymer clay pieces.


What a wonderful rescue story, Tammy. Hooray for your perseverance and the striking results you achieved. I’ve never worked with polymer clay….is this bracelet very ‘strong’ i.e. not fragile? It sure is pretty!!!!!
Thanks, Barbara. The bracelet is not as strong as, say, solid copper, but it is durable. It’s got enough flexibility to allow bending to put on and take off. And there’s a sheet of metal – a bracelet blank designed for reinforcing polymer clay bracelets, baked between two layers of clay.
Oh I like. A lot! 🙂 I haven’t experimented much with Swellegant on polymer clay. I think I only used it a bit as soon as I got it and then switched to metal. Did you paint the metal coating directly on the clay? Thought you had to use the primer first.
Thanks, Marica. I did use the primer. I’m not sure how necessary it was. But it came with the kit I bought so I used it. I’ve since used the metal coating on pc with no primer. I’m waiting to see how it holds up.
I see. Was just wondering. I think I’ve seen people not using it. Haven’t tried it myself though.
I want to get more dyes and experiment more with Swellegant.
Nice save! I love how versatile polymer is and how pieces can be changed when they don’t meet our expectations. Swellegant paints are on my list of stuff to get, I love how they transformed your bracelet!
Thanks, Beth. I feel fairly justified in not throwing away polymer clay mistakes because it is so versatile I know I will eventually find a way to fix or repurpose the piece. The Swellegants are fun. I’ve used the patinas and dye oxides on some metal bits in addition to covering polymer clay with the coatings. I look forward to seeing what you do when you get some for your studio.