 The theme for the Self-Representing Artists in Jewelry Design challenge in May was “enamel and resin.”
I still don’t own a torch. A torch is an essential ingredient in enameling, from what I’ve read. I’ll get one eventually. When I decide I have space to store it and all the bits and pieces that go with playing with fire in your home.
I only started experimenting with resin about a year ago. I started with the UV-cure kind, which is a gel that doesn’t require any measuring or mixing. And it hardens in minutes, as opposed to 6-12 hours or longer for the two-part epoxy resins used in jewelry making.
Even though I’ve worked my way up to using the two-part kind, I haven’t played with it much. Every time I set out to use it, I feel like I’m preparing for brain surgery or something equally delicate. I mean, you have to measure precisely, mix carefully, and then take every precaution to ensure the piece is on a level surface and free of any stray dust, cat hair, etc. while it cures.
This is not easy when your “studio” is also your kitchen counter. And you have cats. And it’s summer so you have your ceiling fan on to circulate what little cool air your a/c can manage. So, where do I cure my resin pieces? In my oven, of course. No, the oven isn’t on; it’s too darned hot to think of that. Which makes the oven the best place to put things you don’t want tipped over or coated with lint and whatnot.
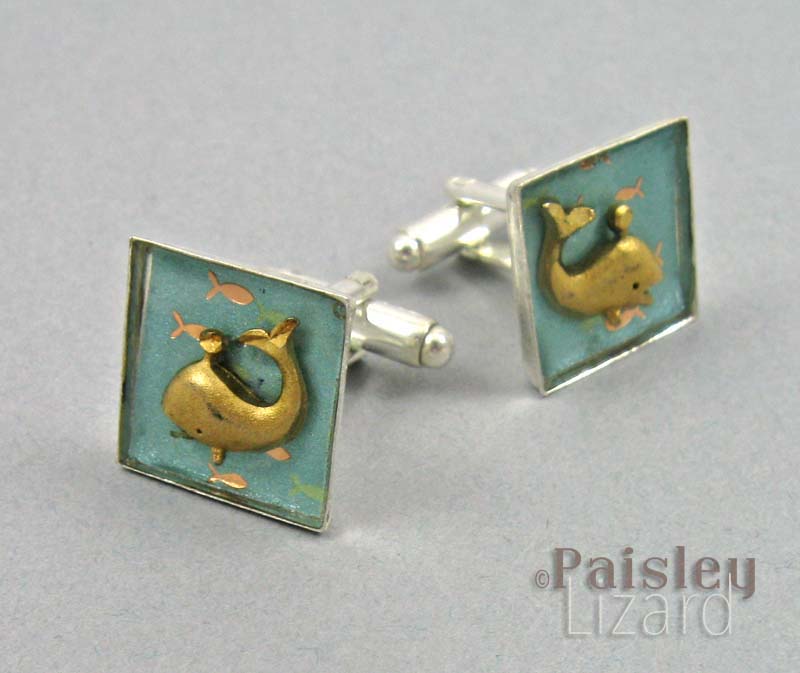
And that is why I reverted to the UV-cure resin for my first project. I’ve had these cufflinks in the planning stages for I can’t remember how long. I had all the parts in a little project box, just waiting for me to work up the courage to mix some resin. Why didn’t I just use the UV-cure stuff back when I came up with the design? I can’t even remember why.
I put a piece of scrapbook paper as the base in the silver-plated cufflink blanks. It has little fishes. Then I floated some goldtone whales in resin over the paper. The whales are repurposed earrings, with the posts cut off the backs. The finish on the whales is a little scuffed, which I think adds to the sort of vintage-inspired charm.
I really wanted to try enameling for this challenge. But I also am still reluctant to bring more tools and supplies into an already overflowing craft space. I’ll get a torch eventually. Just you wait and see.
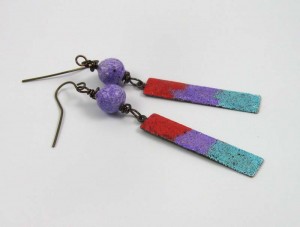
In the meanwhile, there are these “cold enamel” powders called Iced Enamels, which come in some lovely colors. I’ve used them before and they’re very simple. To prep the piece, just lightly sand your metal component (some Vintaj brass blanks in this case) and brush on the enameling medium. Then sprinkle on the powder and cure with a heat gun. The only complicated part is that you have to seal the powders with resin so they don’t scratch off.
When I first used Iced Enamels I tried sealing the pieces with the UV-cure resin. It didn’t cure properly and stayed sort of tacky or sticky. Maybe that was just user error on my part. But, to be safe, I followed the directions this time and mixed up some Ice Resin. I brushed on a thin coat and then had left over resin. So I threw some mica flakes into bezel and poured in the resin. Waste not, right?
While I was waiting for the resin to cure, I went to bed. Hey, it was late and that stuff needs to be left completely alone for at least 6 hours. The next morning I decided my fauxnameled components needed some coordinating beads. Do I not have any purple, red, or turquoise beads? Of course I do. But where would be the fun in that?
I decided to see what happens when you put Iced Enamels on baked polymer clay. So I coated some white beads with the medium, dusted on some powder, and cured with a heat gun. It seems to work about as well as it does on metal. You just have to be careful not to scorch the beads while melting the powders.

These earrings will go into my “experimental” box. I’m not sure how the Iced Enamels will hold up on the polymer clay beads.
Being too lazy to stir up more resin, I decided to try sealing the Iced Enamels onto the polymer clay beads with a layer of liquid polymer clay. I brushed on a coat of Kato Liquid PolyClay and cured that with the heat gun. In the process, the Iced Enamels bubbled and crackled. I quite like the sort of crumbly and cracked effect. But the beads are somewhat fragile in that the coating was easily scraped off.
Ideally, I should have popped the beads into an oven to really make sure the liquid polymer clay was fully cured. But, as previously mentioned, it’s far too hot to use the oven. I’m sort of curious what would happen to the Iced Enamels if I put the beads in at 265 degrees F for 15 minutes. Would it bubble and crackle even more? Would it peel or scratch off later? That’s an experiment for this fall when it’s cool enough to turn the oven back on.

These earrings are likely destined for a make-over later this year. The round purple beads will need a proper cure in the oven, or I’ll need to make some with a resin coating.
Meanwhile, I have once again used two-part epoxy resin without any disastrous effects. There were no bubbles, no spills, and the metal components turned out nice and shiny with a durable finish. Maybe I should try this on a larger scale?


What a wonderful, informative blog post, Tammy! You taught me a few things this morning. Thank you!
I think both the cuff links and earrings turned out great. Well done.
I got tickled about your reasons for not buying a torch, as I’m having the same problem with where to put anything new in my studio. So, I’ve yet to purchase a few new tools I’d like to try as well.
Thanks for an enjoyable peek into your world. Great read and beautiful work!
Thanks so much for stopping by, Susan. Space for tools and toys has always been a problem. As you well know, it’s not just a matter of having a place to work with them, it’s about where to put them when you aren’t using them. But some day, I will play with fire. 😉
Tammy, it was so enjoyable reading about your process. I love the colors you chose for your earrings…they just pop, and I think they came out great! I’m sure it must be very rewarding to have the will and confidence to try new things. Awesome job and thanks for sharing the fun of creating!!!
Thank you so much, Barbara. I do enjoy playing with new toys and techniques for my jewelry designs.