I know I should have been outside enjoying the warmer weather this weekend, but the tree pollen was killing me. Or at least making me feel like death on a cracker. So, I stayed inside with my HEPA filters and played with polymer clay and two fabulously fun faux finish tutorials I bought on Etsy.
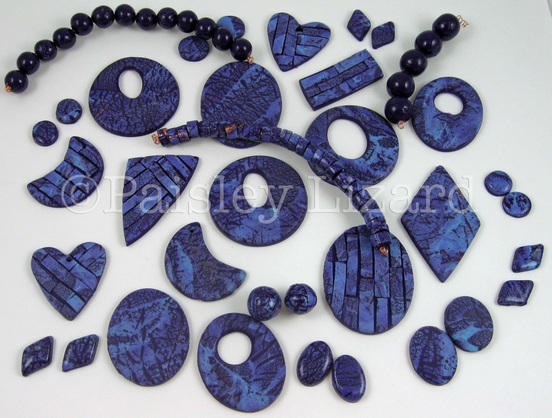
The first tutorial is one I toyed with last weekend – Masterful Faux Made Easy by Lynda Moseley/Diva Designs Inc. When I played last weekend I made faux purple turquoise. As you can see here, I made a nice assortment of sizes and shapes of cabochons and pendants, some in a mosaic style. Lynda shows how to use every last little scrap of the recipe in mosaic inlay pieces. I got impatient (and a little cross-eyed) with that and made some beads with the littlest scraps instead.
For the round beads I smooshed up the scraps, blended them all together and used a bead roller to get uniform shapes. You probably can’t tell from the photo, but there are teeny weeny flecks of copper and blue in the dark purple bead strands near the top. Before I did that, I extruded some of that smooshed up scrap into a snake, wrapped some of my thin pieces of faux turquoise veneer around it and cut that into irregular heishe-style beads (they’re sort of in the center of the photo, all strung together on a piece of copper wire).
The basic recipe calls for a black matrix, but I didn’t have any black clay (How did that happen! It’s a staple in any polymer clay studio, right?) Anyway, as the tutorial suggests experimenting with other matrix colors, I went with deep purple. I really like the effect and just need to find time to finish these (sanding and polishing – not the most fun part of playing with clay) so I can incorporate them into necklaces and earrings.
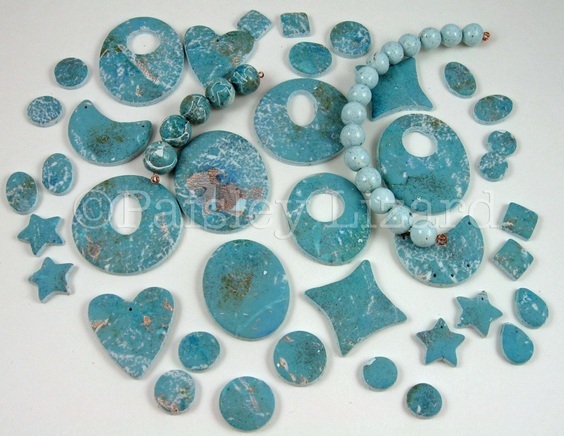
That was last weekend’s recipe. This weekend I tried one of the blue turquoise recipes. With some modifications, of course. Again, I didn’t use black as the matrix color. I was going for something close to Sleeping Beauty turquoise, which has very little to no visible dark matrix. So I used a very pale turquoise tinted base.

Faux aqua-blue turquoise (or maybe larimar) beads, pendants, and cabochons.
I made some of the same shaped pendants and cabochons as with the purple turquoise. This time I didn’t make any mosaic pieces. I was so happy with the smooshed scrappy beads with their subtle flecks from last weekend that I did the same thing this time, making more round beads with subtle flecks of color to complement the pendants and cabochons. Except first I made a few (five, actually) composite looking beads by wrapping some of the torn pieces of veneer scraps over the base color.
I really REALLY love how this recipe turned out. It doesn’t look like Sleeping Beauty turquoise, but that’s okay. I think it looks a bit like larimar. I might revise the recipe a little next time to see if I can get closer to larimar. And after that, I think I will try the lapis recipe. There are endless possibilities in this tutorial. I’m in love.I have always preferred to use actual semi-precious gemstones in my jewelry and never saw the appeal of making my own beads from polymer clay. This tutorial has changed all that. It’s the best of both worlds for me – I get to play with clay and have beads that look like my favorite gemstones, or at least some fabulous imposters.
And speaking of fabulous tutorials, I finally, at long last, had assembled all the ingredients necessary to try the Holo Effect faux dichroic tutorial from Ginger Davis Allman/The Blue Bottle Tree. I got this one before Christmas, and wanted to make ornaments, but didn’t have all the pieces in time. Then, I wanted to use it to make some Valentine’s pendants. But I was resting my wrist after developing tendonitis from too much clay extruding before Christmas and missed that time window.

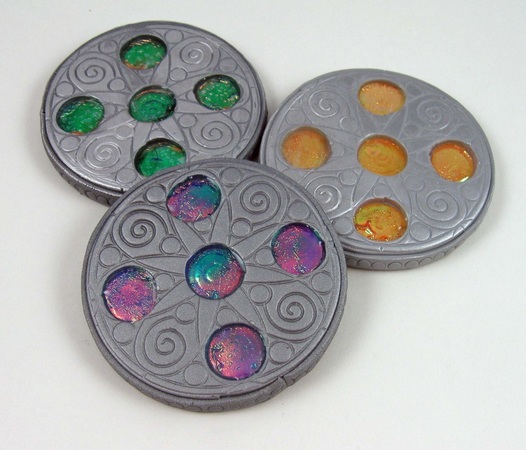
Faux dichroic inlay pendants.
With no holiday in mind, and thus no need to make ornaments or heart shapes, I was lacking inspiration for shapes. Then I found a rubber stamp with a design that would go well with cutouts, and I used it to make these medallion pendants.
I only made three pendants – same shape, different color inserts. It was a short weekend and I had chores to do. Anyway, they really do look like dichroic glass (in person, if not in this photo) and change color as they move. My photos do not do the technique justice. You need to check out Ginger’s photostream to get the real effect.
I am looking forward to trying this one again, and maybe getting it right. I have some bubbles I thought I dealt with, but they sneaked back in when I wasn’t looking. Also, this tutorial gave me an excuse to finally play with resin. I was a little trepidatious about mixing and pouring and leveling, and also more than a little impatient about waiting for the curing. So, I went with a UV-cure no-mix version (Lisa Pavelka’s Magic Glos). It’s like epoxy resin with training wheels. I will work my way up to the actual two-part stuff. Baby steps.
So, that was another fun with polymer clay weekend for me. Hooray for tutorials that illustrate techniques, leave room to experiment, and encourage individual creativity.You may be seeing some of these pieces in my Etsy shop soon, incorporated into necklaces and earrings. Or, you may see some of them as prizes in give-aways on my Facebook page. Stay tuned.


Absolutely gorgeous faux, Tammy! I knew you would take the basic technique and put your own wonderful spin on it. It is very gratifying to hear and see the results of your own experimentation! I can’t wait to see more! Thank you!
Thank you, Lynda. I love the technique and can’t wait to have more time to try other recipes.