The theme for this month’s design challenge from the Art Elements design team is luna moths. These members of the giant silk moth family, Saturniidae, are a spectacular subject for art inspiration, from the colors and patterns in their graceful wings to the textures of their fuzzy bodies and antennae.
I’ve never met a luna moth in person, but I’ve admired them in photographs. I admire moths in general, although they did frighten me as a very young child. Or rather, I was initially afraid of one rather large, very fuzzy moth intent on landing on me one evening as my family sat outside in the glow of the porch light. I have no idea what species it was, nor do I even recall the color. My memory consists of a huge fuzzy thing flying at me, repeatedly trying to land on my head. My dad ‘saved’ me from the moth by getting it to land on him. Once it was stationary, and Dad convinced me it wouldn’t bite, I was able to get a good look and appreciate the beauty. I’ve been a moth fan ever since. I should mention, I have the same ‘flight or fright’ response when any object, living (bees, June bugs, grasshoppers, bats, my cat jumping off the dresser onto my bed) or inanimate (e.g. baseballs, tennis balls, badminton birds, paper airplanes) flies toward my face. So, it truly wasn’t personal, Giant Fuzzy Moth.
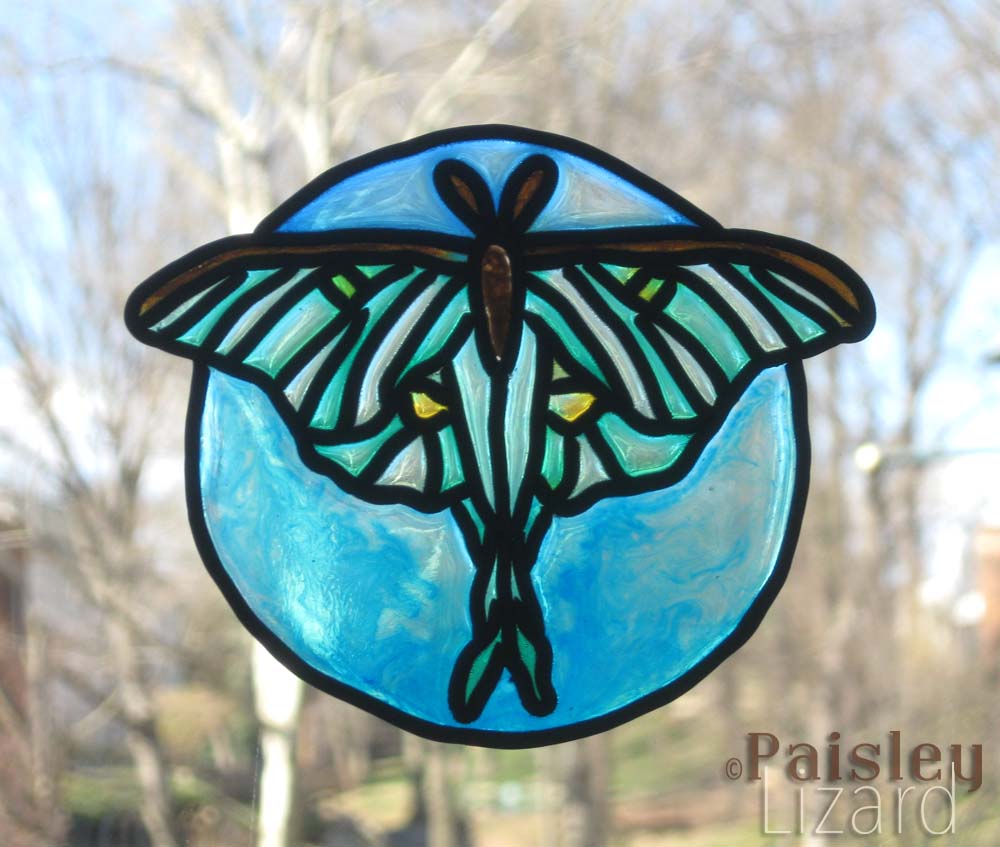
The first piece I finished for this challenge was a stained glass effect window cling made from polymer clay. For the lead lines, I extruded a thin rope of Sculpey Graphite Pearl. After working on the details for a bit, I realized I should have made the rope thinner, at least for the inner lines. But by then I had too much time invested and was too lazy to start over. After all the lines were more or less firmly stuck to the glass (more on the less in a moment), I used liquid polymer clay tinted with alcohol inks to fill in the shape. Some of the colors changed during the cure, as alcohol inks are known to do. One day maybe I’ll make swatches to help me remember what the final results would be.
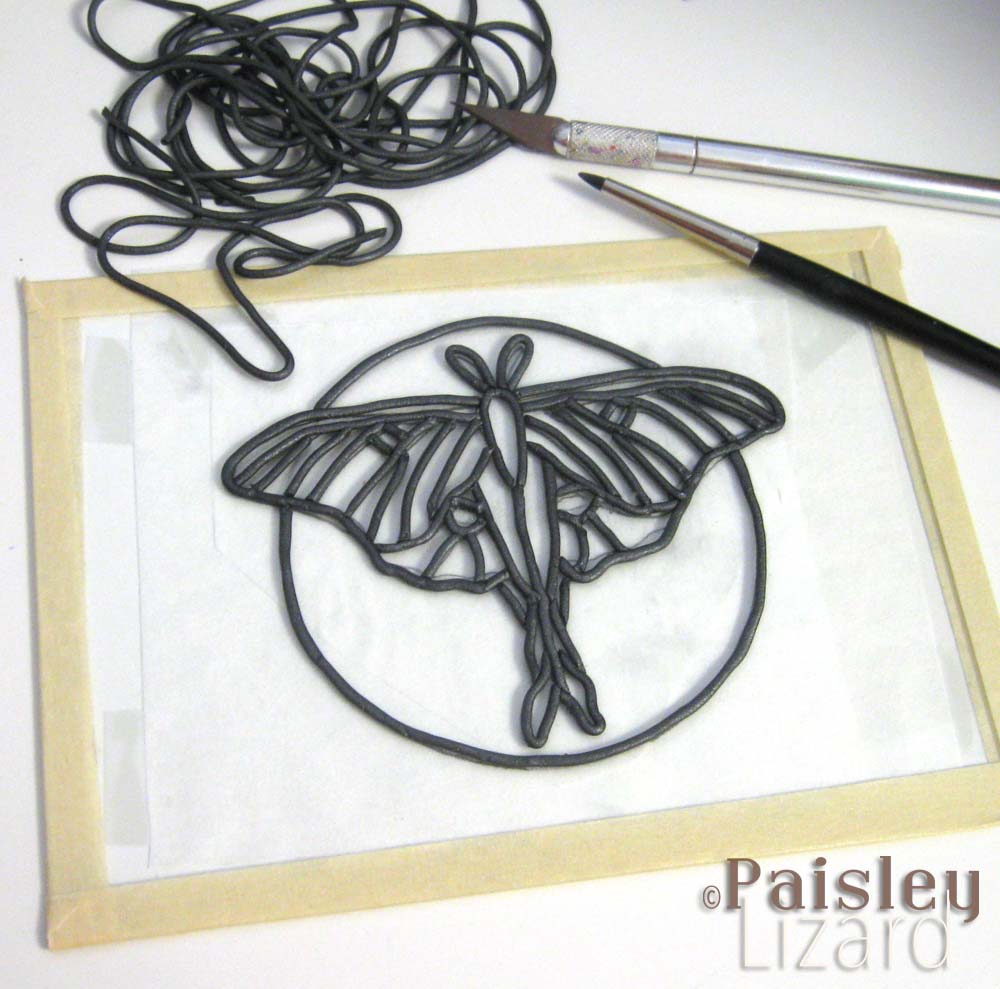
As to the more or less, there were, naturally, a few spots where the lines weren’t as stuck to the glass as I thought and thus some colors ventured into the “wrong” parts of the design as I worked. Overall, it turned out rather well for a first attempt at this technique. And it sticks to glass quite nicely. If I were to do it over, in addition to using thinner ropes for the interior details, I might make the background amber, like a glowing moon.
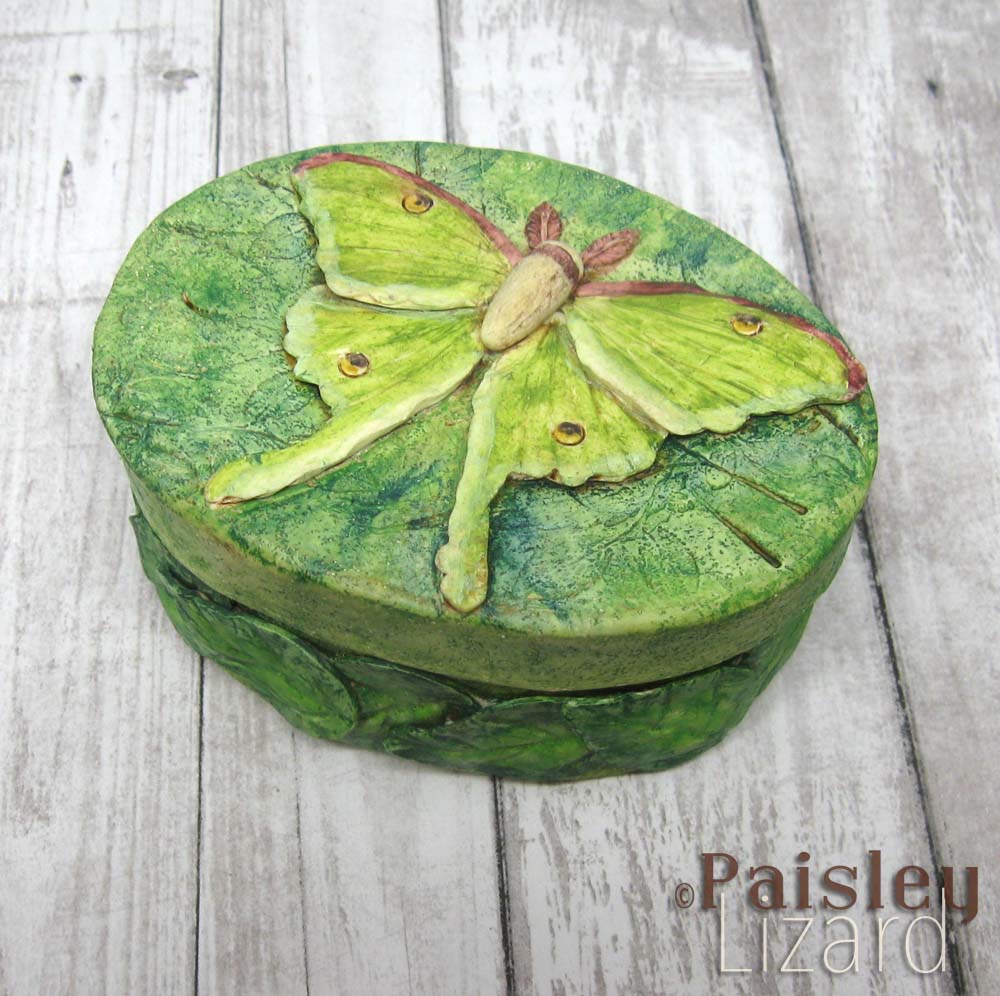
The next piece completed for this challenge is a small jewelry/keepsake box. I think I’ve mentioned once or twice my obsession with covering things in polymer clay? And that I have a large plastic tote filled with papier mache boxes in assorted shapes and sizes? Yes, well, a smallish oval box from that stash was the perfect setting for a luna moth relief sculpture.
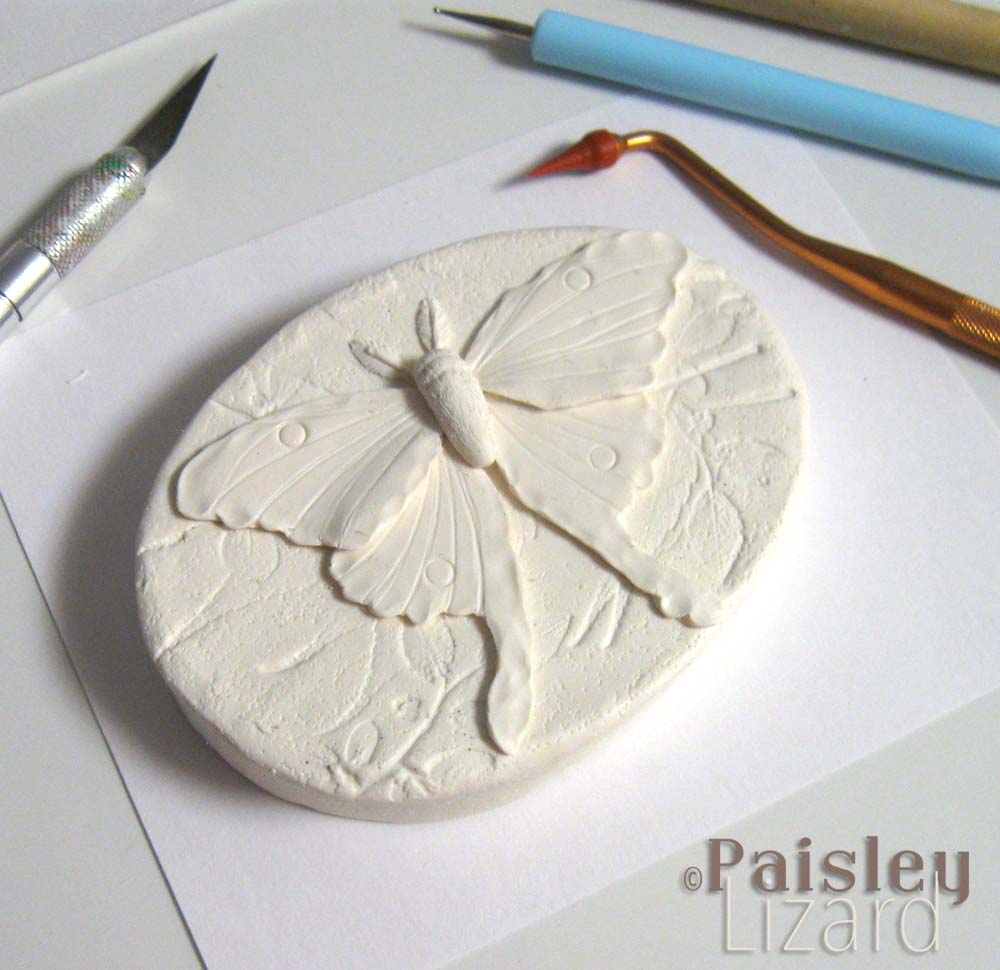
The cured box sat in a corner of my workspace for a couple of weeks while my muse contemplated what colors to paint the background. The moth itself was, of course, green. But for a while I wasn’t sure if the background would also be green, or if I would get wild and make the leaves mauve or something. In the end, shades of green won the day.
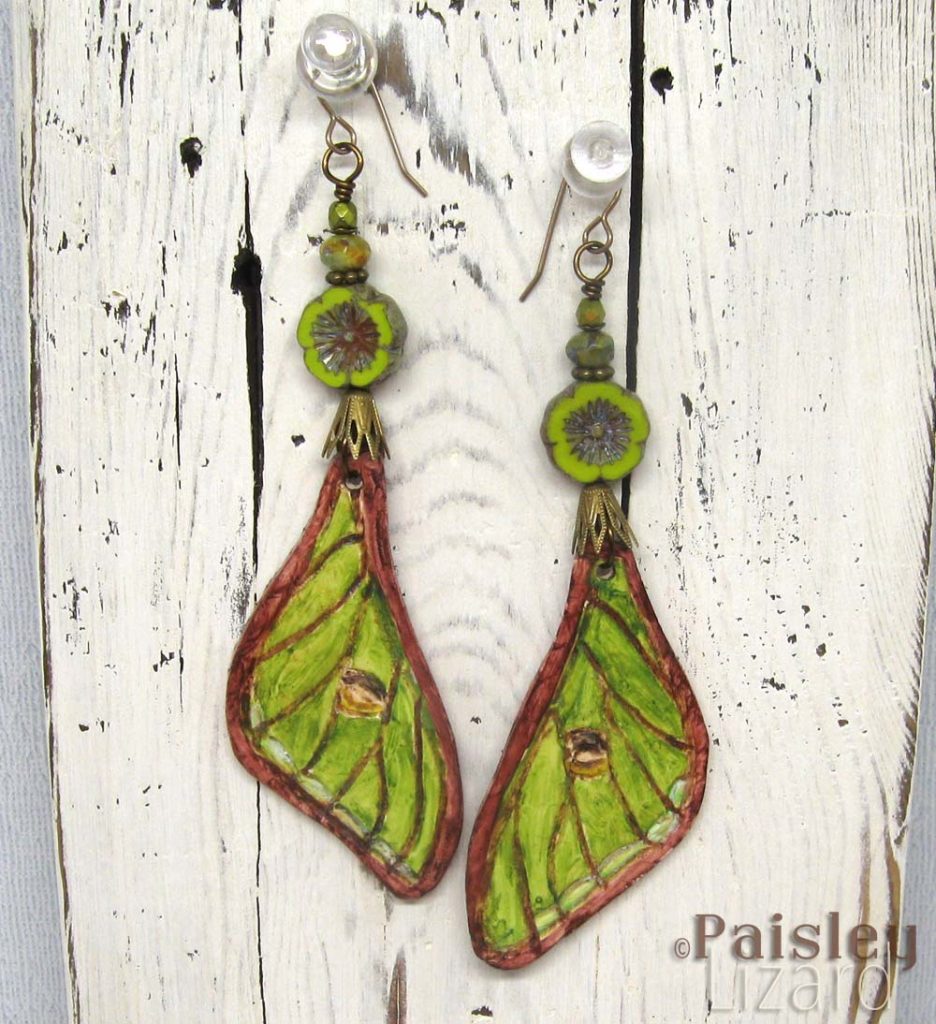
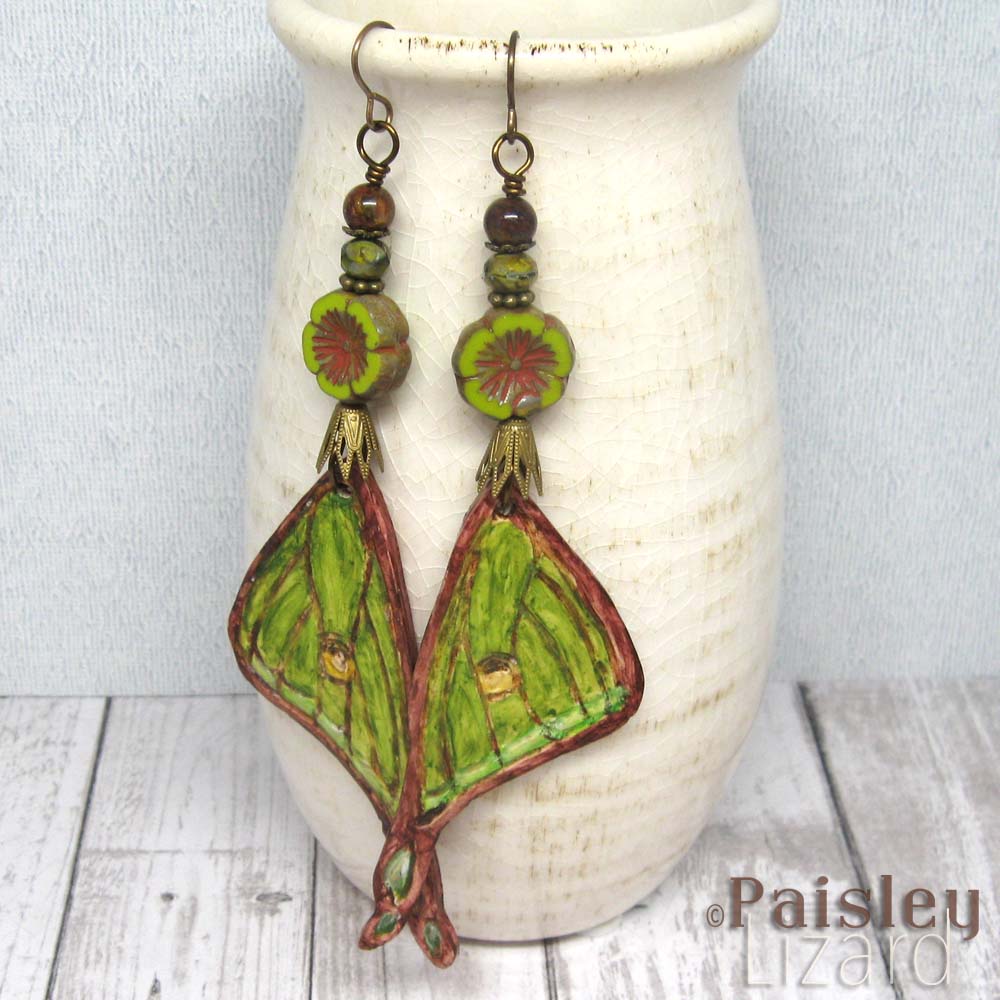
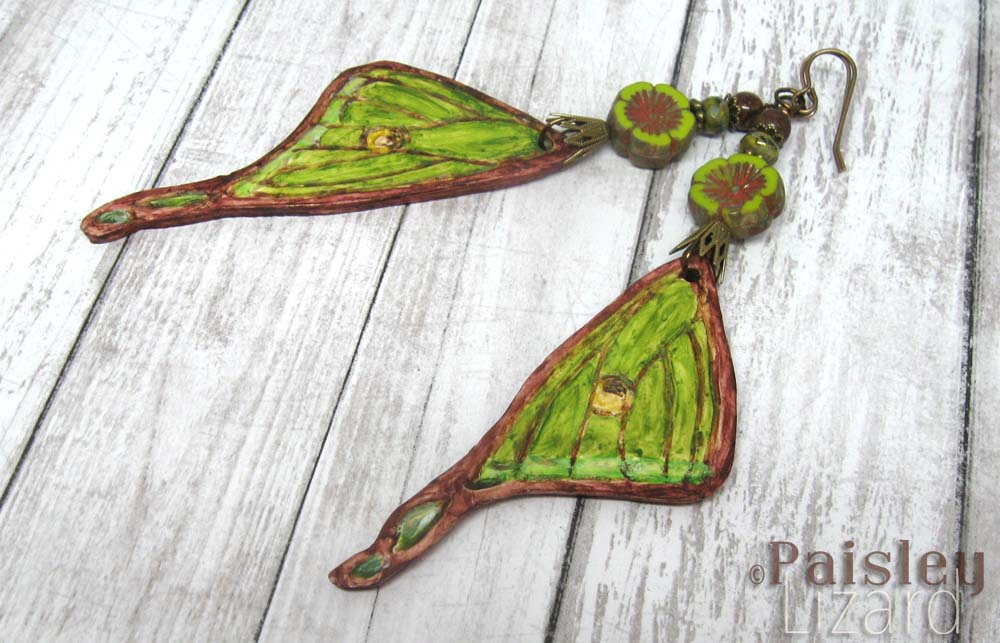
While I pondered how to paint the keepsake box, I made some moth wings for earring focals. They are made from my go-to off-white blend of polymer clay and then colored with Inktense blocks after curing. The color is sealed under a layer of liquid polymer clay that gives the wings a semi-gloss finish.
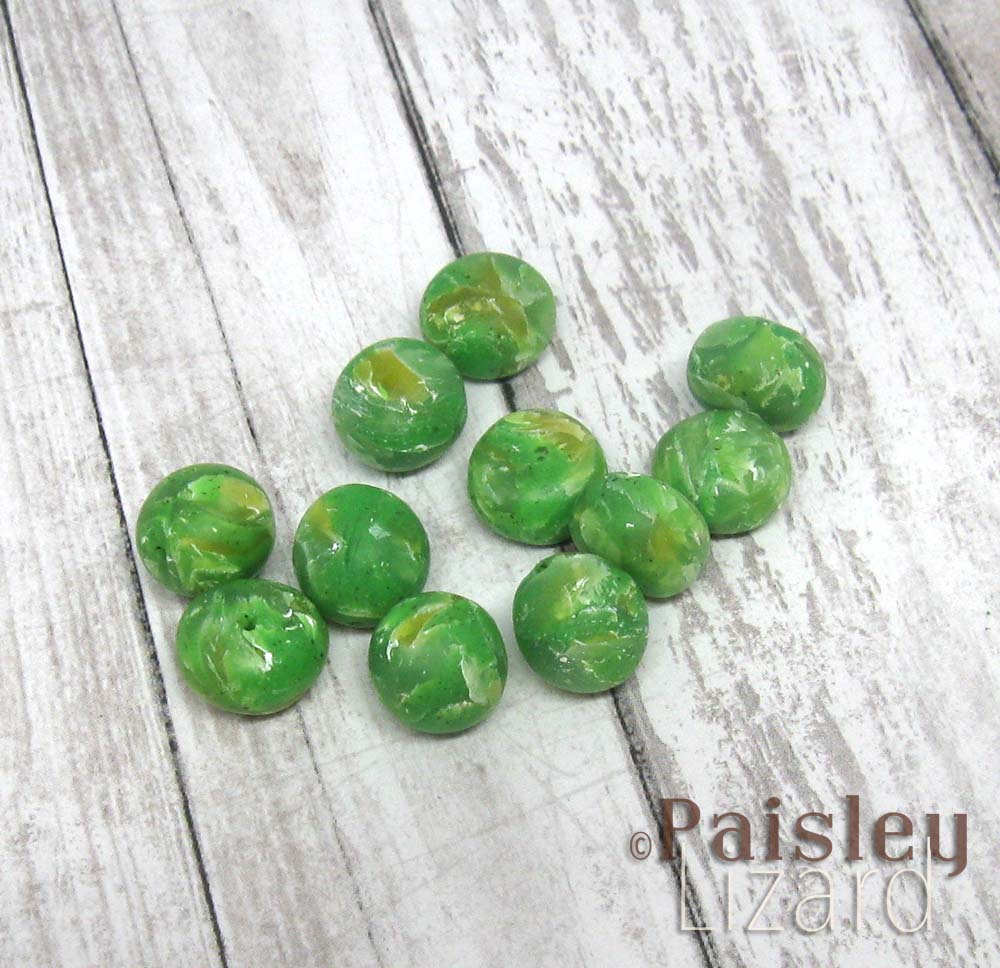
I made a small batch of accent beads in my best attempt at luna moth caterpillar colors. When I mixed up the polymer clay recipe, I intended to use it to make a caterpillar brooch. When things didn’t go according to my lack of a plan, I balled up the mistakes and made beads. I’m sure I’ll find a purpose for them eventually.
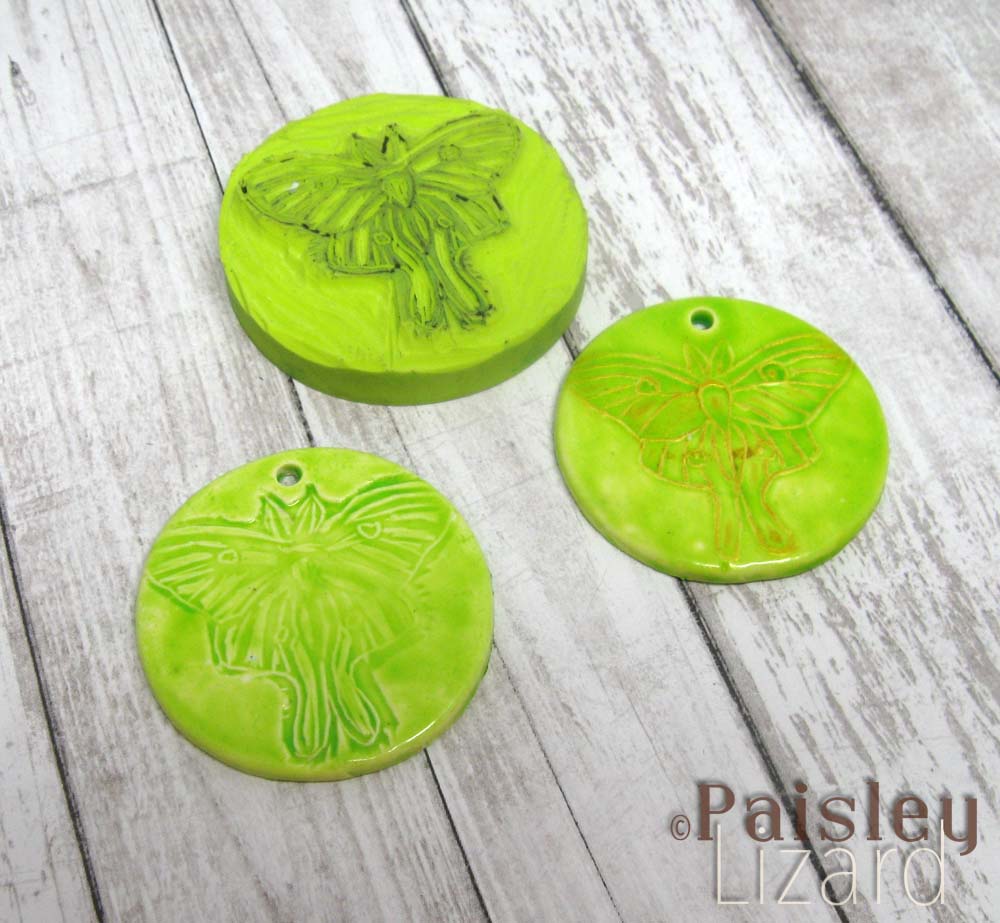
Another “also ran” idea for this month was stamp carving and using the stamps to make polymer clay pendants. I splurged on a Pfeil thin gouge carving tool, per a recommendation in a comment on my first post about stamp carving. It definitely makes consistently better fine lines than the less expensive tool I have. It does not, however, improve my spatial skills regarding keeping track of which bits of the block to carve away versus leave. It also does not improve my fine motor skills and thus ability to carve along the lines. I will keep practicing the carving. But for the purpose of this challenge, my grand plan to carve stamps for making luna moth pendants did not work out.
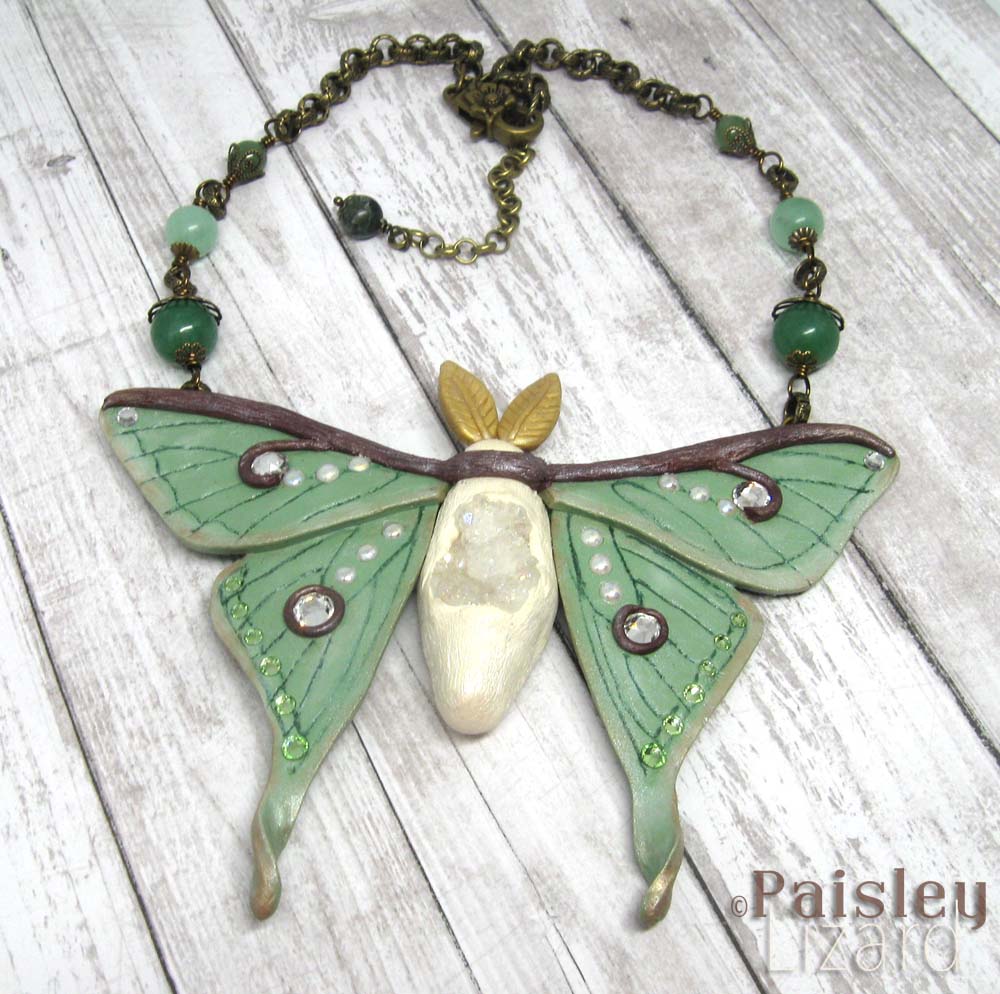
My final piece for this challenge is a near life-sized moth pendant. I have had a Christi Friesen luna moth tutorial for years and this challenge was the perfect reason to give it a try. Of course, I deviated from the instructions a bit, referring to the tutorial as a guide for assembly more than design. Anyone who has used that tutorial would probably recognize the Friesen-inspired elements.
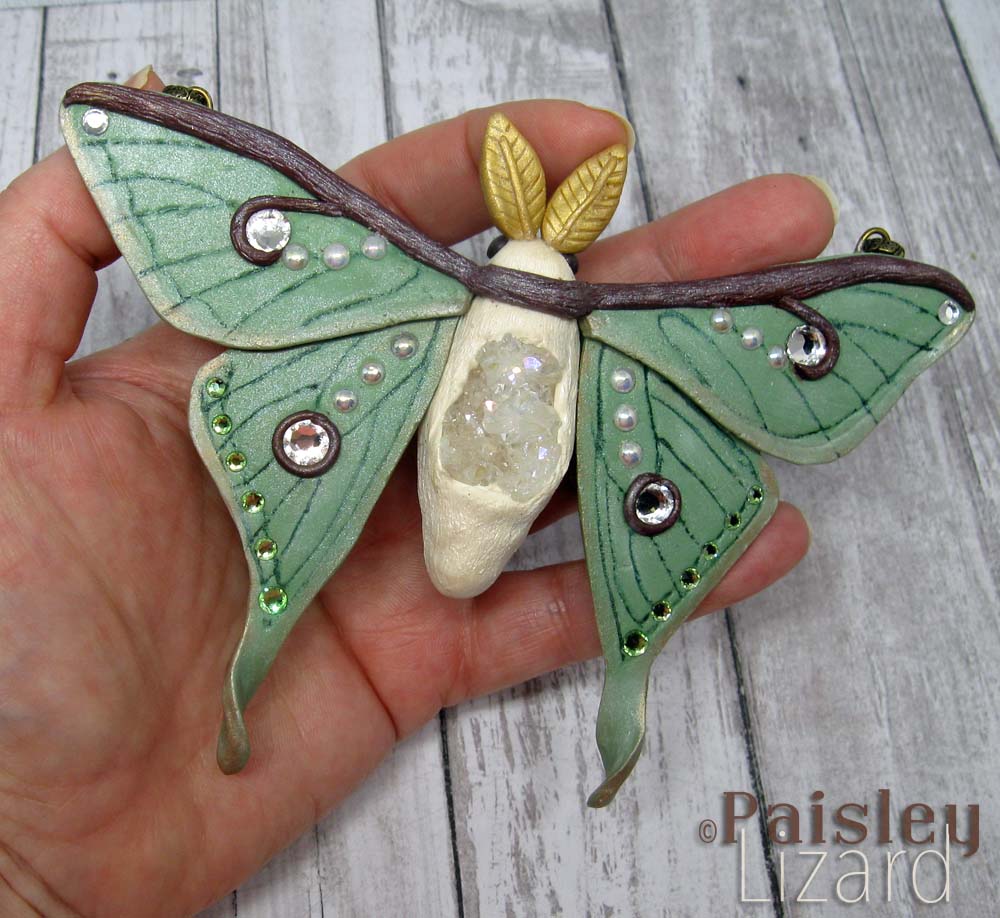
One of my alterations to the tutorial was to embed a druzy pendant in the moth’s body. This complicated assembly somewhat and resulted in the need to improvise a structural patch for overall strength. As a result of the way the patch looks (not visible from the front, but not a very “clean” back), and a few other improv design decisions (like painting the veins even though my hands are not steady), this piece isn’t suitable for sale and will remain part of my personal collection. Don’t you just hate it when that happens and you end up with a new piece of jewelry? No? Me neither.
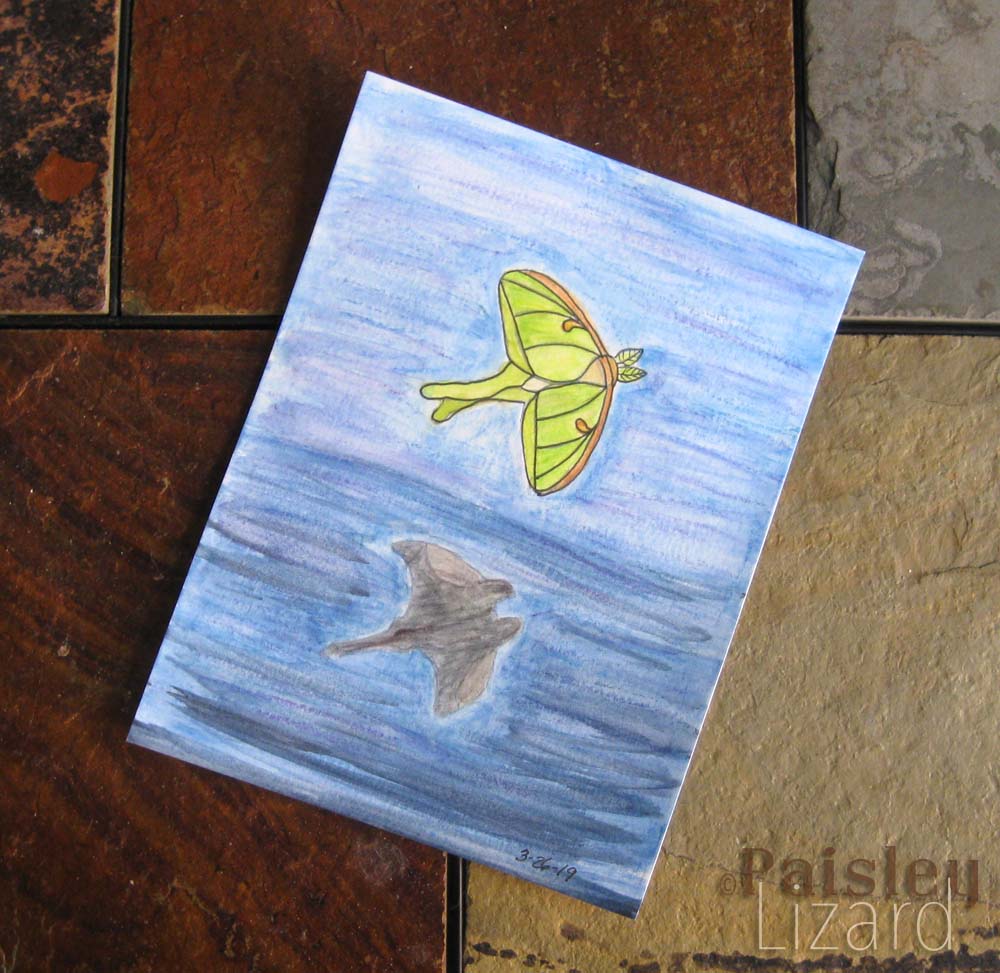
On my to-do or do-over list from this challenge: (1) carve new moth stamps for making polymer clay pendants (i.e., keep practicing the carving), (2) find a design use for the caterpillar beads, (3) make another sparkly luna moth pendant/necklace without the boo-boos from the prototype, and (4) learn to use my Inktense pencils and blocks to paint on paper because I have this awesome vision of a luna moth flying above a moonlit ocean casting a shadow that’s actually a manta ray just under the water’s surface because have you ever noticed how they have the same basic silhouette? but I don’t know how to paint on paper so you’ll have to close your eyes and imagine what that would look like if I knew how to paint. There’s no telling when or if I will get around to completing this list. It’s got a lot of competition from other also-ran ideas from previous challenges, not to mention new design challenges on the horizon.
Thanks to Jennifer Cameron for this month’s design inspiration. This design challenge is also a blog hop so be sure to visit the other participating artists for more luna moth creations. You’ll be amazed at the diversity of techniques and media used and awed by the talent in this group.
Guests:
Tammy <–You are here!
Art Elements Team:

As with every month, I really, really can’t wait to see what you created! Of course all your sneakpeaks made this even worse 😉 I so love how you approach the theme, how your ideas evolve, that you show the creation process as well! I am in awe at how much you got done (but I am this with your work every month 🙂 ). My personal favorite is the little box you covered with polymer clay. The wings are so delicate and I honestly love the painted version as well as the white version before painting! By the way, Christi Friesen was the one (with her first or second book years and years ago) that taught me to embrace my finger prints. I learned a lot from her books even though our style is so different.
Thanks so much, Claire. I learned a lot from Christi’s books as well. They are entertaining and informative. I nearly left the box unpainted because I liked it in the off white too.
Wow Tammy you created alot this month! I really enjoyed reading your post and have had a few scary run ins with moths but can appreciate their beauty. I really love your luna moth carvings I think they are beautiful and that trinket box is just perfect! I can’t wait to see what you do with the caterpillar beads, such a lovely colour!!!!
Thanks so much, Niky. Even all these years later, and knowing moths can’t hurt me, I duck or flinch if they fly toward my face. Can’t control that response.
Wow, you created so many different pieces and all so beautiful, I loved reading about your all process. My favorites would be your sparkly luna moth necklace, that is a unique piece. I also love your stamp and the print you made.
Thanks so much, Karin. I wore the necklace to work a few days before this reveal and it generated a lot of comments. Thanks especially for mentioning my also-ran pieces. 🙂
Your Luna moths are beautiful! And you used the challenge to learn new skills which is always a good thing.
Thanks so much, Mary. I like to use the challenges as a reason to try new things. Keeps me from getting into a rut of the same old thing.
Another prolific month Tammy and with great success. I love that you tried some new technique and the glass piece is very effective. Particularly like your interpretation of the Christi Friesen tutorial… lovely work.
Thanks so much, Lesley. My cats are fascinated by the window cling. I had to move it higher up the window so they cannot reach it.
I always look forward to seeing your creations – especially the sneak peeks on Instagram!
I love all the pieces you created and I love that you try something new each time.
I agree with you – I hate it when a piece doesn’t turn out and you have to add it to your personal collection 🙂
Awesome pieces!
Thanks so much, Beth. I was initially disappointed with the structural defects in the moth and how fixing them changed the look of the back. But now I’m kinda glad I have to keep it for myself. 😉
Wow, so much to see!
My favorite hands down is the little box, though. Hard to decide if I liked it better before or after painting.
That seems to be a common theme – liking the box before painting as much as or more than the painted. It’s always a challenge for me to take the step of adding color. I fear ruining things but really need to be braver.
As usual, you knocked it out of the park. I am always so amazed at how many ideas you manage to try in such a short time. The box is my absolute favorite. The sculpting is just so beautiful. I loved it without color and with color. The druzy in the moth pendant was kind of brilliant too. You polymer stained glass turned out really great. Fantastic work! The painting was very clever and I like it. I’m not sure why you don’t? I think it looks great, no squinting required.
Thanks so much, Jen. I think the painting is not bad for a first attempt but it is a far way from my vision. The secret to my productivity for the challenges is that I spend all my time working on them to the exclusion of household chores. I really need a challenge theme that involves me using the vacuum on the floors.
Holy cow are you prolific and talented! Congratulations, all of them are awesome!
Thanks so much, Lori.
I always anticipate seeing your creations after seeing the sneak peeks on IG. I also love reading about your processes. All of your luna moths are lovely but I just adore the keepsake box you created. I am glad you went with all greens as the background. It really is gorgeous! The earrings are really special too.
Thanks so much, Cathy. I wonder how the box would have looked if I used purples or burgundy on the leaves, but I am happy with the greens.
So many fabulous designs. As I read through I decided each one was a new favourite. I love your use of multiple techniques, you really showed off the subject at it’s best, especially the box piece!
Thanks so much, Caroline. I felt a bit like a moth, flitting from one project to the next.
Wow Tammy – your artistic energy and creations are just fabulous. I love seeing what you create and everything this month was just stunning. My jaw kept dropping lower with each lovely creation you revealed. The luna moth pendant with the druzy has to be my favorite piece – that gave me goosebumps! But I also thought the earrings and trinket box turned out amazing. I love that you show us ideas and works in progress too – that makes me more courageous about trying techniques I’m not familiar with too. Thank you for a great post full of inspiration – Sarah
Thanks so much, Sarah. I don’t think anyone has ever reported goosebumps from my work before. 🙂 Absolutely try new things. I was afraid of failing at sculpting for so long and I’m still making it up as I go, but having fun every time I try.
Your work always just makes my jaw drop – I love your design sense and skills to carry things out! 🙂
Thanks so much, Marsha. You can’t see, but I am blushing. 😀
I am amazed at so many techniques and gorgeous pieces! Adding the druzy is such a bright idea! Always looking forward to enjoy your sense of humor 🙂
Thanks so much, Rozantia. I had planned to use that druzy in last month’s challenge and just couldn’t find a way. I guess it knew I would need it for this month. 🙂
Tammy, your necklace came out beautifully, and lived up to what I saw in your sneak peeks! I love the idea you had with the wings and the caterpillar. I had those two in mind also, but didn’t get a round tuit (the old joke 🙂 ) The layers on the covered box really draw my attention, and add life to the piece. Finally your Luna/Manta wannabe project is one I would love to see. The concept is brilliant and I’m sure you’ll pull it off with tons of creativity.
Thanks so much, Alysen. I am often in need of a round tuit as well. 🙂 I need to set aside time to play with the painting thing. I know I’ll never get any better if I don’t practice.
So many treasures! Wow! The druzy bodied moth may be my fav – but the covered box in all shades of green is pretty fab! I tip my hat to you for the window cling. That looks SO tedious!
Thanks so much, Jenny. I am glad I tried the window cling because it’s been on my list for a while. But yes, very tedious and not likely to be a regular technique for me.
Oh my goodness, these are all absolutely stunning! You’ve done so many beautiful pieces for this challenge. The stained glass is such a beautiful medium for this subject, and your completed relief box is absolutely magical.
The life sized pendant is my absolute favorite. The longer I stare at it, the more lovely details jump out at me. That druzy in it’s abdomen gives such a lovely implication of the “fuzziness” of the moth, while still adhering to the elegance of your wing crystals. This piece is to die for!
Thanks so much, Colette. Even though I encountered some problems with construction because of adding the druzy, I do love the necklace and am not so secretly glad it has flaws that require me to keep it for myself. 😉
Such a wide range of wonderful pieces!! Thanks for sharing this delightful work!
Thanks so much, Mel.